Soot from candles can leave dark, oily marks on walls and ceilings. This guide offers a clear, step-by-step approach using common household supplies and specifically chosen cleaners designed for soot cleanup. Readers will learn how to assess the damage, select the right tools, and achieve cleaner walls without damaging paint or wallpaper.
To help homeowners restore walls efficiently, the article covers quick answers, necessary tools, safety considerations, detailed steps, troubleshooting, common mistakes, optimization tips, and when to call a professional.
Quick Answer
Start with gentle dry cleaning to remove loose soot, then wipe with a solvent-free cleaner, and finish with a soap-and-water wash. For stubborn stains, use a dedicated soot stain remover sponge or a wall cleaning kit designed for degreasing soot. Always rub gently in a circular motion to prevent damage.
What You’ll Need
Gather these tools and products before starting. The list focuses on items that specifically address soot removal from walls:
- candle soot remover spray for walls
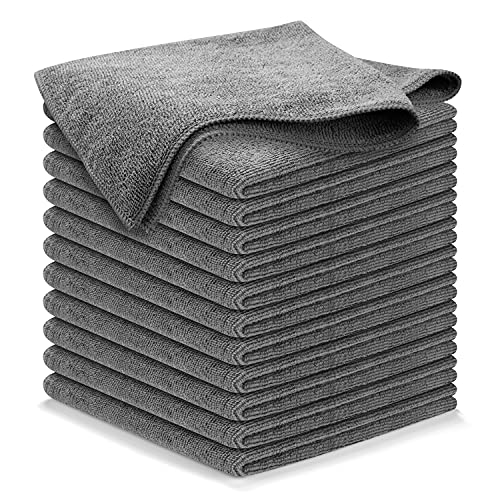
- microfiber cleaning cloths for soot on walls
- wall scrub brush with stiff bristles
- soot stain remover sponge for walls
- wall cleaning kit degreaser for soot cleanup
- optional gloves and eye protection


Before You Start
Prepare the area by moving furniture away from the wall and laying down drop cloths. Test cleaners on an inconspicuous spot to ensure they won’t discolor paint. Wear gloves to protect skin from cleaners. Allow time for any treated areas to dry before final touch-ups. Best practice: work from top to bottom to prevent re-depositing soot on cleaned sections.
Step-By-Step: How To Remove Candle Soot From Walls
- Gently dust the wall with a dry microfiber cloth to remove loose soot particles.
- Apply candle soot remover spray for walls to the affected area, following the label directions, and let it sit briefly.
- Wipe with a clean microfiber cloth, using small, circular motions to lift soot without scrubbing aggressively.
- For stubborn stains, use the soot stain remover sponge for walls. Lightly rub in a circular motion until the stain fades.
- If needed, use a wall scrub brush with stiff bristles to gently lift deeper grime in textured surfaces; avoid harsh scrubbing on delicate finishes.
- Rinse the area with a mild soap-and-water solution and wipe clean with a fresh microfiber cloth. Change cloths as they accumulate soot.
- Allow the wall to air-dry completely. Inspect for any remaining spots; repeat steps 2–6 if necessary.
- For persistent odors or residue, apply a targeted degreasing cleaner from the wall cleaning kit degreaser for soot cleanup, then rinse and dry.
- Return furniture and decor once the walls are fully dry, and consider sealing painted surfaces with a protective coating if soot recurs frequently.
Troubleshooting
| Symptom | Likely Cause | Fix | Prevention |
|---|---|---|---|
| Stubborn dark patches remain after cleaning | Deep-set soot or stained finish | Repeat cleaning with soot stain remover sponge; consider repainting if persistent | Ventilate during candle use; keep flames small |
| Paint dulling or discoloration | Over-wetting or abrasive scrubbing | Switch to gentler cleaning methods; use minimal moisture | Test cleaners first; use soft cloths |
| Ringing or watermark on walls | Water spreading soot unevenly | Dry thoroughly; use blotting motions to lift moisture | Use a water-based cleaner with quick drying time |
| Smell persists after cleaning | Soot odor trapped in porous surfaces | Ventilate well; consider a deodorizing spray designed for interiors | Limit candle use in enclosed spaces; run exhaust fans |
Common Mistakes
- Using harsh abrasive cleaners that damage paint or wallpaper
- Over-wetting walls, which can cause streaks or peeling
- Rubbing aggressively, which distributes soot into the wall texture
- Neglecting to test cleaners on hidden areas before full application
Tips For Best Results
- Work in a well-ventilated area to avoid inhaling fumes from cleaning products
- Use a clean microfiber cloth for each pass to prevent re-depositing soot
- For textured walls, repeat the gentle brushing technique to lift soot from grooves
- Inspect after drying; repeat steps promptly if new stains appear
- Consider a protective wall finish if soot buildup is frequent in candle-lit rooms
Call A Professional
Call a professional if soot damage covers a large area, if there is smoke odor that persists after cleaning, or if walls are made of delicate materials (e.g., unfinished plaster, wallpaper with finishes). Seek expert help when repainting is needed or when you notice water damage accompanying soot.
FAQ
Can I use regular household cleaners to remove candle soot?
Yes, but for best results use cleaners specifically formulated for soot or degreasing detergents designed for walls.
Is candle soot harmful to touch or inhale?
Prolonged exposure to soot particles can irritate the skin, eyes, and lungs. Use protective gloves and ensure good ventilation during cleanup.
What should I do if the soot recurs after cleaning?
Identify the soot source (e.g., frequent candle use in a small space) and adjust ventilation or consider switching to LED candles to prevent recurrence.
Do I need to repaint after cleaning soot from walls?
Repainting may be necessary if staining remains after thorough cleaning or if the finish is damaged.
Are there safe cleaning methods for wallpaper with soot?
Yes, but avoid harsh scrubbing. Use a mild cleaner tested on a hidden area and follow manufacturer instructions for wallpaper care.
Buying Guide
When choosing products for candle soot removal on walls, consider size, surface type, and the cleaning challenges typical to your home. A compact wall cleaning kit may suffice for small spaces, while larger homes benefit from a more comprehensive set that includes a soot remover spray, stain remover sponge, and degreaser. Noise level and energy efficiency are less relevant for cleaning tools, but ease of use, availability of residue-free finishes, and compatibility with different wall surfaces matter.
Buying Guide: Key Buying Factors
- Size and coverage: Choose products that match your wall area. A larger spray bottle or multi-pack can reduce trips to the store.
- Noise level: Power tools are rarely required, but a wall scrub brush should operate quietly without splashing residues.
- Energy efficiency: Not a primary concern for cleaning tools; select products with low chemical impact and refillable options when possible.
- Controls and usability: Ergonomic spray bottles and comfortable handles improve control and reduce fatigue during cleaning.
- Surface compatibility: Ensure cleaners are safe on paint, primer, or wallpaper; test on hidden areas first.
- Safety and branding: Look for non-abrasive formulas, child- and pet-safe labeling, and clear usage instructions.
- Storage and maintenance: Keep solvents sealed in a cool, dry place; replace worn brushes and cloths as needed.
- Cost of ownership: Reusable microfiber cloths and durable scrub brushes offer better long-term value than disposable pads.