RV owners rely on comfortable climate control during road trips and seasonal camping. Regular cleaning of an RV air conditioner helps maintain cooling efficiency, extend equipment life, and improve indoor air quality. The following step-by-step guide covers practical methods and recommended tools for a thorough clean.
Quick Answer
Quick method: Disconnect power, remove the filter, rinse and scrub with a microfiber kit, clean the condenser coils from the exterior, and reassemble with dry components. For hard-to-reach areas, use a vent brush to loosen debris before final wipe-down.
What You’ll Need
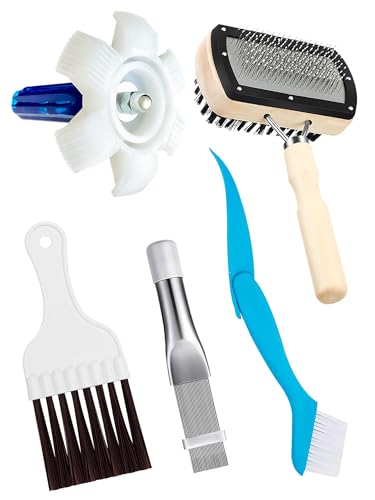
- RV air conditioner cleaning kit with coil cleaner and fin comb
- 12V RV roof AC condensate drain pan cleaning brush
- RV air conditioner vent and duct cleaning brush set
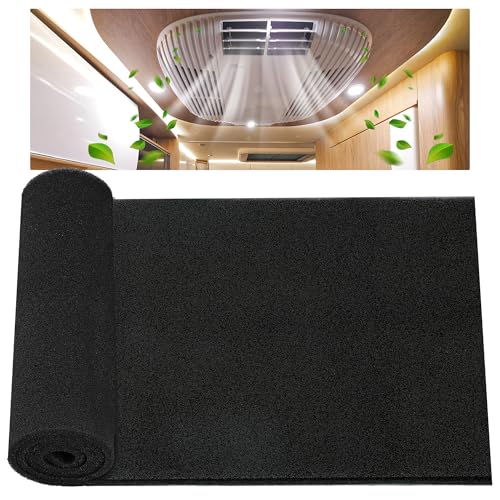
- RV AC filter cleaning kit with microfiber replacement filters
- RV roof air conditioner condenser coil cleaning spray

Before You Start
Ensure the RV is parked on level ground and the AC unit is powered off at the breaker. Remove the interior access panel carefully and disconnect the power supply to prevent shocks. Wear eye protection and gloves when handling chemical cleaners. Check the condensate drain for blockages to avoid water backup inside the trailer. Allow the unit to cool before touching metal components to prevent burns. Time estimate: 45–90 minutes depending on the model and debris level.
Step-By-Step: How To Clean An RV Air Conditioner
- Turn off power at the breaker and unplug the RV. Remove the interior access panel and take out the filter.
- Inspect the filter for wear. If reusable, wash with mild soap and water or follow the Kit’s microfiber instructions; let it dry completely before reinstall.
- Vacuum dust from the housing and louvers using the vent brush set to minimize loose debris falling into ductwork.
- Apply the coil cleaner to the condenser coils from the exterior roof access. Allow dwell time per product directions, then rinse with low-pressure water if recommended by the kit.
- Straighten and comb the fins with the fin tool to restore airflow paths and efficiency. Do not force coils or bend fins aggressively.
- Clean the condensate drain pan and line with the drain pan brush to remove mold and mineral buildup. Clear any clog using a mild solution if needed.
- Wipe down interior surfaces, including the grille and diffuser, with a damp microfiber cloth. Reinstall the clean filter and ensure it seats properly.
- Reassemble the interior panel, restore power, and run the unit on cool for a short cycle to verify proper operation and drainage.
- Schedule a periodic cleaning every season or after heavy use, especially in dusty or humid climates. Document any unusual noises or reduced airflow.
- If odors persist, repeat cleaning with a second pass on coils and ensure all damp areas are thoroughly dried.
- For extreme debris or suspected electrical issues, stop and seek professional service to avoid damage.
Troubleshooting
| Symptom | Likely Cause | Fix | Prevention |
|---|---|---|---|
| Weak airflow | Clogged filter or dirty evaporator | Clean or replace filter; clean evaporator surfaces | Clean monthly during heavy usage |
| Leak or moisture inside | Blocked condensate drain | Clear drain line and pan; check for cracks | Regular drain maintenance |
| Unpleasant odor | Mold in ducts or pan | Clean ducts and pan; replace microfiber filters | Dry surfaces after cleaning |
| Condenser coil shows green or mineral buildup | Environmental debris | Apply coil cleaner and rinse as directed | Protect from heavy dust; cover when parked long-term |
| Air conditioner won’t start | Electrical or fuse issue | Check breakers, connections, and safety switch | Inspect wiring regularly |
Common Mistakes
- Using high-pressure water directly on coils, which can bend fins and force debris deeper
- Reinstalling a damp filter or components before fully drying, causing mold growth
- Neglecting the condensate drain, leading to water damage inside the unit
- Ignoring manufacturer directions for cleaners or dwell times, reducing effectiveness
Tips For Best Results
- Schedule cleaning at the start of camping season for optimal performance
- Use a microfiber kit to comprehensively trap dust and prevent it from recirculating
- Keep a spare filter on hand to minimize downtime while cleaning
- Inspect seals around the roof unit for gaps that allow moisture and dust entry
Call A Professional
Consider a pro if you notice persistent leaks, electrical smells, or unusual noises after cleaning. Stop-use signs include frequent tripping breakers, hot or burning odors, and visible damage to wiring or fan blades. A technician can assess refrigerant lines, seals, and overall system integrity beyond routine cleaning.
FAQ
How often should I clean my RV air conditioner?
Clean the filter monthly during heavy use and perform a full coil and duct cleaning at least once per season or every 3–6 months in dusty environments.
Can I use household cleaners on the RV AC?
Use products designed for RV AC systems or coil cleaners recommended by the kit. Avoid harsh household cleaners that can corrode components.
Is it safe to spray water on the roof unit?
Use only low-pressure water as directed by the cleaner. Do not spray directly into electrical components or fans.
What if the drain pan is always full?
Check and clear the condensate line, inspect for cracks, and ensure the pan is properly aligned to drain away from the interior.
Should I replace the filter after cleaning?
Yes, replace or thoroughly clean the filter according to the kit’s guidelines to maintain airflow and air quality.
What cleaning frequency is best for RVs parked in humid climates?
More frequent checks are advised—every 1–2 months—with a full clean every 2–3 months to prevent mold and mineral buildup.
Buying Guide
When selecting RV air conditioner cleaning tools and consumables, consider size compatibility with your unit, cleaning power, and ease of use. Factors to review include:
- <bCoil cleaning performance: Choose a cleaner designed for condenser coils with a safe dwell time and clear rinsing instructions.
- <bFilter maintenance: Look for microfiber replacement filters that can be washed and reused, reducing ongoing costs.
- <bVent and duct access: A robust brush set helps reach dusty corners without disassembly, improving cleanliness.
- <bDrain pan care: A dedicated drain pan brush helps eliminate mold and mineral deposits that block drainage.
- <bEase of use and compatibility: Ensure tools fit your specific RV roof height and duct configuration.
- <bSafety features: Protective gloves and eye protection, plus clear product safety data sheets, add peace of mind.
- <bMaintenance schedule: Consider bundled kits that align with seasonal calendars for regular upkeep.