Pop-up campers offer verses of adventure with lightweight travel and flexible living space, but their canvas surfaces are susceptible to dirt, mildew, and weather wear. A careful cleaning routine helps extend canvas life, preserve appearance, and maintain water resistance. This guide provides practical steps and tools to safely clean and care for pop-up camper canvas in American settings.
Following a structured approach—using gentle cleaners, proper scrubbing tools, and a reliable method for drying and waterproofing—reduces the risk of fabric damage and preserves the camper’s resale value. The process emphasizes safety, surface preparation, and routine maintenance to keep canvas in top condition for many camping seasons.
Quick Answer
Use a gentle canvas-specific cleaner, scrub with a soft bristle brush, treat mildew promptly with a mildew stain remover, and finish with a waterproofing spray. Rinse thoroughly, dry completely in shade, and reapply protectant as needed.
What You’ll Need
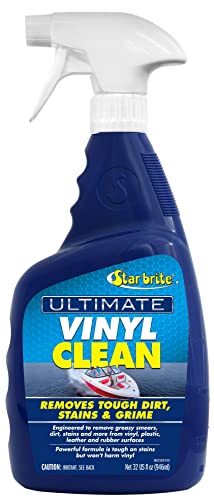
- Canvas tent cleaner spray for campers
- Mildew stain remover for canvas tent fabric
- Waterproofing spray for canvas tents RV awnings
- Soft bristle brush for canvas cleaning
- RV awning canvas cleaning kit with cleaner and protectant


Before You Start
Before beginning, ensure the canvas is fully detached or adequately supported, with doors and windows closed to prevent water intrusion. Work in a shaded area to avoid rapid surface drying, which can leave streaks. Test cleaners on a small inconspicuous area first to confirm colorfastness. Wear gloves and eye protection when applying chemicals. Allow ample time for each stage so the fabric can dry completely between steps.
Critical cautions: never use harsh household bleach on canvas, and avoid high-pressure water that can damage seams. Always follow manufacturer instructions on product labels for spray distance and dwell time.
Step-By-Step: How To Clean Pop-Up Camper Canvas
- Inspect the canvas for tears, loose stitching, or mold growth. Note areas that need extra attention before cleaning.
- Rinse the canvas with a gentle stream of water to loosen surface dirt without forcing grime into seams.
- Apply canvas tent cleaner spray for campers evenly across the fabric, focusing on heavily soiled sections. Let it sit for the recommended dwell time.
- Use a soft bristle brush for canvas cleaning to scrub in circular motions, keeping the brush light to avoid fiber damage.
- For mildew, apply mildew stain remover for canvas tent fabric to affected areas and allow it to penetrate as directed by the product instructions.
- Rinse thoroughly with clean water, ensuring all cleaner and mildew residues are washed away to prevent whitening or staining.
- If water resistance has degraded, spray the canvas with waterproofing spray for canvas tents RV awnings, following the manufacturer’s guidance on coverage and drying times.
- Pat dry with towels if needed, then air-dry the canvas completely in a shaded area before reassembling or closing the camper.
- Reassess any areas that require additional cleaning cycles or a second pass, especially near seams and zippers.
- Reapply a protective coating as the waterproofing treatment wears, typically every season or after heavy exposure to rain and sun.
- Store or seal the canvas properly once dry to prevent dirt buildup and pest intrusion during off-season storage.
Troubleshooting
| Symptom | Likely Cause | Fix | Prevention |
|---|---|---|---|
| Streaky or uneven cleaning | Uneven product distribution | Reapply cleaner in small portions and brush evenly | Test on a hidden area first; keep fabric damp during cleaning |
| Milk-white residue after rinsing | Soap buildup or improper rinsing | Rinse thoroughly with clean water | Rinse until water runs clear |
| Persistent mildew spots | Deep-set mold, insufficient dwell time | Reapply mildew remover and allow longer dwell, then rinse | Address moisture sources and dry promptly |
| Waterproofing wearing off quickly | Overuse of treatment or sun exposure | Reapply as per label and avoid over-application | Apply in cool, shade conditions |
| Seams or stitching pulling after cleaning | Rough scrubbing or pre-existing wear | Avoid scrubbing over seams; inspect and repair | Gentle cleaning and routine seam checks |
Common Mistakes
- Using household bleach or harsh detergents on canvas fabric
- Scrubbing vigorously over seams or zippers
- Skipping a proper rinse, leaving chemical residues behind
- Cleaning in direct sun which speeds drying and causes streaks
- Neglecting to fully dry before storage, which invites mildew
Tips For Best Results
- Work in small sections to maintain control over the cleaning process.
- Always test cleaners on a hidden area to confirm colorfastness.
- Use a dedicated soft-bristle brush to avoid fabric damage.
- Coordinate cleaning with a gentle scheduled maintenance routine to prevent buildup.
- Store canvas dry and clean between trips to minimize mildew risk.
Call A Professional
Consider consulting a professional if the canvas shows extensive mildew, deep staining, or structural issues such as torn seams, frayed hems, or large water leaks. Stop cleaning and contact a pro if there is persistent odor, soft spots, or if water leaks compromise the interior. For severe damage, a repair specialist can assess whether patching or replacement is needed.
FAQ
Can I use household cleaners on pop-up camper canvas?
Household cleaners with strong chemicals can damage canvas; use products specifically designed for canvas or RV fabrics.
How often should I clean canvas on a pop-up camper?
Clean annually or after heavy use, plus spot-clean as needed to prevent mildew and dirt buildup.
Is it safe to waterproof canvas after cleaning?
Yes, but ensure the fabric is completely dry before applying waterproofing spray and follow the product directions.
What if mildew returns after treatment?
Repeat mildew removal steps, improve drying conditions, and consider a stronger or repeated waterproofing application after thorough cleaning.
Buying Guide
Choosing the right cleaning and protection kit for a pop-up camper canvas involves several factors. Consider how often you camp, climate exposure, and storage conditions to determine the best balance between cleaning power and fabric safety.
Size and fit
Assess the canvas area you need to treat, including any extension sections and awnings. Larger areas may benefit from a more comprehensive cleaning kit that includes multiple cleaning stages and protective spray compatible with larger surfaces.
Noise level
If you camp in quiet environments or near neighbors, select tools and sprays that operate with minimal noise and simple, low-dust formulas to reduce disruption during cleaning sessions.
Energy efficiency
Manual brushing and spray applications are energy-efficient options. If you prefer powered tools, use battery-powered accessories with low energy draw and battery management to avoid frequent recharges during trips.
Controls and ease of use
Choose products with clear labels and dwell times, as well as spray applicators and brushes that feel comfortable in hand. A simple kit with a cleaner, mildew remover, protectant, and brush simplifies the process.
Placement and storage
Store cleaning supplies in a cool, dry place away from direct sunlight. Keep smaller items in a dedicated tote or bin to prevent loss during trips.
Care compatibility
Verify that the kit components are compatible with canvas and compatible with RV awnings to ensure consistent results across all fabric areas.