Limescale buildup on faucets can reduce water flow and mar the look of sinks and bathrooms. This guide explains practical, safe steps to remove mineral deposits and keep faucets sparkling. It covers common tools, safety tips, and best practices for homes across the United States.
Quick Answer
Remove mineral deposits with a descaler or natural vinegar soak, scrub with a dedicated brush, rinse, and dry. Use a faucet descaler kit for heavy buildup and a limescale remover sponge for stubborn spots. Regular maintenance prevents future buildup.
What You’ll Need
- Faucet cleaning brush
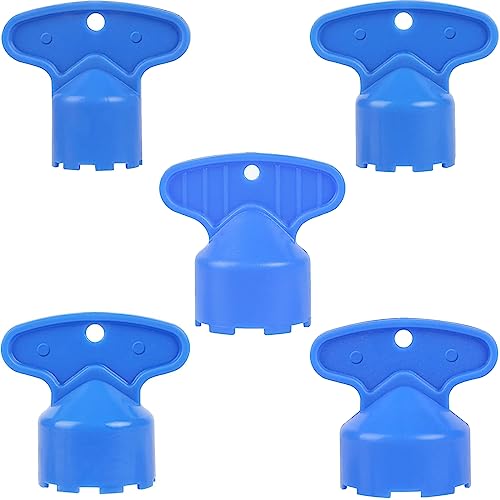
- Faucet aerator removal tool
- Bathroom faucet cleaning brush set
- Limescale remover sponge for faucet
- Faucet descaler kit


Before You Start
Shut off the water supply if you’re disassembling parts beyond the aerator. Place a towel to catch drips and protect the sink. Test cleaning products on a small, inconspicuous area first to avoid finish damage. For safety, wear gloves and work in a well-ventilated space. Plan for a 30–60 minute session for a standard faucet, longer for heavy buildup.
Caution: Do not mix acidic cleaners with chrome finishes or brass fittings unless the manufacturer approves it. Avoid abrasive pads on delicate surfaces.
Step-By-Step: How To Clean Limescale From Faucet
- Disassemble the Aerator: Use the faucet aerator removal tool to unscrew and remove the aerator from the faucet spout. Place small parts in a container so they don’t get lost.
- Soak the Aerator: Submerge the aerator in a bowl of warm white vinegar or a faucet descaler kit solution for 15–30 minutes to dissolve mineral deposits.
- Scrub Gently: Use the faucet cleaning brush or a dedicated bathroom faucet cleaning brush set to scrub the aerator screens and housing. Rinse with clean water.
- Clean the Spout Interior: If limescale lines the inside of the spout, fill a small bag with vinegar and secure it around the spout with a rubber band. Let it soak for 15–20 minutes, then rinse.
- Descale the Faucets: Apply a limescale remover sponge for faucet to affected areas around the base and handles. Gently scrub any remaining buildup without scratching finishes.
- Rinse and Reassemble: Reattach the aerator and run hot and cold water to flush debris. Wipe dry with a soft cloth to prevent new deposits.
- Check for Leaks: After reassembly, turn the water on slowly and inspect for leaks around the aerator and fittings. Tighten fittings if needed, being careful not to overtighten.
- Schedule Maintenance: Create a monthly or quarterly routine to wipe surfaces and descale as needed, especially in areas with hard water.
- Optional Surface Protection: Apply a light coat of furniture or faucet polish recommended for metal finishes to deter future buildup.
- Address Persistent Stains: For stubborn spots, repeat the descaling process or consider a more robust descaler kit designed for heavy mineral deposits.
- Sanitize Nearby Surfaces: Wipe mirrors and countertops to remove any splashes from cleaning solutions and keep the area hygienic.
Troubleshooting
| Symptom | Likely Cause | Fix | Prevention |
|---|---|---|---|
| Reduced water flow after cleaning | Aerator debris stuck or loosened | Rinse aerator thoroughly and reattach securely | Regularly clean aerator during maintenance |
| Unusual odors or residue | Residual cleaner or vinegar on surfaces | Rinse with water and wipe dry | Rinse promptly after cleaning |
| Finish discoloration or dullness | Harsh cleaner contact with metal finish | Switch to milder cleaners and test in a small area | Use manufacturer-recommended products |
| Water leaks around fittings | O-ring or gasket wear | Tighten connections; replace worn parts | Inspect seals during maintenance |
Common Mistakes
- Using abrasive sponges on chrome or brushed finishes
- Over-tightening aerator or fittings, causing leaks
- Neglecting to rinse thoroughly after descaling, leaving residues
- Skipping a test run of water after reassembly
Tips For Best Results
- Work with the faucet in a comfortable height and lighting for precise scrubbing.
- Use warm, not hot, vinegar to prevent damage to seals.
- If in a hard-water area, schedule regular descale cycles to stay ahead of buildup.
- Label and store small parts in a magnetic tray or labeled container to avoid misplacement.
Call A Professional
Call a plumber if there is persistent leakage after reassembly, corroded fittings, or if heavy limescale has penetrated the faucet body. Seek professional help for fixtures with integrated cartridges or complex cartridge systems that require specialized tools.
FAQ
Can vinegar damage metal faucets?
Vinegar is generally safe for most metal finishes when diluted, but it should not be left on sensitive finishes for extended periods. Rinse thoroughly after use.
How often should I descale faucets in hard water areas?
Plan a descale every 1–3 months, depending on water hardness and buildup rate.
Is it safe to use a descaler kit on all faucet types?
Most kits are suitable for common finishes, but always check the product label for compatibility with your faucet material.
What if the aerator won’t come off?
Try a specialty aerator wrench or consult a professional if stubborn corrosion prevents removal.
Should I dry the faucet after cleaning?
Yes, drying helps prevent new mineral deposits and keeps the surface shiny.
Buying Guide
When choosing tools and products for cleaning limescale from faucets, consider size, compatibility, and ease of use. Think about your faucet type (single-handle, widespread, or wall-mounted) and water hardness in your area. Compare limescale remover products and descaler kits for effectiveness and finish safety.
Key buying factors include:
- Size and compatibility: Ensure tools fit your faucet aerator size and spout diameter. Many aerator removal tools come in multiple sizes.
- Noise level and convenience: Some brushes and kits are designed for quiet, low-effort cleaning and quick rinses.
- Energy and water efficiency: Cleaning tools do not directly affect efficiency, but regular maintenance helps faucet performance and water flow.
- Controls and ease of use: Simple, non-abrasive brushes and easy-to-use descalers reduce risk of damage.
- Placement and accessibility: Tools with extendable handles or flexible heads aid cleaning under sinks and hard-to-reach spots.
For most households, a combination of a faucet aerator removal tool, a dedicated faucet cleaning brush set, and a mild descaler kit provides effective results without damaging finishes. Consider adding a limescale remover sponge for quick touch-ups and a maintenance plan to keep fixtures looking and functioning their best. If you’re unsure about your faucet’s finish or internal components, start with mild products and test first in a small area.