The P-trap under sinks can accumulate hair, soap scum, and mineral deposits, leading to slow draining or odors. A systematic approach using the right tools helps restore flow without costly repairs. This guide lays out practical steps, safety notes, and common fixes for American households.
Users will find a straightforward method that combines mechanical cleaning with safe cleaners. While many clogs can be cleared with basic tools, persistent blockages may require a more thorough kit or professional assistance. This article covers from preparation to prevention so the P-trap stays clean longer.
Quick Answer
Place a bucket beneath the P-trap, unscrew the U-bend, remove debris with a stiff brush, rinse, reassemble, and test drainage. If hair or buildup persists, use a handheld auger or a specialized cleaning kit to extend reach into the pipe and trap arm. Finish with an enzyme cleaner to maintain cleanliness.
What You’ll Need
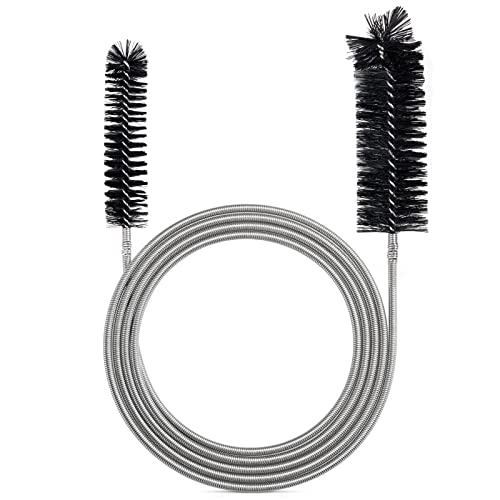
- P-trap cleaning tool kit for sinks
- handheld drain snake auger 3/8 inch
- drain cleaning brush with stiff bristles
- toilet bowl auger plunger combo kit
- enzyme drain cleaner for P-trap and pipes


Before You Start
Prepare a bucket or container to catch draining water. Protect the work area with towels or old newspapers. Wear gloves to minimize contact with dirty water. Turn off the water supply to the sink if necessary to reduce spills. Expect a typical clean-up to take 15–45 minutes depending on clog severity. If metal fittings show significant corrosion or leaks, stop and reassess before continued disassembly.
Step-By-Step: How To Clean A P-Trap
- Place a bucket beneath the P-trap and place a towel to catch spills.
- Use a screwdriver to loosen the slip nuts on the trap arm and tailpiece slowly.
- Carefully remove the P-trap, letting water drain into the bucket.
- Inspect the trap for hair, soap scum, and mineral buildup; wipe with a drain cleaning brush with stiff bristles.
- If clogs persist, insert a handheld drain snake auger 3/8 inch into the pipe from the trap outlet and gently twist to grab debris.
- Clean the interior of the trap and trap arm, then reattach the P-trap with new seals if available.
- Run warm water to flush the lines; observe drainage for a few minutes to ensure flow is smooth.
- Apply a small amount of enzyme drain cleaner for P-trap and pipes following label directions to maintain cleanliness.
- If slow draining returns, repeat the auger process from another access point or consider a toilet bowl auger plunger combo kit for deeper reach.
- Recheck for leaks at all joints; tighten fittings carefully and wipe away any excess sealant or water.
- Document a routine cleaning schedule to prevent future buildup.
Troubleshooting
| Symptom | Likely Cause | Fix | Prevention |
|---|---|---|---|
| Slow drainage after cleaning | Partial clog or mineral buildup | Re-run the auger and use enzyme cleaner | Periodic maintenance every 3–6 months |
| Water backs up into the sink | Clog in trap arm or wall drain | Auger deeper into pipe; inspect trap seal | Avoid flushing hair and solids |
| Bad odor persists | Organic buildup in trap or pipe | Clean trap thoroughly; use enzyme cleaner | Regular cleaning and vent checks |
| Leaks after reassembly | Loose fittings or worn washers | Tighten joints and replace gaskets | Inspect seals during every reassembly |
Common Mistakes
- Forcing the auger and damaging pipes instead of controlled twisting
- Over-tightening slip nuts, causing leaks
- Rushing the disassembly without securing the area
- Using acidic cleaners that can corrode metal traps
- Neglecting routine maintenance after a successful clean
Taking a careful, methodical approach reduces the chance of damage and improves long-term results.
Tips For Best Results
- Warm water helps dissolve soap scum and mineral deposits when rinsing
- Choose the right-length auger to reach the trap arm and wall lines
- Keep a spare gasket or washocks handy for quick reseals
- Combine mechanical cleaning with enzyme cleaners for ongoing prevention
- Record the date of cleaning to establish a maintenance interval
Call A Professional
Seek professional help if there is:
- Repeated clogs after multiple cleanings
- Persistent leaks at fittings or visible pipe damage
- Unclear pipe routing or unusual fixtures that complicate access
- Electrical or plumbing codes require licensed expertise in your area
FAQ
Can I clean a P-trap without removing it?
Yes, some clogs clear with a thorough auger from the trap outlet, but removing the trap provides better access to stubborn buildup.
Is an enzyme cleaner safe for septic systems?
Most enzyme cleaners are compatible with septic systems when used as directed; check product instructions for specifics.
How often should a P-trap be cleaned?
Regular maintenance every 3–6 months helps prevent buildup and odors in most homes.
What if water leaks after reattachment?
Turn off water, inspect seals, replace gaskets, and re-tighten fittings to stop leaks.
Are metal P-traps harder to clean?
Metal traps can corrode over time; ensuring proper seal replacement and gentle handling reduces damage risk.
Buying Guide
When choosing tools to maintain a P-trap, consider size, durability, and compatibility with household plumbing. A balanced set should include a P-trap cleaning tool kit for sinks, a handheld drain snake auger 3/8 inch, a stiff-bristle drain cleaning brush, a toilet bowl auger plunger combo kit, and an enzyme drain cleaner for ongoing prevention. Pay attention to the kit’s reach, ease of use, and availability of replacement parts.
Key buying factors include size and fit for common sink traps, noise level during operation, energy efficiency is not typically a concern for manual tools, but consider ergonomic handles for extended use. Controls should be straightforward: simple twist-and-feel actions are preferable. For placement, a compact kit is ideal for apartment sinks and under-sink cabinets. Compare kits based on the number of components, warranty, and the ability to reuse parts over time. A practical choice balances affordability with reliable performance and durability.