White spots on wood tables are a common complaint, often caused by moisture trapped beneath the finish. With the right approach and a few tools, most spots can be reduced or removed without replacing the table. This guide provides practical, step-by-step methods suitable for American households, using common DIY products and techniques.
Quick Answer
Two fast options: start with a gentle heat and moisture attempt using a cloth and iron on low, then move to a solvent-based approach with wood filler epoxy or a stain marker if needed. For stubborn marks, a wood conditioner and color restorer can help even out the surface.
What You’ll Need
- Wood filler epoxy for water stains on furniture
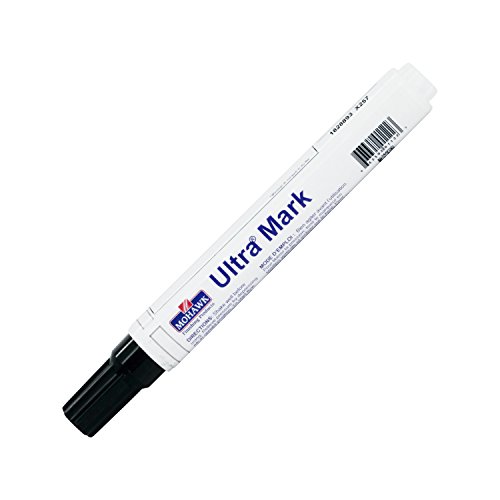
- Stain marker for white water stains on wood furniture
- Wood conditioner and color restorer for water spots on tables
- Furniture repair kit with grain filler and stain remover
- Sanding sponge and wood filler kit for table refinishing


Before You Start
Assess the finish type on the table (shellac, varnish, polyurethane) and choose compatible products. Work in a well-ventilated area and protect nearby surfaces. Test any product on a small, inconspicuous area first to ensure it doesn’t alter color unexpectedly. Time estimates vary: plan for 1–3 hours for lighter spots and longer for heavy damage. Handle solvents safely and wear gloves if needed.
Step-By-Step: How To Remove White Spots From Wood Tables
- Identify the spot type: water-induced white rings usually occur on unfinished or thin finishes; deeper white areas may indicate moisture damage beneath the finish.
- Heat treatment (for shallow spots): place a clean cotton cloth over the spot and apply low heat with a warm iron for a few seconds at a time. Check frequently to avoid scorching. This can drive moisture back into the finish and even out the appearance.
- Assess progress: if the spot dimples or lightens, you may repeat the heat step once or twice. If no change, move to a solvent-based approach.
- Apply wood filler epoxy for water stains on furniture (for deeper or sunk spots): mix or load the epoxy as directed, carefully fill the hollow or damaged area, and smooth the surface. Let cure fully according to the product instructions.
- Sand lightly: once cured, gently sand the repaired area with a sanding sponge to achieve a flush surface with the surrounding wood. Wipe away dust.
- Use a stain marker for white water stains on wood furniture to even out pigment: apply along the grain, blending into the surrounding finish. Wipe off excess and let dry.
- Restore color and seal: apply a wood conditioner and color restorer for water spots on tables to even tone and prepare for a finish coat. Follow with a compatible top coat or polyurethane if needed.
- Refinishing touch-up: if the surrounding finish looks uneven, consider a small amount of sanding sponge and wood filler kit for table refinishing to recoat and blend the surface with the rest of the table.
- Final inspection: check for uniform color and gloss. Touch up any remaining white spots using the appropriate tools until the surface matches the rest of the table.
- Care and prevention: seal the surface with a protective finish and use coasters or mats to minimize future moisture exposure.
- Clean up: wipe down the area with a damp cloth and allow the finish to cure completely before using the table again.
Troubleshooting
| Symptom | Likely Cause | Fix | Prevention |
|---|---|---|---|
| Spot reappears after repair | Moisture trapped under finish | Reassess moisture exposure; reapply epoxy or marker as needed | Maintain humidity, use protective mats |
| Finish dulls or yellowing | Incompatible product or over-application | Follow product directions strictly; remove with appropriate cleaner if necessary | Test on hidden area first |
| Rough repaired area | Insufficient sanding or curing | Lightly sand and reseal after full cure | Allow adequate cure time |
| New scratches appear | Over-aggressive sanding | Use finer grit and gentle pressure | Protect table with pads during maintenance |
| Color mismatch | Different wood tones or finish aging | Use color restorer to even tone, consider touch-up with stain marker | Choose matching products and test |
Common Mistakes
- Rushing the curing stages of epoxy or stain removers
- Using too much heat, which can warp thin veneers
- Over-sanding, leading to noticeable flat spots
- Skipping a test patch on an inconspicuous area
- Ignoring the grain direction when applying finishes
Tips For Best Results
- Begin with gentle methods; many white spots respond to heat and moisture rather than chemicals.
- Keep finishes consistent by pairing products that match the existing finish type (shellac, varnish, polyurethane).
- Work in sections when refinishing to ensure uniform color and sheen.
- Document the steps you take on a small area to replicate the process on larger spots.
- Store products properly: away from heat, moisture, and direct sunlight.
Call A Professional
Consider a professional if the finish is severely damaged, the wood is visibly warped, or previous attempts did not yield satisfactory results. Stop and consult a carpenter or furniture refinisher if:
- The table is a valuable antique with delicate veneer
- Moisture damage extends beyond the surface, risking structural stability
- Color matching requires complex staining or custom finishing
FAQ
Can white spots be removed without refinishing the whole table?
Yes, many spots respond to targeted treatments like heat, epoxy fillers, or stain markers, sometimes avoiding full refinishing.
Will heat damage the wood?
Low heat on a cloth can help; avoid high heat or direct contact with the wood to prevent scorching or warping.
Is a stain marker suitable for all woods?
Stain markers work best on light, unfinished, or clear-finish woods. Test first to ensure color blends well.
How long does the repair last?
Properly applied epoxy or fillers can be durable, but future moisture exposure may cause new spots. Regular sealing helps longevity.
Should I refinish the entire tabletop?
Only if color mismatch or finish wear is widespread. For small spots, spot repairs typically suffice.
What maintenance helps prevent white spots?
Use coasters, immediately wipe spills, maintain moderate humidity, and reapply protective finishes as recommended by product guidelines.
Buying Guide
Key buying factors help choose products for removing white spots and restoring wood tables. Consider the following perspectives to compare options effectively.
Size and coverage: Epoxy fillers and stain markers come in various sizes; choose based on the extent of spots and the area to be treated. For larger tables, a multi-pack or refill options are practical.
Finish compatibility: Ensure products match the table’s finish (polyurethane, shellac, varnish) to avoid color mismatches and adhesion issues.
Non-toxicity and drying times: Look for low-VOC formulations if used indoors. Dry times affect project timelines and dust prevention strategies.
Ease of use: Products like stain markers and conditioner/restorer kits are designed for DIY use; choose user-friendly options if you’re a beginner.
Grain considerations: Some kits include grain fillers; these help restore smoothness and minimize visible lines after repairs.
Tools compatibility: Ensure the kit’s included tools (sanding sponges, applicators, brushes) align with your existing setup to minimize additional purchases.
Cost vs. value: Compare per-use cost, longevity, and the potential need for multiple applications. A slightly higher upfront cost can yield longer-lasting results.