Slippery floors pose a common safety risk in homes and workplaces. This guide outlines practical, step-by-step methods to improve traction on various floor surfaces, using readily available products and proven methods. Readers will learn how to assess slick spots, choose appropriate tools, and apply treatments that reduce the risk of falls.
Quick Answer
Assess the surface identify high-traffic, wet areas; select a treatment appropriate for the floor type; apply evenly and allow to dry completely; and test the grip before resuming normal activity. For larger spills, use a wet-dry mop and a wet floor mat to maintain traction during cleanup.
What You’ll Need
- Anti-slip floor coating kit 1 gallon
- Slip resistant floor treatment spray 32 oz
- Non-slip grip tape roll 2 inch
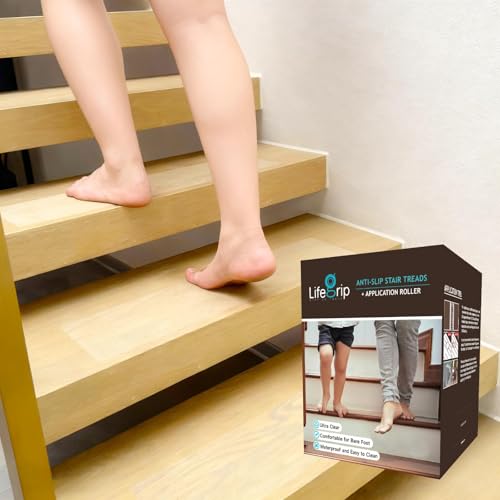
- Anti-slip stair treads 8 pack
- Wet floor safety mat non-slip 18×30 inches


Before You Start
Before applying any traction-enhancing product, ensure the area is clean, dry, and free of debris. Read each product label for surface compatibility and ventilation requirements. Work in a well-ventilated space and wear protective gloves. Allow ample drying time as specified by the product instructions, typically several hours. Proceed with caution on glossy or sealed floors, which can become slippery again if residues remain.
Step-By-Step: How To Get Rid Of Slippery Floors
- Inspect all slippery zones and note the floor type (concrete, tile, wood, vinyl) to select compatible products.
- Mat the area with a non-slip floor mat at entry points to prevent tracking wetness into other rooms.
- Clean thoroughly: sweep or vacuum, then mop with a neutral cleaner to remove oils and residues that reduce grip.
- Apply the chosen anti-slip coating or treatment as directed. For coatings, use long, even strokes and avoid pooling.
- Allow the coating or spray to dry completely as per label instructions. Do not walk on the treated surface until dry.
- In high-traffic zones or stairs, install anti-slip stair treads or layer grip tape to reinforce traction.
- Reassess the area after curing time. If necessary, reapply a second coat or additional treatment on problem spots.
- Place the wet floor mat strategically in areas prone to spills to provide immediate protection during cleanup.
- Test traction by walking slowly in stocking feet or with shoes, paying attention to any remaining slick patches.
- Schedule periodic reapplication as recommended by product guidelines, especially in wet or outdoor environments.
- Maintain routines: wipe spills promptly and keep floors dry to sustain traction over time.
Troubleshooting
| Symptom | Likely Cause | Fix | Prevention |
|---|---|---|---|
| Floor remains slick after treatment | Residue buildup or incompatible surface | Clean thoroughly and reapply following label directions | Test compatibility on a small area first |
| Coating peels or wears quickly | Heavy foot traffic or moisture exposure | Choose a tougher formula or apply extra coats | Place mats and reduce contamination during cure |
| Stairs remain slippery | Lack of dedicated traction on steps | Install anti-slip stair treads or grip tape | Regularly inspect and replace worn treads |
| Spots reappear after cleaning | Oils or cleaners left residue | Use recommended cleaners only | Rinse thoroughly after cleaning |
Common Mistakes
- Applying products to a dirty or damp surface
- Overlooking ventilation requirements during application
- Rushing drying times, leading to reduced effectiveness
- Using incompatible products for certain floor materials
- Neglecting to install physical traction aids in high-traffic areas
Tips For Best Results
- Test a small, inconspicuous area before full application to confirm finish and adhesion.
- Choose products designed for your floor type (concrete, tile, wood, vinyl) to maximize grip.
- Use a clean, dry microfiber cloth to remove dust before applying coatings.
- Pair chemical treatments with physical aids like grip tape or stair treads for optimum safety.
- Periodically re-evaluate high-traffic zones and reapply as needed based on wear and moisture exposure.
Call A Professional
Stop signs to watch for include persistent slickness despite multiple treatments, peeling coatings, or uneven finishes. If the area spans a large floor plan, involves commercial kitchens, or presents ongoing slip hazards for elderly residents, consult a professional flooring contractor or safety specialist to assess and implement a comprehensive traction solution.
FAQ
How often should I reapply anti-slip treatments?
Reapplication frequency depends on foot traffic, moisture exposure, and product type; follow label guidance and monitor wear patterns.
Can I use grip tape on wood stairs?
Yes, but choose a tape designed for wood and stairs, and ensure edges are secure to prevent tripping hazards.
Will anti-slip coatings change the floor color or texture?
Some coatings may alter appearance or feel; perform a patch test to confirm aesthetics before full application.
Do I need to remove existing sealants before applying?
In many cases, a light cleaning is sufficient, but consult product instructions; some coatings require a prep step for best adhesion.
Is it safe to use on glossy floors?
Glossy surfaces can be slippery; specific anti-slip products are formulated for such finishes—verify compatibility first.
Are there floor-safe mats I should place near entryways?
Yes, dry, non-slip mats near entrances help trap moisture and reduce slick spots indoors.
Buying Guide
When choosing products to fight slippery floors, consider several factors. Practical options include coatings, sprays, tapes, and mats. For larger areas or busy spaces, a combined approach often works best. Key buying factors include:
- Size and coverage: Match product quantity to floor area; one gallon coatings cover a specific square footage and may require multiple coats.
- Noise level: Some mats and stair treads are designed to minimize squeaks and movement; look for non-slip, low-noise options.
- Energy efficiency: Traction solutions do not consume energy, but choosing durable materials reduces replacement frequency and waste.
- Controls and application: Read label instructions, drying times, and ventilation needs; simpler setups are ideal for DIY users.
- Placement: Use mats at entryways, in kitchens, bathrooms, and stairways; install tape and treads on vulnerable edges for best protection.
- Surface compatibility: Confirm the product is suitable for your floor type (concrete, tile, wood, vinyl) to avoid damage or poor adhesion.
- Maintenance: Some treatments require routine cleaning with specific cleaners; choose products that fit existing maintenance schedules.
- Long-term durability: Look for coatings and tapes with proven wear resistance for your environment, especially high-traffic or wet areas.