Rust on a vehicle can spread quickly if not addressed, but with the right steps and tools, you can restore a car’s appearance and structural integrity. This guide covers practical methods suitable for DIY enthusiasts and short-term fixes for minor surface rust.
Quick Answer
Act fast on any rust spots to prevent flaking. Clean, treat, and protect with the right products. For deep rust, a professional assessment may be needed.
What You’ll Need
- Car rust remover gel for automotive body
- Rust converter spray automotive metal primer
- Abrasive sanding disc kit for rust on car body 60-120 grit
- Drill attachment wire brush for car rust removal
- Automotive rust repair kit with rust remover and filler
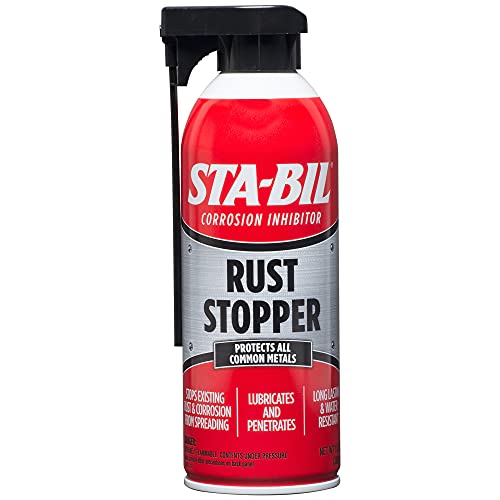


Before You Start
Assess the damage and decide whether rust is merely surface-level or has compromised the metal. Wear protective gear such as gloves and eye protection. Work in a well-ventilated area. Remove loose paint and rust flakes carefully before applying any products. If rust has penetrated to the core metal or near structural components, consult a professional.
Step-By-Step: How To Remove Rust On A Car
- Identify and isolate affected areas with masking tape to protect adjacent paint.
- Use the drill attachment wire brush for car rust removal to blast away loose rust on the surface until the metal is shiny and smooth to the touch.
- Apply a thin layer of car rust remover gel for automotive body to the treated area and let it sit according to the product instructions, then wipe away with a clean cloth.
- If any remaining rust remains, re-apply the gel and repeat the process until the metal is clean and white or gray metal shows.
- Spray a rust converter spray automotive metal primer over the cleaned area to neutralize residual rust and convert it to a stable compound.
- Allow the converter to dry completely, following the product’s drying time, then inspect for any pinholes or uneven spots.
- For deeper repairs, mix and apply the automotive rust repair kit with rust remover and filler as directed, filling any pits and smoothing the surface.
- Sand the repaired area with a fine grit (120) sanding disc to achieve a uniform surface, then wipe away dust.
- Apply an additional coat of primer if needed and let it cure. Lightly sand again to ensure a smooth base for paint.
- Finish with matching automotive paint and a clear coat, ensuring color match and proper curing time between coats.
- Inspect the area in several lighting conditions, looking for shine, uniform texture, and any residual rust bleed that may require touch-up.
- Dispose of used rags and metal shavings safely according to local regulations.
Troubleshooting
| Symptom | Likely Cause | Fix | Prevention |
|---|---|---|---|
| Rust returns after painting | Inadequate rust removal or pinholes | Revisit steps 2–4, apply fresh primer | Repair promptly, seal edges well |
| Paint blistering or peeling | Moisture under finish | Ensure dry surface before painting | Control humidity during coatings |
| Uneven surface after filler | Hardened filler too thick | Sand gradually in coats, feather edges | Plan filler thickness in layers |
| Excess dust or residues | Improper cleaning | Wipe with tack cloth, remove dust | Keep work area dust-free |
Common Mistakes
- Skipping rust removal and applying primer directly over rust.
- Using too aggressive grit too soon, causing deeper metal damage.
- Incomplete drying between steps, leading to poor adhesion.
- Neglecting surface preparation around edges where moisture can creep in.
- Failing to match paint color or finish, resulting in a noticeable repair.
Tips For Best Results
- Work in well-ventilated areas and wear protective gear to avoid inhaling dust and fumes.
- Test products on a hidden area first to check compatibility with the vehicle’s finish.
- Follow each product’s drying times strictly for optimal adhesion and cure.
- Keep a clean workspace; contaminants can cause finish imperfections.
- Consider a professional inspection for extensive rust or corrosion near critical components.
Call A Professional
Stop and seek a pro if rust has penetrated structural members, suspension mounting points, floor pans, or areas near electrical systems. If the metal thickness is significantly thinned, or if there is perforation, professional repair is advised to ensure safety and long-term durability.
FAQ
Can I remove rust without removing paint?
Yes, surface rust can often be removed while preserving adjacent paint, but deep rust will require more invasive treatment.
How long does rust treatment take?
Most iterations take a few hours, including curing times for primers and fillers, with additional time for paint to cure.
Will the rust converter prevent future rust?
It converts existing rust and helps inhibit further corrosion, especially when followed by proper priming and painting.
Is professional rust repair worth it?
For extensive rust or hidden corrosion, a professional assessment can save time and ensure structural integrity.
Buying Guide
When selecting tools and materials for rust removal and repair, consider size, efficiency, and compatibility with your vehicle. Key buying factors include:
- Size and scope: For small touch-ups, a gel-based rust remover and spray primer may suffice. For larger areas, an automotive rust repair kit with filler offers a complete solution.
- Noise level and vibration: Drills with comfortable grips and low-vibration designs reduce fatigue during grinding or brushing.
- Energy efficiency: Electric tools with variable speed settings provide better control and conserve energy during extended projects.
- Controls and ease of use: Simple spray-on primers and pre-mixed fillers reduce complexity for DIYers.
- Placement and access: A flexible brush, sanding discs, and drill attachments help reach tight spots under trim and around curves.
When comparing products, assess how each item supports the complete workflow: remove rust, neutralize it, repair (if needed), and finish with paint. Balanced kits that combine rust remover, filler, and primer tend to offer better results for most amateur projects. Consider a package that includes compatible abrasive discs and a drill attachment wire brush to streamline use.