Cooking grease can linger on kitchens, hoods, and cookware if not addressed promptly. This guide provides practical, step-by-step methods using common sanitizing products and tools to restore surfaces without damage. Readers will learn proven techniques for both fresh splatters and baked-on residues.
Quick Answer
Act quickly on fresh grease with warm water and a grease-fighting spray. For stubborn buildup, pair detergent-based degreasers with mechanical scrubbing, then rinse and dry thoroughly to prevent streaks and re-soiling.
What You’ll Need
- heavy-duty kitchen degreaser spray 32 oz citrus
- nylon scrub brush set for stubborn grease in kitchen
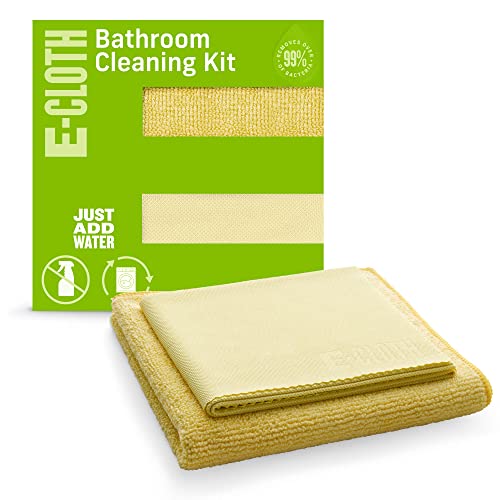
- grease removing wipes and microfiber cloth combo kit
- oven hood degreaser spray with abrasive scrub pad
- stain-removing degreaser sponge scrubber for baked-on grease


Before You Start
Preparation reduces mess and speeds up results. Clear counters, remove loose grime, and ensure good ventilation. Test each product on a small, inconspicuous area first to check for discoloration or surface damage. Time estimates vary by surface: light cleanups take 10–20 minutes, heavy buildup may require 30–60 minutes. Critical cautions include avoiding abrasive scrubs on nonstick cookware and never mixing cleaners with bleach or ammonia.
Step-By-Step: How To Remove Cooking Grease
- Identify the surface and choose an appropriate degreaser: for cabinets and countertops, use a citrus-based spray; for hard-to-clean hood surfaces, a degreaser with an abrasive scrub pad helps lift baked-on grime.
- Prepare the cleaning solution: spray the degreaser onto the greasy area from a comfortable distance to prevent oversaturation. Allow a brief dwell time for the formula to work.
- Scrub in a systematic pattern: use a nylon scrub brush or microfiber cloth to work the cleaner into the grease. For tight corners, use the sponge scrubber to reach crevices.
- Rinse and wipe away residues: dampen a microfiber cloth with warm water and wipe the surface clean. Repeat as needed to remove all cleaner and loosened grease.
- Dry and inspect: use a dry microfiber cloth to remove moisture and examine for remaining smears. Repeat targeted scrubbing on stubborn spots if necessary.
- For baked-on grease: apply the stain-removing degreaser sponge scrubber to the area and agitate with moderate pressure, then wipe clean with a damp cloth.
- Hood and vent checks: if residue persists on the oven hood, use the abrasive scrub pad with the dedicated hood degreaser spray; rinse and dry afterward to prevent streaks.
- Refrigeration nearby: wipe any spillages promptly to avoid attracting new grease, especially around stove tops and kitchen counters.
- Final pass: re-spray a light layer of cleaner to high-traffic zones and buff with a clean microfiber cloth for a streak-free finish.
- Preventive care: establish a routine to wipe surfaces after cooking, especially when frying or sautéing with oils.
- Storage and disposal: seal cleaners properly after use and store away from heat sources and children.
Troubleshooting
| Symptom | Likely Cause | Fix | Prevention |
|---|---|---|---|
| Grease reappears quickly on cabinets | Residue built up over time | Re-clean with degreaser and a fresh cloth; follow with a protective wipe | Wipe after cooking; use liners on surfaces |
| Streaks after drying | Residual cleaner or water spots | Buff with a dry microfiber cloth | Dry thoroughly after every cleaning |
| Rough surface texture after scrubbing | Abrasive pad damaged finish | Switch to nonabrasive sponge or gentler pad | Avoid aggressive scrubbing on delicate surfaces |
| Grease still on vent hood | Baked-on film | Use hood degreaser spray with abrasive scrub pad, then rinse | Clean regularly to prevent buildup |
| Fumes or irritation during cleaning | Strong cleaner concentration | Dilute as directed and ventilate the area | Keep area ventilated during cleaning |
Common Mistakes
- Using hot water on porous surfaces, which can set stains
- Letting degreaser sit too long and bleaching finishes or glazing
- Using metal scrubbers on nonstick cookware or etched countertops
- Neglecting to wipe and dry after cleaning, promoting new grease adhesion
Tips For Best Results
- Work from the top down to prevent dirty drips onto cleaned areas.
- Test cleaners on inconspicuous spots to avoid color changes.
- Use warm water for rinsing to remove grease more effectively than cold water.
- Pair mechanical scrubbing with cleaner dwell time for stubborn grease.
- Establish a weekly wipe-down routine for frequently used surfaces.
Call A Professional
Consider professional help if grease has penetrated porous surfaces, extensive baked-on grime covers large areas, or if there are persistent odors. Seek a pro for delicate finishes, extensive hood lining, or damaged surfaces that require specialized tools or coatings.
FAQ
What surfaces can I treat with these methods?
Most kitchen surfaces respond well, including cabinets, countertops, vent hoods, and backsplashes. Avoid abrasive scrubs on nonstick coatings and natural stone without testing first.
Is it safe to mix cleaners?
No. Mixing cleaners, especially with bleach or ammonia, can create dangerous fumes. Use products as directed on their labels.
How often should I clean grease buildup?
Light cleaning after each cooking session helps prevent heavy buildup; a thorough weekly wipe-down is recommended for high-traffic kitchens.
Can I use dishwasher or washing machine for degreaser residues?
Generally not. Use surface-specific methods and rinse thoroughly to avoid leaving residues in appliances.
Buying Guide
Choosing the right products to remove cooking grease depends on surface type, cleaning frequency, and desired ease of use. Consider the following factors to compare options and pick the best fit.
- Size and coverage: Larger bottles reduce refills for frequent cleanups; opt for 32 oz or larger for kitchen-wide use.
- Surface compatibility: Ensure the degreaser is safe for cabinets, metal, glass, and appliance finishes before use.
- Noise and effort: Some scrubbing kits include abrasive pads; choose based on your tolerance for scrubbing and potential surface scratching.
- Energy and efficiency: Efficient cleaners reduce dwell time while delivering strong grease-breaking action.
- Controls and packaging: Look for spray bottles with fine-mist control or ready-to-use wipes for convenience.
- Placement and storage: Store products away from heat sources and out of reach of children; keep a dedicated cleaning caddy for easy access during meal prep.
Answers to common questions about surface compatibility and cleaning frequency help guide your choices. If you want a simplified routine, prioritize a citrus degreaser for daily upkeep and a dedicated hood cleaner for tough, baked-on grime.