Calcium buildup, or limescale, is a common problem in areas with hard water. It can make faucets look dull and reduce water flow. With simple tools and a few practical steps, homeowners can restore their faucets to full function without professional help.
This guide walks through safe, effective methods to remove calcium deposits from faucets using readily available supplies. It emphasizes common-sense cleaning, preventive habits, and practical timelines to keep faucets sparkling.
Quick Answer
For light buildup, soak the aerator or affected parts in a vinegar solution, then scrub with a brush or pad. For heavier deposits, use a dedicated faucet descaler tool or calcium scale remover for faucet, followed by a thorough rinse. Regular maintenance slows future buildup.
What You’ll Need
- calcium scale remover for faucet
- faucet descaler tool hard water deposits
- faucet cleaning brush mineral deposits
- nylon scrub pad for faucet calcium buildup
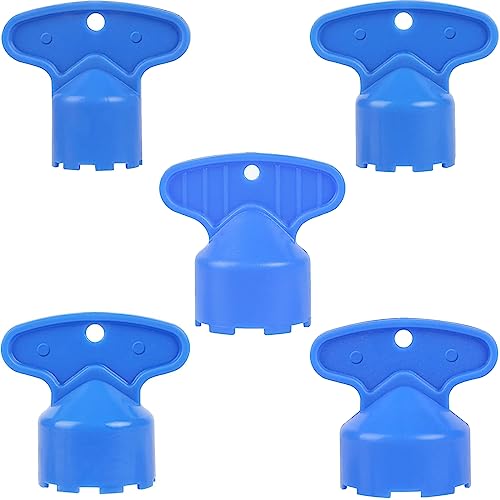
- faucet aerator cleaning tool calcium deposits


Before You Start
Before tackling calcium deposits, turn off water supply to the affected fixture and protect the surrounding surface. If you’re cleaning porcelain or chrome finishes, test a small inconspicuous area first to ensure no finish damage occurs. Typical project time ranges from 20 minutes for light buildup to 60 minutes for stubborn deposits. Exercise caution with acidic cleaners and avoid mixing cleaning agents.
Step-By-Step: How To Remove Calcium Deposits From Faucets
- Detach easily removable parts such as the aerator or cartridge, if applicable, and place them in a tray.
- Prepare a cleaning solution suitable for mineral deposits. A common approach is white vinegar diluted with water (1:1) or a commercial calcium scale remover for faucet.
- Soak metal components in the solution for 15–30 minutes to loosen hard mineral buildup.
- Gently scrub all surfaces with a faucet cleaning brush mineral deposits or nylon scrub pad for faucet calcium buildup to lift scale.
- For stubborn spots, apply a thin coat of calcium scale remover for faucet and let it sit according to product directions, then re-scrub.
- Rinse thoroughly with warm water, reattach aerator or parts, and run the faucet to clear any loosened debris.
- Inspect the aerator and internal passages; repeat steps as needed until flow is restored.
- Wipe dry and buff to a shine with a clean microfiber cloth to prevent new water spots.
- Implement preventive care by wiping fixtures after use and scheduling periodic descaling sessions.
- Document any recurring issues that might indicate water quality problems or hidden corrosion.
- Reassemble all parts securely and test for leaks and steady water flow.
- Consider routine checks with the faucet aerator cleaning tool calcium deposits on a quarterly basis.
Troubleshooting
| Symptom | Likely Cause | Fix | Prevention |
|---|---|---|---|
| Low water flow after cleaning | Partial blockage remains | Revisit steps 4–7; use a stronger descaler if needed | Regular gentle cleaning every few months |
| Streaks or residue after rinse | Soap film or mineral leftovers | Re-rinse with clean water, dry thoroughly | Wipe dry after use to prevent new deposits |
| Finish discoloration | Overly harsh cleaners | Switch to milder or manufacturer-recommended products | Follow product directions precisely |
| Aerator won’t thread back correctly | Damaged threads or debris | Inspect threads, clean, or replace aerator | Use protective caps during storage |
Common Mistakes
- Using abrasive pads that scratch chrome or polished finishes
- Leaving acidic cleaners on metal for too long
- Rushing rinse steps, leaving mineral residues behind
- Neglecting to remove the aerator for thorough cleaning
Taking time to rinse and dry after each cleaning session minimizes future buildup and extends faucet life.
Tips For Best Results
- Schedule regular descaling sessions, especially in hard-water homes
- Keep a dedicated bottle of faucet cleaner for mineral deposits to avoid cross-contamination
- Use a soft cloth to dry fixtures after cleaning to prevent water spots
- Test cleaning solutions on a small area first to ensure compatibility with finishes
- Consider installing a whole-house filtration system if mineral buildup recurs often
Call A Professional
Call a professional if the faucet is corroded, if the supply lines show leaks, or if deposits are persistent despite multiple cleanings. Seek immediate help for severe mineral buildup that affects multiple fixtures or if the faucet remains stubborn after using descaling products. Also contact a pro if there is visible plumbing damage or if you suspect hidden leaks behind walls.
FAQ
Can vinegar damage my faucet finish?
Vinegar can harm certain finishes if left for long periods; dilute and limit exposure, and test a small area first.
How often should I descale faucets in hard water areas?
For hard water areas, descale every 1–3 months, depending on buildup and usage patterns.
Is it safe to use a commercial faucet descaler tool?
Yes, when used according to the manufacturer’s instructions and with appropriate protective gear.
What if the calcium deposits return quickly after cleaning?
Frequent occurrence may indicate high mineral content or a leak; consider water filtration or professional assessment.
Can I replace the aerator instead of cleaning it?
Yes, replacing a clogged aerator with a new one can restore flow if cleaning fails.
Are lime-scale removers safe for plastic parts?
Check product labels; some removers may degrade certain plastics—use gentler options for plastic components.
Buying Guide
Choosing the right approach to calcium buildup depends on faucet type, water quality, and maintenance goals. Consider the following factors to guide purchases:
- Size and compatibility: Ensure tools and descalers fit your faucet style (spout type, aerator size, and threading).
- Noise level: Some descaler tools operate quietly, which is desirable in bathrooms and kitchens.
- Energy and water efficiency: Regular descaling maintains optimal flow and reduces strain on plumbing.
- Controls and ease of use: User-friendly tools with clear instructions save time and reduce error.
- Placement and storage: Compact tools are easier to store under sinks or in vanity cabinets.
- Material compatibility: Verify that cleaners are safe for chrome, nickel, brass, or plastic finishes.
- Safety features: Look for non-corrosive formulas and protective gloves or goggles recommendations.
When comparing options, weigh long-term maintenance needs against upfront cost. For homes with persistent hard-water issues, a combination of a descaler tool and a mineral deposits cleaner can provide reliable results. If unsure, start with a simple vinegar soak and progress to a commercial descaler as needed. Will the investment pay off in cleaner fixtures and better water flow? In most cases, yes, with regular upkeep.