Burnt residue in pots is a common kitchen mishap that can feel daunting to clean. With the right approach and safe tools, most burnt-on food can be lifted without damaging the cookware. This guide outlines practical steps, selecting the right cleaners, and maintenance tips to keep pots looking good and performing well.
Understanding how to treat burnt-on food promptly helps extend the life of stainless steel and nonstick cookware alike. The methods below emphasize safe techniques, common-sense cleaning, and effective products designed for stubborn residues.
Quick Answer
Choose a safe, effective cleaner, soak if needed, then scrub with a suitable brush or pad. For tough spots, apply a dedicated burnt-on residue remover and repeat. Finish with a gentle rinse and dry to prevent water spots.
What You’ll Need
- Stainless steel pot burn residue cleaner paste
- Pot scrub brush stainless steel bristles for burnt food
- Non-abrasive pot cleaner pad for burnt pots
- Heavy-duty pot cleaning brush set for burnt-on food
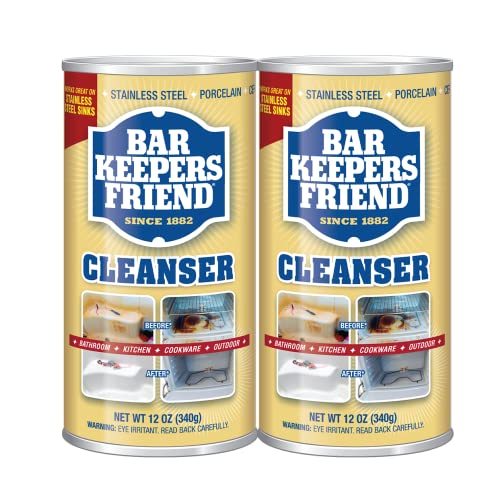
- Bar Keepers Friend burnt-on residue remover for pots


Before You Start
Before cleaning, ensure the pot is cool to touch. If the pot is extremely hot, wait until it is safe, then fill it with warm water to start loosening burnt particles. Protect surfaces and wear gloves to prevent skin irritation from cleaners.
Safety notes: Always follow product instructions, especially on aluminum or coated cookware, and avoid mixing cleaners unless the label permits it. For enamel and nonstick surfaces, use non-abrasive methods to reduce the risk of coating damage.
Time estimate: 20–60 minutes depending on residue. Heavily burnt pots may require repeat treatments.
Step-By-Step: How To Remove Burnt Food From A Pot
- Fill the pot with hot water to cover the burnt area and add a small amount of dish soap; let it soak 15–30 minutes to loosen carbonized food.
- For stubborn spots, sprinkle a small amount of Bar Keepers Friend burnt-on residue remover for pots or apply the stainless steel pot burn residue cleaner paste directly to the residue.
- Use a pot scrub brush stainless steel bristles for burnt food to gently agitate the surface. Avoid scrubbing too aggressively to prevent scratches on delicate coatings.
- If residue remains, place the pot back on the stove with a little water and bring to a simmer for a few minutes; this helps lift burnt bits off the bottom.
- Wipe away loosened debris with a non-abrasive pad, then rinse thoroughly with warm water.
- For very stubborn areas, repeat the soaking and scrubbing with the cleaner paste or residue remover, ensuring even coverage on the affected zone.
- Rinse one final time, then dry with a clean towel to prevent mineral deposits and water spots.
- Inspect the pot’s interior for any remaining residue. If needed, repeat the process focusing on the most persistent areas.
- Season or re-condition any coated pots as recommended by the manufacturer to maintain nonstick performance and longevity.
- Store the cleaning tools and cleaners out of reach of children, and clean brushes after use to extend their life.
Troubleshooting
| Symptom | Likely Cause | Fix | Prevention |
|---|---|---|---|
| Residue remains after cleaning | Coarse carbon buildup | Re-soak and re-scrub with cleaner paste or residue remover | Pre-soak after cooking to prevent hardening |
| Scratches appearing on surface | Overly aggressive scrubbing | Switch to non-abrasive pads and softer brushes | Use non-abrasive tools on coated pots |
| Discoloration or dull finish | Heat exposure or improper cleaners | Follow manufacturer guidelines; avoid harsh chemicals on sensitive finishes | Use the correct cleaner for your pot material |
| Cleaner paste doesn’t dissolve tough spots | Residue deeply baked on | Apply with damp heat and let sit longer; reapply | Prevent buildup by soaking shortly after cooking |
Common Mistakes
- Using metal brushes on nonstick or anodized finishes
- Overheating pots after cleanup, which can bake in fresh residue
- Skipping soaking or using too little cleaner for large deposits
- Mixing cleaners not recommended by the product labels
Preventative care and using the right combination of cleaners helps maintain cookware shine and longevity.
Tips For Best Results
- Always start with soaking to loosen burnt material before scrubbing.
- Choose a cleaner paste or residue remover designed for burnt-on residue to minimize abrasion.
- For enamel or coated pots, prefer non-abrasive pads and soft brushes to protect coatings.
- Rinse thoroughly and dry promptly to avoid water spots and mineral buildup.
- Regular maintenance after each cooking session reduces heavy cleanup later.
Call A Professional
If the pot has severe damage, warped walls, or persistent staining that does not respond to standard cleaners, consider professional assessment. Signs to seek help include pitting, deep scratches, or compromised coatings that could affect food safety or heat distribution.
FAQ
Can I use baking soda to remove burnt-on residue?
Baking soda is a mild abrasive and can help with light burns, but for heavy buildup use a purpose-made cleaner paste or residue remover following product directions.
Is Bar Keepers Friend safe for nonstick pots?
Bar Keepers Friend is generally safe for many pots, but always check the cookware’s label. For fragile coatings, test on a small area first.
How long should I soak a burnt pot?
Soak for 15–60 minutes depending on the severity. For extremely baked-on residue, a longer soak paired with gentle scrubbing is effective.
Can I put metal scrubbers in the dishwasher?
Most metal scrubbers should not go in the dishwasher; hand washing extends tool life and prevents potential scratching on cookware.
What is the best way to restore the shine after cleaning?
Rinse thoroughly, dry completely, and optionally buff with a clean microfiber cloth to restore luster.
Are cleaners safe for aluminum pots?
Some cleaners can etch aluminum; always follow the product instructions and test on a small area before full use.
Should I dry the pot immediately after washing?
Yes, drying prevents mineral deposits and water stains, especially in hard water areas.
Buying Guide
When shopping for products to tackle burnt-on residue, consider size and material of the pot, the level of residue, and cleaning preferences. Key buying factors include:
- <bSize and compatibility: Choose products that clearly state compatibility with your pot material (stainless steel, aluminum, enamel, nonstick).
- <bCleaning power: Look for stronger formulas for heavy baked-on residue, but ensure the formula is safe for your cookware.
- <bAbrasiveness: Non-abrasive pads are ideal for coated surfaces; stainless steel bristle brushes are useful for tough spots on uncoated pots.
- <bEase of use: Paste cleaners are convenient for direct application; liquid cleaners may be faster for soaking.
- <bSafety and scent: Choose low-odor, EPA-approved cleaners if sensitive to fumes and prefer silicone- or plastic-handled tools for comfort.
- <bControls and practicality: Tools that fit comfortably in your hand and have durable bristles or pads improve cleaning efficiency.
- <bPlacement and storage: Store cleaners and brushes in a dry, accessible location; keep vinegar or acidic cleaners separate if using multiple products.
For many households, a combination approach—soaking, a dedicated cleaner paste or residue remover, and a suitable brush or non-abrasive pad—provides reliable results. Consider keeping a lightweight, nonabrasive pad for regular maintenance to prevent heavy buildup.