Yellow drips on bathroom walls can result from a variety of sources, including mineral deposits, soap scum, mildew, or paint-bleach interactions. This guide provides practical, step-by-step methods using common household cleaners and tools to restore a clean, residue-free surface while protecting paint and finishes. The strategies below balance effectiveness with surface safety for most American homes.
Quick Answer
For fresh yellow drips, start with a gentle cleaning solution and a soft cloth or microfiber cloth. If stains persist, switch to a bleach-based bathroom wall cleaner spray or a paint-safe wall scrub sponge for tougher spots. Always test a small, inconspicuous area first and rinse well between steps.
What You’ll Need
- Yellow stain remover for bathroom walls spray
- Bathroom wall cleaning brush nylon bristles
- Microfiber cloth for bathroom wall cleaning
- Bleach-based bathroom wall cleaner spray
- Paint-safe wall scrub sponge

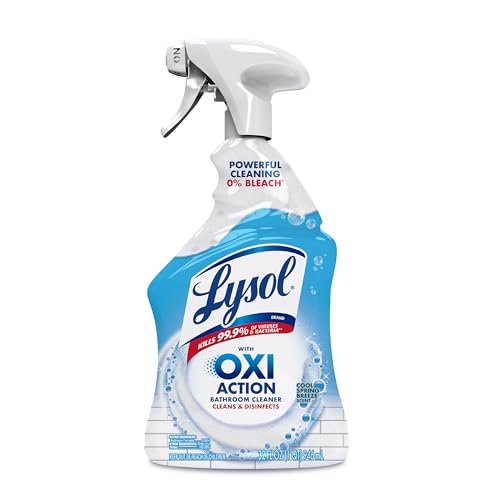

Before You Start
Protect nearby surfaces with a drop cloth or towels and wear gloves to prevent skin irritation. Ensure good ventilation in the bathroom and consider opening a window or running a fan. Test any cleaner on a hidden area of the wall to verify it does not damage paint or wallpaper. Plan for a 20–40 minute cleaning window depending on stain severity. Do not mix bleach with ammonia or vinegar.
Step-By-Step: How To Clean Yellow Drips From Bathroom Walls
- Identify the stain type by examining color, texture, and spread; determine whether it is mineral-based, soap scum, or mildew-related.
- Wipe the area with a damp microfiber cloth to remove loose film and rinse the cloth frequently to keep the surface clean.
- Apply a light spray of yellow stain remover for bathroom walls and let it sit for the product’s recommended dwell time.
- Gently scrub the stained area with a paint-safe wall scrub sponge, using circular motions to lift embedded residues without harming paint.
- Rinse the area with clean water or a damp microfiber cloth to remove loosened material and cleaner residue.
- If stains persist, spray a bleach-based bathroom wall cleaner on a fresh cloth and dab the area; avoid oversaturation and let it sit briefly, then rinse thoroughly.
- For stubborn spots, use a nylon bristle bathroom wall cleaning brush to apply targeted agitation while keeping pressure moderate.
- Wipe again with a clean microfiber cloth until the surface appears uniform and free of yellow flecks.
- Dry the wall with a dry microfiber cloth to prevent streaks and water spots; inspect for any remaining trace and repeat if needed.
- Inspect adjacent walls for similar staining and repeat the process as necessary to ensure even cleanliness.
- If you notice paint peeling or discoloration after cleaning, stop and evaluate whether repainting or professional services are required.
- Document the steps and store cleaners safely away from children and pets for future maintenance.
Troubleshooting
| Symptom | Likely Cause | Fix | Prevention |
|---|---|---|---|
| Stains reappear after cleaning | Residual mineral deposits | Reapply stain remover and extend dwell time; use a toothbrush-style brush for stubborn spots | Wipe down walls weekly with a mild cleaner to prevent buildup |
| Discoloration after using bleach | Paint or wallpaper sensitivity | Cease bleach use on affected areas; switch to paint-safe sponge and water rinse | Test a hidden area first; use diluted solutions |
| Streaks or water spots | Improper drying | Dry thoroughly with microfiber cloth | Wipe in a consistent direction to reduce streaking |
| Fading paint | Overexposure to harsh cleaners | Cease aggressive cleaners on painted surfaces | Use gentler products and limit dwell time |
Common Mistakes
- Using abrasive brushes or scrubbers that scratch painted walls
- Using high concentrations of bleach without proper ventilation
- Aggressive scrubbing that damages paint or wallpaper finish
- Skipping a spot test before applying cleaners to the entire wall
These missteps can worsen the problem or require repainting. A measured approach preserves wall integrity while removing yellow drips.
Tips For Best Results
- Work from top to bottom to avoid re-depositing cleaner on cleaned areas
- Use microfiber cloths for effective pick-up and quick drying
- Choose a cleaner that matches your wall type (painted, vinyl, tile, etc.) for best results
- Limit the dwell time of bleach-based products and always ventilate the room
- Regular maintenance prevents buildup; consider a monthly light wipe-down routine
Call A Professional
Consider professional help if the stains cover large areas, the wall surface shows peeling or extensive discoloration, or there is persistent mildew that returns after cleaning. Stop cleaning attempts if there is visible damage to paint, wallpaper, or plaster, and seek a pro’s assessment.
FAQ
Can I use bleach on all bathroom wall finishes?
Bleach is effective on many surfaces but can damage painted walls, wallpapers, or certain coatings. Always test first and rely on milder cleaners for delicate finishes.
How long should stain removers sit on the wall?
Follow the product’s label for dwell time; typically a few minutes to maximize effectiveness without overexposing the surface.
What tools are best for stubborn yellow drips?
A paint-safe wall scrub sponge with a nylon brush can help lift embedded stains without scratching the surface.
Is it safe to mix cleaners if I run out of one product?
No. Mixing cleaners can create harmful fumes. Use one product at a time and rinse thoroughly between steps.
Buying Guide
When choosing tools and cleaners for removing yellow drips from bathroom walls, consider size, surface type, and ease of use. A spray cleaner is convenient for quick touch-ups, while a spray plus brush combination provides deeper cleaning for stubborn spots. Look for a solution that is safe for painted surfaces and compatible with the wall material. Noise level is less of a concern for most household cleaning, but consider hand-scrubbing vs. motorized tools if you prefer minimal effort. Energy efficiency is not a major factor for manual cleaning, but if you use powered scrubbers, select energy-efficient models. Controls should be simple and intuitive, with clear dwell times and safety instructions. For placement, keep cleaners organized in a cool, dry cabinet away from sunlight to preserve effectiveness and prevent degradation. Finally, compare products based on stain-removal efficacy, ease of use, and surface safety to ensure results align with your wall type and staining severity. Are you targeting mineral-based stains, soap scum, or mildew? Matching the product to the stain type improves outcomes without unnecessary harshness.