Maintaining clean water storage is essential for safe drinking water and overall household hygiene. This guide explains a practical, step-by-step approach to cleaning a home water tank using common tools and safe, food-grade cleaners. The process emphasizes accessibility, safety, and effectiveness for American households.
Quick Answer
Quick method: Empty the tank, rinse with clean water, apply a food-grade cleaning solution, scrub with a long-reach brush, rinse thoroughly, and dry before refilling. Use a siphon pump for draining and a tank cleaning nozzle hose attachment to reach corners. Start with a water storage tank cleaning kit for a complete setup.
What You’ll Need
The following tools and materials cover most home water tank cleaning tasks. Gather these before you begin to streamline the process.
- Long reach water tank cleaning brush extension pole
- Water storage tank cleaning kit
- Siphon pump for cleaning water tank
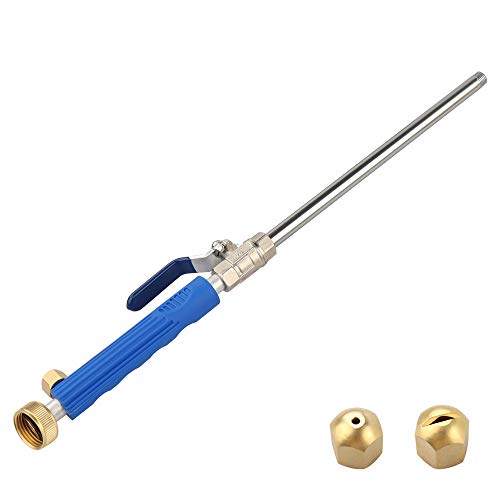
- Tank cleaning nozzle hose attachment
- Food-grade cleaning solution for water storage tanks


Before You Start
Plan for a practical cleaning window, typically 1–2 hours depending on tank size. Ensure power is off if the tank is connected to any electrical components, and wear gloves and eye protection. Clear the area to avoid contamination from pets or household chemicals. Never mix cleaning solutions with household cleaners and avoid using bleach in systems that store drinking water unless you follow local guidelines. Check inlet and outlet connections for secure seals to prevent leaks during cleaning.
Step-By-Step: How To Clean A Water Tank At Home
- Drain the tank using the siphon pump for cleaning water tank to remove most of the dirty water.
- Remove any removable covers or lids and physically inspect the interior for sediment, biofilm, or debris.
- Rinse with clean water using the tank cleaning nozzle hose attachment to flush corners and seams.
- Mix a food-grade cleaning solution for water storage tanks according to the product directions. Avoid harsh chemicals that could leave residues.
- Scrub interior surfaces with the long reach water tank cleaning brush extension pole to reach low corners and elevated walls.
- Reapply cleaning solution if heavy buildup remains, scrub again, then drain the solution with the siphon pump.
- Thoroughly rinse all surfaces with clean water until no soap or residue remains.
- Fill the tank with fresh water, circulate briefly, and drain again to remove any remaining cleaning agents.
- Final rinse with clean water, then allow the tank to air-dry completely before refilling with potable water.
- Reinstall lids and seals, inspect for leaks, and document the cleaning date for maintenance records.
Troubleshooting
| Symptom | Likely Cause | Fix | Prevention |
|---|---|---|---|
| Persistent musty odor | Residual cleaning agents or biofilm | Repeat rinse with clean water and re-clean area | Regular maintenance schedule |
| Streaks or sediment after rinse | Inadequate scrubbing or lingering dirt | Scrub thoroughly with long-reach brush | Use a water storage tank cleaning kit for guidance |
| Leak around seals | Damaged gaskets or loose fittings | Tighten fittings or replace seals | Inspect seals during every cleaning |
| Inability to drain fully | Siphon pump blockage or incorrect setup | Clear blockages and re-position pump | Keep hoses clean and elevated |
Common Mistakes
- Using non-food-grade cleaners in potable water tanks
- Skipping a thorough rinse, leaving residues behind
- neglecting to dry the tank completely after cleaning
- Forgetting to inspect and reseal tank fittings
- Not documenting cleaning intervals, which leads to inconsistent maintenance
By avoiding these missteps, households can maintain safer, cleaner storage for longer periods.
Tips For Best Results
- Schedule regular cleanings and adjust frequency based on water usage and storage conditions.
- Pre-assemble the siphon pump and nozzle attachments to speed up the process.
- Use a dedicated cleaning kit designed for water storage tanks to ensure compatibility with food-grade standards.
- Keep the work area well-ventilated and wear protective gloves during scrubbing.
- Label the cleaned tank with a date to track maintenance cycles.
Call A Professional
Consider a professional if the tank shows persistent odors, heavy mineral buildup, or structural damage to the tank or lid. Seek expert help for large or commercial-grade tanks, or when local health regulations require certified service providers. If you notice persistent leaks, cracks, or seals that cannot be resealed, stop using the tank and contact a professional promptly.
FAQ
How often should I clean a home water tank?
Most households benefit from cleaning every 6–12 months, depending on usage, water source, and storage conditions.
Is a siphon pump necessary for cleaning?
While not strictly required, a siphon pump greatly simplifies draining and reduces water spillage, especially for larger tanks.
Can I use bleach to clean a drinking water tank?
Bleach can be used if local guidelines permit it and the tank is properly rinsed, but food-grade cleaners are preferred for drinking water storage.
What’s the best way to dry the tank?
Leave the tank open or vented after a full rinse and allow several hours for air-drying before refilling.
Buying Guide
When choosing gear for cleaning a water tank at home, consider size, ease of use, and compatibility with your tank type. The right combination of tools can streamline maintenance and improve results.
Size and reach: A long reach water tank cleaning brush extension pole helps access tall or deep tanks without ladders. Pair it with a comprehensive water storage tank cleaning kit for a complete solution.
Nozzle and attachments: A tank cleaning nozzle hose attachment ensures corners and outlets receive adequate attention, reducing hidden sediment.
Draining and flow control: A siphon pump for cleaning water tank offers reliable drainage and helps manage disposal of dirty water without spills.
Cleaning solution: Use a food-grade cleaning solution for water storage tanks to maintain safety for potable water and avoid harmful residues.
Reliability and fit: Check that tools are compatible with your tank size and material (polyethylene, fiberglass, etc.) and that seals and gaskets are replaceable.
For budgets and scenarios, compare a compact kit for smaller residential tanks with a premium kit that includes extended reach tools, multiple nozzles, and robust siphon equipment. Consider whether you prefer a modular approach (add-on tools later) or an all-in-one solution from the start. Finally, verify warranty terms and availability of replacement parts to protect your investment.