Preparing walls properly can dramatically improve paint adhesion and the final look of a room. This guide walks through practical methods to remove grease, dirt, and old coatings, ensuring a smooth, long-lasting paint job. By following the steps below, homeowners and DIY enthusiasts can achieve professional-looking results at home.
Quick Answer
Before painting, wash walls with a specialized cleaner to remove oils and grime, scrub stubborn stains, and rinse well. Use microfiber cloths or a sponge scrubber for best results, and finish with a thorough drying time.
What You’ll Need
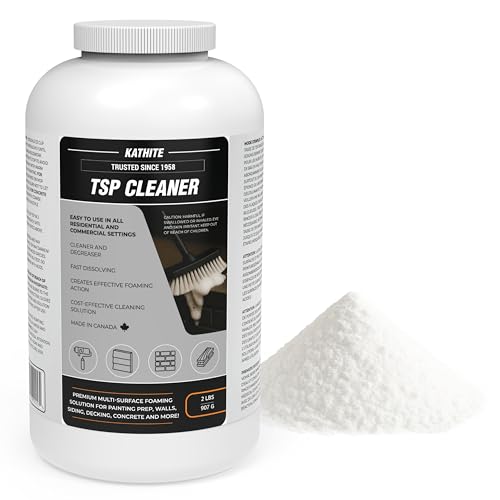
- TSP substitute wall cleaner powder for painting prep
- grease remover spray for walls before painting
- microfiber wall cleaning cloths 12×12 for paint prep
- wall cleaning brush with long handle
- sponge scrubber for walls stain removal


Before You Start
Assess the wall surfaces and patch any holes or cracks prior to washing. Ventilate the room well and protect floors with drop cloths. Always test a small, inconspicuous area first to confirm the cleaner won’t damage the finish. Avoid over-wetting walls, which can lead to paint peeling later.
Time estimate: 45–90 minutes per room, depending on wall size and contamination level. Allow extra drying time between cleaning and priming.
Step-By-Step: How To Clean Walls Before Painting
- Clear the area and remove switch plates and outlet covers to access wall surfaces.
- Dust walls with a dry microfiber cloth to remove loose dirt and spider webbing.
- Prepare a cleaning solution using a TSP substitute wall cleaner powder according to package directions.
- Apply the cleaner with a long-handled wall cleaning brush or a microfiber cloth, focusing on areas with buildup.
- For greasy spots, spray a dedicated grease remover on the stained area and let it sit for a few minutes.
- Scrub stubborn stains with a sponge scrubber in gentle circular motions, then rinse with clean water on a new cloth.
- Rinse the walls thoroughly to remove all cleaner residues, wiping in a top-to-bottom motion.
- Allow walls to dry completely, typically 1–4 hours depending on ventilation and humidity.
- Inspect for remaining marks; repeat targeted cleaning if needed before priming.
- Once dry, lightly sand glossy areas to improve primer adhesion and wipe away dust.
- Apply primer if needed, then proceed with your chosen paint finish.
Troubleshooting
| Symptom | Likely Cause | Fix | Prevention |
|---|---|---|---|
| Stubborn stains persist after cleaning | Grease or nicotine buildup | Reapply grease remover and give extra dwell time | Clean promptly after messes to prevent setting |
| Water spots or streaks | Improper rinsing | Rinse thoroughly and dry with clean cloths | Rinse in multiple passes with fresh water |
| Peeling after painting | Residual cleaner or moisture | Ensure complete dry time and clean surface fully | Provide adequate ventilation during cleaning and drying |
| Surface roughness after cleaning | Over-scrubbing | Lightly sand with fine grit and wipe dust | Use gentler scrubbing pressure next time |
Common Mistakes
- Skipping the test patch on new or delicate finishes
- Using excessive water on porous surfaces
- Neglecting to remove all cleaner residues before priming
- Cleaning without proper ventilation or protective gear
Tips For Best Results
- Work from top to bottom to prevent dirty drips on cleaned areas.
- Choose a cleaner compatible with the wall material and previous finishes.
- For large areas, use a long-handled brush to minimize arm fatigue.
- Dry walls thoroughly before applying primer to avoid trapping moisture.
- Consider wearing gloves and eye protection when handling cleaners.
Call A Professional
Consult a pro if walls have extensive mold, peeling lead paint, or structural damage. Seek immediate help if you notice persistent musty odors, visible water intrusion, or efflorescence after cleaning. If the room will be occupied during cleaning or painting and chemical sensitivities are a concern, a professional may provide safer alternatives and proper containment.
FAQ
What cleaner is best for walls before painting?
The best option depends on surface and contaminants. A TSP substitute wall cleaner powder works for general dirt and grease, often followed by a dedicated grease remover for tough spots.
Can I use regular household cleaner on walls before painting?
Household products may leave residues or be too mild for heavy grime. Use cleaners designed for painting prep to ensure proper adhesion.
How long should walls dry after cleaning?
Dry time ranges from 1–4 hours, depending on humidity, airflow, and wall material. Ensure walls are completely dry before priming.
Do I need to sand after cleaning?
Lightly sanding glossy areas improves primer adhesion. Wipe away dust before priming.
How do I remove stubborn grease stains?
Apply a dedicated grease remover, let it dwell, then scrub gently and rinse thoroughly.
Is it necessary to remove outlet covers before cleaning?
Yes, removing covers helps reach all wall surfaces and prevents moisture from getting behind electrical fixtures.
Buying Guide
When choosing wall-cleaning products for prepping before painting, consider the following factors:
- Size and coverage: Choose cleaners and cloths that cover the room efficiently without frequent restocking.
- Cleaning power: For greasy kitchens or heavily used hallways, select stronger degreasers in addition to general wall cleaners.
- Surface compatibility: Some cleaners are formulated for glossy paint, others for matte or wallpapered surfaces. Always check labels.
- Application tools: Long-handle brushes and microfiber cloths reduce effort and improve consistency.
- Ventilation and safety: Ensure proper airflow and use protective gear when handling cleaners.
Compare products by how well they remove oil, dirt, and stains, as well as their ease of rinsing and drying time. Consider a kit that includes a cleaner, a degreaser for tough spots, and soft cloths for final wipe-downs. For best results, pair products with a sturdy wall cleaning brush with a long handle and microfiber wall cleaning cloths 12×12 for paint prep.