Preparing a solid, clean subfloor is essential for a long-lasting, professional-looking floor. Proper cleaning removes debris, dust, and residues that can interfere with adhesion and performance. This guide outlines practical steps, recommended tools, and safety tips to ensure a moisture-aware, clean surface before installation.
Quick Answer
Inspect for moisture with a moisture meter, remove old adhesive, vacuum thoroughly with a HEPA system, and seal the subfloor if needed before installing new flooring.
What You’ll Need
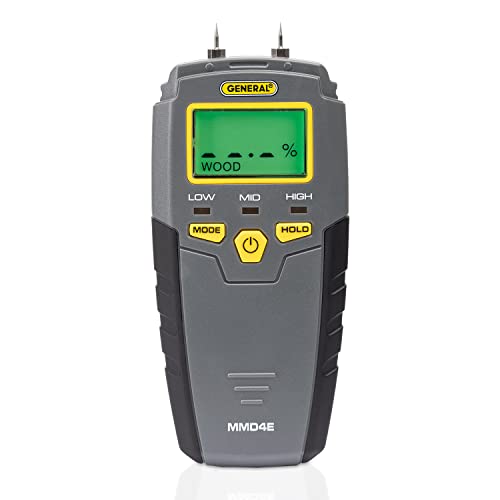
- Subfloor moisture meter
- Heavy duty floor scraper tool for adhesive removal
- HEPA shop vac dust extractor for construction
- Utility knife with retractable blade for subfloor adhesive
- Floor scraper blades replacement pack


Before You Start
Before beginning, assess the subfloor type (concrete or wood) and check for visible damage such as cracks, cupping, or soft spots. Address any structural issues with a professional if necessary. Wear safety goggles, gloves, and a dust mask during scraping and vacuuming. Allow the area to ventilate if adhesives or primers are used, and plan for cleanup time appropriate to the square footage.
Critical cautions: Test moisture in several areas to avoid hidden damp spots. Do not install flooring on a visibly damp or structurally compromised subfloor. Keep power tools away from water and follow manufacturer instructions for any adhesive removers or primers.
Step-By-Step: How To Clean Subfloor Before Flooring
- Assess moisture levels: Use a subfloor moisture meter on both concrete and wood surfaces to establish a baseline. Note readings and determine if any areas require drying or additional prep.
- Remove loose debris: Vacuum the area with a HEPA shop vac dust extractor for construction to capture fine dust, sawdust, and loose particles. This creates a clean workspace for adhesive removal.
- Identify and remove adhesive: Scan the surface for old glue or adhesive residues. Use a heavy duty floor scraper tool for adhesive removal to lift and scrape away the majority of adhesive without damaging the subfloor.
- Cut and detach tough residues: For stubborn residues, employ a utility knife with retractable blade to score and lift adhesive lines. Work in small sections to avoid gouging the substrate.
- Scrape remaining film: Switch to sharp floor scraper blades replacement pack blades if blades dull or residue thickens. Maintain a shallow angle to minimize subfloor damage.
- Final dry sweep: Vacuum again with the HEPA system to capture fine particles released during scraping. A dry environment reduces the chance of moisture-related issues during installation.
- Inspect for moisture after cleaning: Re-test key areas with the moisture meter. If readings are elevated, allow additional drying time or implement ventilation and dehumidification before proceeding.
- Address imperfections: Fill small cracks or gaps with an appropriate floor-leveler or primer as recommended by the flooring manufacturer. Ensure the surface is consistently flat and dry before laying new flooring.
Troubleshooting
| Symptom | Likely Cause | Fix | Prevention |
|---|---|---|---|
| Moisture readings repeatedly high | Poor ventilation or ongoing moisture source | Increase airflow, use dehumidifiers, recheck after drying | Seal leaks and monitor humidity during prep |
| Adhesive remains after scraping | Thick residue or improper scraper blade | Switch to sharp blades and re-scrape in small sections | Test a small area first to choose the right method |
| Subfloor damage or soft spots | Water damage or structural weakness | Consult a professional; replace damaged sections if necessary | Address moisture sources early |
| Dust and debris reappears after vacuuming | Inadequate filtration or missed areas | Use a fresh HEPA filter and re-vacuum thoroughly | Move methodically and cover all zones |
Common Mistakes
- Skipping moisture testing or relying on visual cues alone
- Over-scraping, which can gouge or weaken the subfloor
- Using non-HEPA vacuums or dry sweeping without proper containment
- Ignoring curing times for primers or adhesives
Tips For Best Results
- Work in sections to maintain a consistent cleaning pace and prevent recontamination.
- Always follow the flooring manufacturer’s recommendations for subfloor preparation products and acceptable moisture levels.
- Maintain consistent blade angles during scraping to avoid gouges or heat damage.
- Ventilate the space well and use a dehumidifier when drying concrete or wood subfloors.
- Keep a spare blade pack handy to minimize downtime during heavy adhesive removal.
Call A Professional
Consider professional help if moisture readings are consistently high, the subfloor shows significant damage, or the project extends beyond a single room. Signs that warrant expert assessment include visible mold, persistent soft spots, or structural cracking that could affect installation integrity.
FAQ
What moisture range is acceptable for concrete subfloors?
Typical acceptable moisture levels vary by flooring type; consult the manufacturer’s guidelines for specific requirements.
Can I install over a slightly dusty subfloor?
Dust must be minimized; clean thoroughly to ensure proper adhesion and durability of the new flooring.
Is a moisture barrier necessary on every subfloor?
Some flooring systems require a moisture barrier; verify with the flooring manufacturer and apply as directed.
How long should I wait after sealing or priming before laying flooring?
Follow the product’s recommended cure time, ensuring the surface is dry and dust-free.
Buying Guide
Choosing the right tools for subfloor cleaning supports a smoother installation and better long-term performance. Key buying factors include:
- Moisture monitoring: A reliable subfloor moisture meter helps identify damp areas and guides drying strategies.
- Adhesive removal: A heavy duty floor scraper tool and sharp blades ensure efficient removal of old adhesives without damaging the substrate.
- Dust control: A HEPA shop vac dust extractor minimizes airborne particles and keeps the work area clean, improving indoor air quality.
- <bCutting tools: A retractable utility knife facilitates precise cuts for adhesive and residue removal in tight spaces.
- <bSpare parts: Replacement blade packs maintain tool effectiveness and prevent downtime during cleanup.
When evaluating options, compare tool durability, blade availability, and compatibility with existing equipment. Consider the size of the project and the level of moisture exposure to determine whether a single skilled approach or a combination of tools is most effective. Always prioritize safety and follow manufacturer instructions for all products used in subfloor prep.