A well-maintained sandwich press not only extends its life but also keeps flavors fresh and odors minimal. This guide walks American users through a practical, step-by-step cleaning routine that works for most electric paninis and grills. The goal is to remove stuck cheese, oil, and burnt bits without damaging nonstick surfaces.
Readers will find a concise Quick Answer, a complete list of tools, safety notes, actionable steps, troubleshooting, common mistakes, and buying guidance to help choose the right cleaning supplies for future maintenance.
Quick Answer
Unplug the press, cool it briefly, wipe loose debris with a dry cloth, then scrub and rinse using non-abrasive brushes and a mild detergent. Dry completely before storing. For stubborn residue, reheat briefly and scrape with a scraper, then re-clean.
What You’ll Need
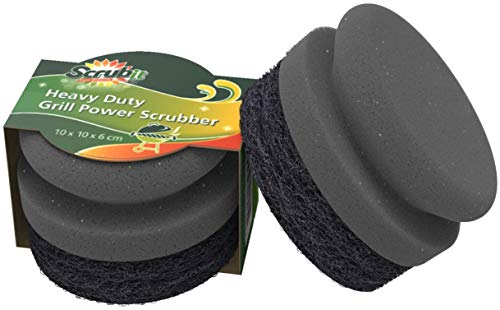
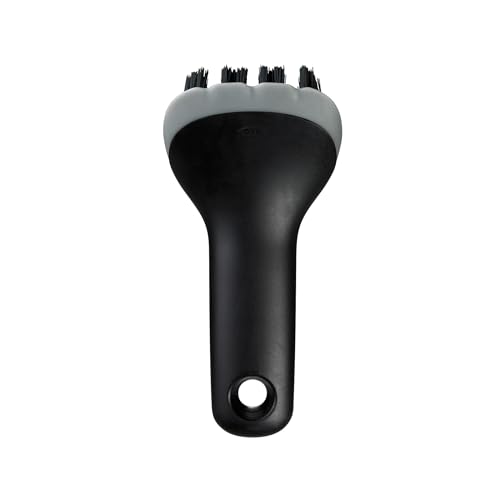
- Panini press cleaning brush with scraper
- Sandwich maker cleaning kit
- Nonstick grill plate cleaner brush
- Silicone spatula for panini press cleaning
- Electric grill plate cleaning brush set
Before You Start
Read the user manual for any model-specific cautions. Always unplug the device and let it cool completely before cleaning. Do not submerge the base or power cord in water; use a damp cloth for exterior wiping. Protect hands with gloves if handling hot surfaces, and avoid harsh chemical cleaners that can damage nonstick coatings. Time estimates assume a standard electric grill with removable plates and average daily use.
Caution: Do not use abrasive pads on nonstick surfaces, which can scratch and degrade performance. If the plates are removable, check for dishwasher-safe components, but dry any non-dishwasher-safe parts thoroughly before reassembly.
Step-By-Step: How To Clean A Sandwich Press
- Unplug and Cool: Disconnect from power and allow the unit to reach a safe handling temperature.
- Remove Removable Plates: If your model has detachable plates, take them out and set aside for thorough cleaning.
- Wipe Loose Debris: Use a dry microfiber cloth to remove loose crumbs, oil, and cheese from the plates and gasket area.
- Scrape Stubborn Residue: Gently use the scraper from the panini press cleaning brush with scraper or a plastic spatula to lift caked bits without scratching.
- Apply Gentle Cleaner: Lightly dampen a cleaning brush with water and a small amount of mild dish soap, then scrub the nonstick surface in circular motions.
- Rinse and Wipe: Wipe away soap residue with a clean damp cloth. For detachable plates, rinse under lukewarm running water and dry completely before reassembling.
- Dry Thoroughly: Use a dry cloth or air-dry the plates completely to prevent moisture from contacting electrical components.
- Reassemble and Test: Place plates back (if removed), plug in, and run a quick dry cycle to verify there are no leftover detergents or odors.
- Targeted Deodorizing: If lingering smells persist, wipe with a small amount of white vinegar diluted in water, then rinse and dry again.
- Schedule Regular Cleaning: Establish a routine—wipe after each use and do a deeper clean weekly or biweekly depending on frequency of use.
- Store Properly: Keep the press in a clean, dry area to prevent dust from accumulating on the plates.
- Special Considerations: For hard-to-reach areas, use a silicone spatula for precision cleanup and the electric grill plate cleaning brush set for crevices.
Troubleshooting
| Symptom | Likely Cause | Fix | Prevention |
|---|---|---|---|
| Residue sticks after cleaning | Residue baked during high heat | Reheat briefly, then scrape with scraper and clean again | Wipe plates with oil after use to reduce sticking |
| Nonstick coating appears scratched | Abrasion from metal tools | Switch to plastic or silicone tools; avoid metal scrapers | Use soft brushes and non-abrasive cloths |
| Smell persists | Food odors trapped in crevices | Clean thoroughly, include removable plates if possible | Season plates lightly with a thin layer of oil after cleaning |
| Water not drying quickly | Moisture remains in grooves | Dry with towel, then air-dry completely before reassembly | Ensure channels are dry after each wash |
Common Mistakes
- Using harsh chemicals that strip nonstick coatings
- Forgetting to dry plates completely before reassembly
- Using metal tools that gouge the surface
- Submerging the base or electrical components in water
Tips For Best Results
- Establish a routine: quick wipe after each use and a deeper clean weekly for heavy cooks, especially with cheese and oil.
- Keep a dedicated cleaning kit handy near the kitchen appliance to simplify maintenance.
- When dealing with stubborn cheese, reheat briefly to soften before scrubbing, then finish with a thorough wipe.
- For hard-to-reach crevices, use a silicone spatula to dislodge debris without scratching.
- Choose non-abrasive brushes designed for nonstick grill plates to extend the life of the surface.
Call A Professional
Call a professional if the appliance shows signs of internal damage, unusual heat, or persistent electrical issues after cleaning. If there is any unusual burning smell during operation, stop using the device and consult a technician or the manufacturer’s support line.
FAQ
Can I put the sandwich plates in the dishwasher?
Only if the plates are labeled dishwasher-safe. If not, hand wash with mild soap and warm water, then dry completely.
What nonstick cleaner is safe for grill plates?
Use mild dish soap and a soft-bristle cleaner or a nonabrasive brush designed for nonstick surfaces.
Is it okay to use vinegar for cleaning?
Yes, a very diluted vinegar solution can help neutralize odors, but rinse and dry thoroughly afterward.
How often should I deep-clean a sandwich press?
For frequent use, a deep clean every 1–2 weeks is recommended; otherwise, monthly cleaning should suffice.
What should I do if food sticks even after cleaning?
Preheat and lightly oil the plates before cooking to create a fresh nonstick surface and reduce sticking.
Are metal tools ever safe to use on nonstick plates?
Generally no; use plastic, silicone, or wood tools to protect the coating.
Buying Guide
Key decisions when selecting a cleaning setup for a sandwich press include factors like size, noise level, energy efficiency, controls, and placement. The following perspectives help compare options and ensure the right fit for daily kitchen use:
- Size and compatibility: Check plate dimensions and whether removable plates exist to optimize cleaning access.
- Cleaning tools: Consider a kit that includes a scraper, nonstick brushes, and silicone spatulas, and ensure brushes are gentle on coatings.
- Effectiveness vs. safety: Prioritize products designed for nonstick surfaces to prevent scratches while cleaning.
- Ease of use: Look for cordless or easy-to-rinse tools that simplify after-use routines.
- Placement and storage: Opt for compact kits that fit neatly in a utensil drawer or cabinet near the appliance.
- Durability and materials: Favor sturdy brushes made of heat-tolerant, non-scratch materials to extend life and protect surfaces.
- Cost vs. value: A higher-quality cleaning kit often saves time and preserves the nonstick coating, reducing replacement needs over time.
Would you like help choosing a specific combination of items from the listed products to match your sandwich press model and cleaning frequency?