Overlapping sliding shower doors can collect soap scum, mineral deposits, and mold in the tracks. Regular, selective cleaning keeps them looking clear and functioning smoothly. This guide covers practical steps, the right tools, and safety tips for American households.
Using the right brushes, scrapers, and microfiber tools makes cleaning quicker and more effective, reducing the effort needed for stubborn buildup and preventing damage to the door seals.
Quick Answer
For a fast clean, assemble a flexible cleaning brush, a sliding shower door track cleaning brush, a microfiber squeegee, and a silicone sealant scraper. Scrape loose residue, apply a bathroom-safe cleaner to the tracks, scrub gently, rinse, and dry. Finish with a quick pass of the microfiber squeegee to prevent water spots and mildew runoff.
What You’ll Need
- Sliding shower door track cleaning brush
- Shower door track scraper tool
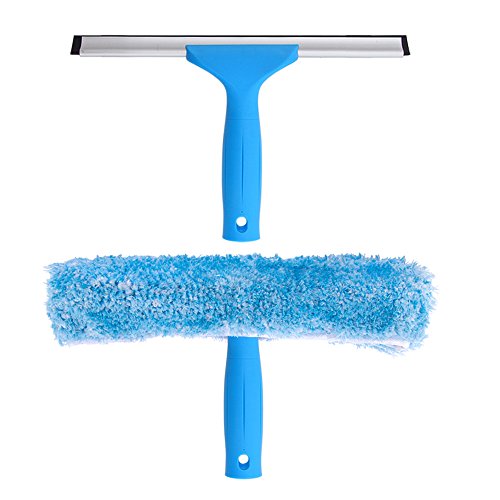
- Microfiber squeegee for shower doors
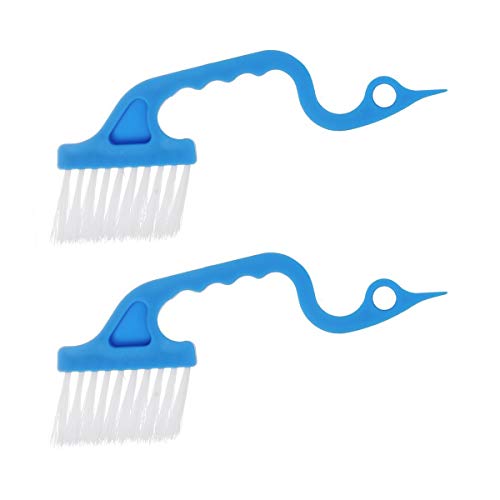
- Flexible cleaning brush for shower door tracks
- Silicone sealant scraper for shower doors

Before You Start
Prepare the area by laying towels to catch drips and placing a small tray for removed debris. Ventilate the bathroom or turn on a fan to reduce chemical fumes. Test any cleaner on a hidden area of the track to avoid discoloration.
Caution: Avoid using abrasive pads or harsh solvents that could scratch the glass or strip door seals. Keep cleaners away from metal hardware to prevent corrosion. Allow scrub tools to dry after use to prevent mildew growth.
Step-By-Step: How To Clean Overlapping Sliding Shower Doors
- Remove loose debris from the door tracks with the shower door track scraper tool, using a steady, gentle motion to lift soap scum.
- Attach the sliding shower door track cleaning brush and scrub the vertical and horizontal track surfaces to dislodge buildup.
- Apply a bathroom-safe cleaner or a vinegar-water mix to the tracks and let it sit for 3–5 minutes to break down deposits.
- Use the flexible cleaning brush for shower door tracks to reach tight corners and the gap between overlapping doors, focusing on mineral scale near seals.
- Wipe away cleaner with a damp cloth, then rinse the tracks with water from a damp sponge to remove loosened grime.
- Run the microfiber squeegee for shower doors along both sides of the doors to remove excess moisture and prevent water spots.
- Inspect door seals for wear. If you notice cracks or stiff rollers, consider applying a small amount of silicone sealant where advised by product instructions and use the scraper sparingly to avoid damage.
- Dry the door edges and any metal hardware with a clean microfiber cloth to prevent corrosion and mold growth.
- Optional: Repeat the cleaning cycle monthly or after several weeks of hard water use to maintain clarity and function.
- Finish by wiping the threshold and framing with a mild cleaner to prevent soap scum buildup in the surrounding area.
- Return doors to their tracks and ensure smooth sliding before leaving the bathroom.
Troubleshooting
| Symptom | Likely Cause | Fix | Prevention |
|---|---|---|---|
| Door sticks or catches | Grit in the track, worn wheels | Clean tracks thoroughly; lubricate with manufacturer-approved product if recommended | Regular light cleaning; avoid overfilling tracks with cleaners |
| Persistent odor | Mildew in seals | Clean seals with mildew-safe cleaner; dry thoroughly | Keep bathroom dry after showers; use ventilation |
| Cloudy glass after cleaning | Residue from cleaners | Rinse well and dry with microfiber; avoid ammonia-based products on glass | Test cleaner on hidden area first |
| Stains on metal hardware | Harsh chemicals | Switch to gentler cleaners; wipe dry | Use non-abrasive tools |
Common Mistakes
- Using abrasive pads that scratch glass and seals
- Letting cleaner sit too long on metal parts, causing tarnish
- Forgetting to dry tracks after cleaning, which invites mold
- Neglecting to check for seal wear during maintenance
Tips For Best Results
- Schedule a monthly cleaning routine to prevent heavy buildup.
- Keep a dedicated toolkit near the shower for quick touch-ups.
- Use a microfiber cloth for final drying to minimize streaks.
- Test all cleaners on hidden areas to avoid damage to glass and seals.
Call A Professional
Stop and call a pro if you notice cracked glass, stubborn metal corrosion, or damaged sliding wheels that hinder door operation. Seek professional help if seal replacements are needed or if cleaning reveals structural issues with the track system.
FAQ
What can I use to remove hard water stains on sliding doors?
A vinegar-water solution or a bathroom-safe descaling cleaner works well. Rinse completely and dry to prevent new spots.
How often should I clean sliding shower door tracks?
Light weekly maintenance with a deeper clean every 1–2 months helps prevent buildup and keeps operation smooth.
Can I use bleach on shower door seals?
Bleach can degrade seals; avoid using it directly on seals. Use mild cleaners recommended for bathroom hardware.
Is it safe to lubricate the door tracks?
Only with lubricants approved by the door manufacturer. Over-lubrication can attract dirt and cause buildup.
Buying Guide
When selecting tools for cleaning overlapping sliding shower doors, consider size, flexibility, and material compatibility. A flexible cleaning brush for shower door tracks reaches tight corners, while a sliding shower door track cleaning brush covers broader surfaces. A microfiber squeegee for shower doors removes moisture efficiently, reducing water spots and mildew. Include a silicone sealant scraper for shower doors to address seal wear without damaging glazing. Keep a shower door track scraper tool for stubborn residue in hard-to-reach channels. For best results, choose tools with ergonomic grips and durable bristles that resist hard-water minerals.
Size matters: measure door width and track depth to ensure brushes fit without obstructing operation. Noise level and ease of storage are practical considerations for shared bathrooms. Energy efficiency is not a direct factor here, but ensuring a quick, effective clean reduces moisture-related issues that can affect bathroom air quality. Consider kit-based options that bundle multiple tools for a coordinated approach to maintenance. Finally, verify compatibility with your door material and seal type to avoid accidental damage.