Cleaning a vinyl record improves playback and longevity by removing surface dust, oils, and grime. A careful routine using purpose built tools can prevent scratches and static. This guide covers practical steps and safe practices for American users.
Whether you are preserving a prized older LP or refreshing a frequently played album, proper cleaning can reveal clearer highs and richer mids while protecting the stylus and cartridge.
Quick Answer
Choose a dedicated vinyl cleaning kit or a compact ultrasonic cleaning setup, use a soft brush to remove loose dust, then apply a gentle cleaning solution and rinse as needed. Finish with a dry microfiber wipe and a anti static spray to minimize re attracting dust.
What You’ll Need
- Ultrasonic vinyl record cleaning machine 2L
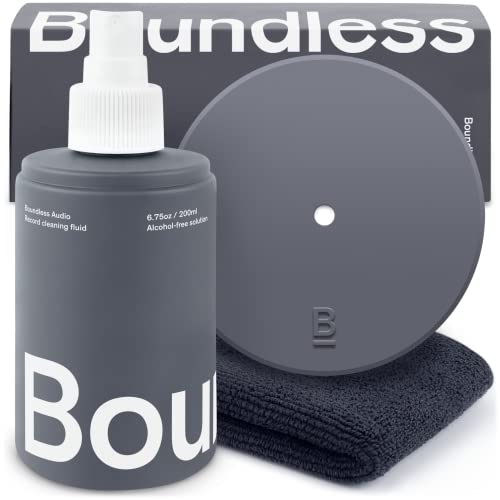
- Vinyl record cleaning kit with brushes and fluid
- Carbon fiber vinyl record cleaning brush
- Anti-static vinyl record cleaning solution spray
- Stylus cleaning brush and stylus cleaner


Before You Start
Prepare a clean, dust free workspace and place a soft mat or towel beneath the record to prevent slipping. Ensure the cleaning area is well lit so you can inspect both sides of the disc. Always unplug electrical devices before handling electrical components. Time estimates vary from 15 to 40 minutes per record depending on the method used. Use gentle strokes and never apply excessive pressure.
Step-By-Step: How To Clean A Record
- Inspect the record for visible dust, fingerprints, and scratches. Note any warps or heavy scuffs that may require specialized care.
- Gently remove loose dust with a carbon fiber vinyl record cleaning brush using soft, straight strokes along the grooves from the inner to outer edge.
- Set up the chosen cleaning method: either place the record in a cleaning machine or prepare a cleaning solution on a microfiber cloth.
- Apply a anti-static vinyl record cleaning solution spray lightly to the surface, avoiding the label. Do not soak the disc.
- If using a cleaning kit, use the included brushes and follow the kit instructions to scrub in the direction of the grooves. Rinse with distilled water if the kit requires it.
- For ultrasonic cleaning, secure the record in the machine and run the cycle according to the product manual, typically a short cycle on a clean setting.
- Rinse the record with distilled water or the kit recommended rinse solution. Avoid tap water that contains minerals that can leave residues.
- Blot dry with a clean microfiber cloth using gentle, sweeping motions from inner to outer edge. Allow the record to air dry completely before play.
- Clean the stylus separately with a stylus cleaning brush and stylus cleaner, following the product instructions carefully to remove dust near the tip without bending the cantilever.
- Inspect again for remaining particles. If needed, repeat the brushing and light cleaning to ensure a pristine surface.
- Store the cleaned record upright in a sleeve to protect from dust and static when not in use.
Troubleshooting
| Symptom | Likely Cause | Fix | Prevention |
|---|---|---|---|
| Popcorn like clicks after cleanup | Residual dust in grooves | Reclean with gentle brushing and a brief rinse | Clean in a dust free area |
| Static cling after drying | Insufficient anti static treatment | Apply anti-static vinyl record cleaning solution spray and wipe | Handle records by edges only |
| Surface streaks or smears | Residue from cleaning fluids | Use distilled water for final rinse and dry with microfiber | Avoid overapplication of solution |
| Drying takes too long | Heavy moisture or humid environment | Increase air flow and use a clean dry cloth to finish | Clean in a dry, ventilated space |
Common Mistakes
- Using tap water or harsh cleaning agents that leave mineral residues
- Brushing against the groove direction causing scratches
- Cleaning while the record is still wet or damp and re attracting dust
- Ignoring the stylus when cleaning the record surface
Tips For Best Results
- Always handle records by the edges to avoid transferring oils from fingers
- Invest in a carbon fiber brush for regular quick cleanings between plays
- Keep an upright storage system to minimize warping and dust exposure
- Use a vinyl record cleaning kit with brushes and fluid for routine maintenance
- Schedule a deeper ultrasonic clean for heavily used or older albums
Call A Professional
Consider professional help if a record shows deep scratches, warps that affect play, or if repeated cleaning does not improve sound quality. Seek expert cartridge and tonearm calibration if you notice persistent skipping or mistracking after cleaning.
FAQ
Can I clean records with water alone?
Water alone is not ideal; use distilled water and a suitable cleaning solution to avoid mineral deposits.
How often should I clean my records?
Clean surfaces regularly, especially after heavy handling or exposure to dust, and deep clean periodically based on play frequency.
What is the best way to clean the stylus?
Use a dedicated stylus cleaning brush and cleaner designed for cartridges, avoiding pressure on the cantilever.
Is ultrasonic cleaning safe for all records?
Ultrasonic cleaning is generally safe but follow manufacturer instructions and avoid excessive cycles on fragile or warped discs.
Buying Guide
When selecting a record cleaning solution or machine, consider size, noise level, energy use, and ease of use. The right system depends on how often records are played and how delicate the collection is. For many households, a combination approach works well: a ultrasonic vinyl record cleaning machine 2L for deep cleans and a vinyl record cleaning kit with brushes and fluid for quick maintenance.
Key factors include size to fit your storage area, quiet operation for living spaces, and effective cleaning without harsh chemicals. Evaluate controls and automation features for consistent results, and plan storage placement away from heat and humidity sources. If possible, compare models by the completeness of included tools, such as the carbon fiber vinyl record cleaning brush and stylus cleaning brush and stylus cleaner, to ensure a full cleaning ecosystem.
Think about future needs such as additional racks, ease of cleaning large batches, and potential upgrades to anti static solutions. A practical kit paired with a dedicated cleaner often offers the best balance of performance and value for many American vinyl lovers.