Grease fires in the oven can be stressful, but a calm, methodical approach minimizes damage and restores kitchen safety. This guide outlines practical steps, recommended tools, and safety considerations to clean up after a grease incident and prevent future flare-ups.
Quick Answer
Act quickly but safely. If flames are small, snuff them with a metal lid or baking sheet and switch off the oven. Use protective gloves, ventilate the area, and follow a thorough cleanup with appropriate cleaners and tools listed below.
What You’ll Need
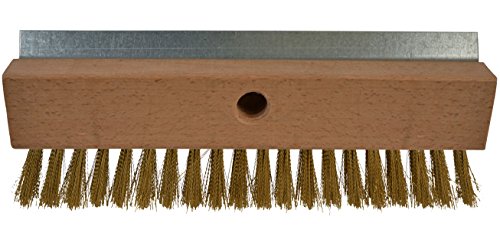
- Stiff-bristle oven cleaning brush
- Heat resistant silicone oven gloves 450F
- Non-scratch oven cleaning sponge set
- Oven scraper with integrated blade guard
- Grease remover degreaser spray for ovens


Before You Start
Assess the oven interior carefully. If there is extensive damage, or if you notice burning odors lingering after a cooling period, pause and ventilate the kitchen. Allow the oven to cool completely before cleaning. Remove baking sheets, racks, and any broken glass carefully. Do not use abrasive tools on coated surfaces, and follow the manufacturer’s guidance for interior cleaning. Time estimate: 45–75 minutes for a typical clean after a small grease fire. Key cautions: wear heat‑resistant gloves, ensure proper ventilation, and never mix cleaning chemicals without reading label directions.
Step-By-Step: How To Clean An Oven After A Grease Fire
- Turn off the oven and unplug if possible, then carefully remove all racks and trays to expose the interior walls.
- Wipe loose soot and debris with a dry microfiber cloth or paper towels, avoiding scratching the enamel with metal bits.
- Use the oven scraper with integrated blade guard to lift and remove caked-on grease from the bottom and racks without gouging the coating.
- Apply a grease remover degreaser spray for ovens to affected areas and let it sit per product directions to break down residues.
- Gently scrub with a non-scratch oven cleaning sponge set to lift grease without damaging surfaces. For stubborn spots, repeat application and scrubbing.
- Rinse the interior with a damp cloth or sponge, removing all cleaner residues. Repeat as needed to ensure a clean surface.
- Return racks to the oven and wipe them with a damp cloth before reinstalling. Wipe the door gasket area to remove any splatters on the seal.
- Run a short, empty bake at a low temperature (about 200–250°F) to dry the interior and burn off remaining cleaner residues. Do this only if your oven’s manual allows it.
- Ventilate the kitchen and wipe down exterior surfaces, including control panels and knobs, with a damp cloth. Inspect for lingering odors and repeat cleaning if necessary.
- After the oven cools, perform a final visual check for any remaining grease. Replace racks and store cleaning tools in a convenient location for future use.
Troubleshooting
| Symptom | Likely Cause | Fix | Prevention |
|---|---|---|---|
| Grease odor persists after cleaning | Residue baked onto surfaces | Re-clean with degreaser and rinse thoroughly | Promptly wipe splatters during cooking |
| Streaks or cloudy enamel after clean | Water marks or cleaner residue | Wipe with a dry microfiber, then a damp cloth and dry | Rinse with clean water; avoid harsh chemicals |
| Scratches on interior coating | Using abrasive tools | Switch to non-scratch sponges and plastic scrapers | Follow manufacturer guidance; never use metal brushes |
| Grease returns shortly after cleaning | Improper sealing or hidden grease pockets | Inspect door seals; clean thoroughly and re-clean hotspots | Address spill prevention during cooking |
Common Mistakes
- Using harsh abrasives that scratch enamel surfaces
- Applying cleaners without allowing dwell time
- Neglecting oven racks and interior doors during cleaning
- Rushing the drying process, leaving moisture behind
Tips For Best Results
- Keep a dedicated cleaning kit nearby with the listed tools for quick action after incidents
- Use a spray degreaser with sufficient dwell time for tougher residues
- Wipe surfaces from top to bottom to prevent spreading grease to clean areas
- Regular maintenance reduces buildup and makes future cleanups easier
Call A Professional
Call a professional if there is visible damage to the oven interior, persistent burning smells after cleaning, or if the grease fire caused soot near wiring or electronics. Do not attempt to operate a compromised oven until inspected and repaired by a licensed technician.
FAQ
Is it safe to use oven cleaner after a grease fire?
Yes, but follow the product directions, ventilate the area, and wear protective gloves.
Can I clean the oven while it is still warm?
Wait until it is cool to avoid burns and to prevent chemical reactions with cleaners.
What helps remove burnt-on grease efficiently?
A degreaser spray with dwell time and a non-scratch sponge are effective for stubborn spots.
Should I run the oven after cleaning?
Only if the manual permits and the oven is completely dry to avoid steam buildup.
How can I prevent future grease fires?
Clean spills promptly, avoid oil-heavy foods at high temperatures, and keep ventilation active during cooking.
What other tools can help after a grease fire?
A stiff-bristle oven cleaning brush and an oven scraper with a blade guard can help remove residue without scratching.
Is it necessary to replace old racks or seals?
Consider replacement if you notice significant wear, corrosion, or residue that cannot be removed.
Buying Guide
Choosing the right tools for oven cleanup supports safer and more effective maintenance. Consider size, compatibility with your oven type, and how often you expect to perform cleans. Key factors include:
- <bSize and fit: Ensure you select tools that fit your oven rack dimensions and interior space.
- <bNoise level: Some cleaners and scrubbers are quieter; look for user-friendly, non-abrasive options.
- <bEnergy efficiency: Regular cleaning preserves heat distribution and efficiency by preventing grease buildup that acts as insulation.
- <bControls and placement: Keep cleaning supplies away from sensitive controls and store in an accessible location near the kitchen.
Product perspectives vary by cleaning approach: a stiff-bristle oven brush tackles stubborn grime, heat-resistant gloves protect hands, non-scratch sponges preserve enamel, an integrated blade guard helps control scraping, and a degreaser spray speeds up the removal process. When evaluating options, balance convenience, durability, and safety features to maintain a clean, efficient oven.