Old tile grout can become porous and stained over time, making your bathroom or kitchen look dingy. A thorough cleaning revives grout lines and improves overall tile appearance. The following steps focus on proven methods and practical tools available to American homeowners.
The process combines targeted brushing, cleaning solutions, and, when needed, gentle sealant protection to keep grout looking fresh longer. Readers will find guidance on choosing the right tools and how to avoid common pitfalls that can damage tile or grout.
Quick Answer
Quick steps: vacuum or sweep the area, apply a grout-safe cleaner, scrub with the appropriate brush, rinse, and dry. For tough grout stains, repeat or switch to a steam method, then consider sealing to protect against future staining.
What You’ll Need
- Angled grout cleaning brush for tile grout
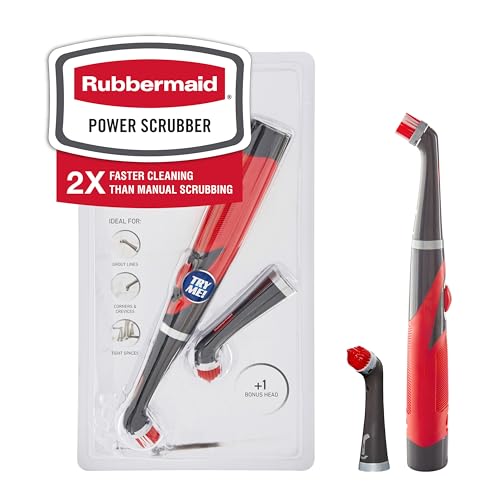
- Handheld electric grout cleaner scrubber
- Steam cleaner for grout lines tile
- Grout sealing kit with penetrating sealant and applicator
- Grout haze remover and tile cleaning kit


Before You Start
Prepare the area by removing items from the floor or walls and placing towels to catch splashes. Ventilate the space well, especially if using chemical cleaners. Test cleaners on a small, inconspicuous area first to ensure colorfast grout. Wear gloves and eye protection to guard against splashes. Time estimates vary: plan 1–3 hours for a typical bathroom with extensive grout lines.
Step-By-Step: How To Clean Old Tile Grout
- Clear the area and vacuum or sweep loose dirt from the grout lines.
- Mix a grout-safe cleaner or make a mild baking soda paste with water for stubborn stains.
- Apply cleaner to the grout using a spray bottle or brush, focusing on stained areas.
- Scrub with the Angled grout cleaning brush for tile grout, using short, firm strokes along the lines.
- Rinse with clean water and wipe away suds with a microfiber cloth; allow to dry briefly.
- For heavy grime, use the Handheld electric grout cleaner scrubber to intensify cleaning on tough sections.
- If stains persist, try a Steam cleaner for grout lines tile—move slowly to penetrate the grout.
- After cleaning, check for remaining haze; use Grout haze remover and tile cleaning kit as needed.
- Let grout dry completely, then apply a Grout sealing kit with penetrating sealant and applicator to protect.
- Apply sealant evenly along the grout lines, following the kit directions, and wipe away excess.
- Allow the sealant to cure fully before exposing to water or heavy use.
Troubleshooting
| Symptom | Likely Cause | Fix | Prevention |
|---|---|---|---|
| Grout remains stained after cleaning | Deep-set stains or sealer residue | Repeat cleaning; try Grout haze remover and tile cleaning kit | Address stains early; clean regularly |
| Grout crumbles or flakes | Old, deteriorated grout | Repair with new grout between tiles or regrout; consult a pro if extensive | Seal and maintain grout to extend life |
| Sealer won’t dry | Too thick application or moisture present | Wipe excess; ensure area is dry before sealing | Follow manufacturer drying times |
| Discoloration after steam cleaning | Too high heat or moisture exposure | Lower steam intensity; shorten exposure | Test in a small area first |
Common Mistakes
- Over-wetting grout, leading to mold growth behind tiles.
- Using aggressive cleaners on natural stone or unsuited materials.
- Skipping drying time before applying sealant, causing poor adhesion.
- Neglecting to seal after cleaning, resulting in quick re-staining.
Tips For Best Results
- Use an angled grout cleaning brush for precise along- grout-line scrubbing.
- Alternate between manual scrubbing and a handheld electric grout cleaner for efficiency.
- Rinse thoroughly after each cleaning pass to avoid soap residue that attracts dirt.
- Apply sealant in a well-ventilated area and follow cure times strictly.
- Regular maintenance, such as light cleaning weekly, helps prevent heavy buildup.
Call A Professional
Consult a professional grout cleaner when grout is crumbling, tiles are loose, or moisture has penetrated behind the grout. If stains are widespread and resealing seems ineffective, a pro can advise on regrouting or additional waterproofing measures. Seek immediate help if there are any signs of persistent mold, efflorescence, or water damage.
FAQ
Can I use bleach to clean old grout?
Bleach can lighten stains but may damage colored grout and harm adjacent tiles. Use grout-safe cleaners first, and test any strong cleaner on a small area.
Is steam cleaning safe for all grout types?
Steam cleaning is effective for many grout types but can loosen older grout or damage sensitive tiles. Test a small area and use moderate heat and distance.
How often should grout be sealed after cleaning?
Most grout benefits from sealing every 1–2 years, depending on wear and moisture exposure. Reapply sealant after deep cleaning or staining.
What’s the best way to regrout heavily stained areas?
For long-stained areas, consider removing the old grout and applying fresh grout, then seal to protect anew.
Buying Guide
When selecting tools for cleaning old tile grout, consider size, power, and ease of use. A balanced kit with a dedicated angled grout cleaning brush and the option of a handheld electric grout cleaner can adapt to small bathrooms or large kitchens. A steam cleaner provides extra power for deep pours between tiles but may require caution around heat-sensitive surfaces. Sealant kits with penetrating sealant help keep grout resistant to future staining, while a grout haze remover helps restore tile shine after heavy cleaning. For best results, match the kit to your grout type (sand, epoxy, cement) and follow manufacturer instructions for cleaning and sealing. Wondering about noise levels and energy use? Look for moderate electrical draw in handheld devices and consider a steam cleaner with adjustable settings for efficiency. Finally, ensure proper placement and storage of these tools to maintain a tidy cleaning routine and avoid clutter in small spaces.