Proper log preparation is essential for a durable, even stain on log homes and cabins. This guide explains a practical, step-by-step approach to cleaning logs, removing dirt, mildew, and oxidation, and preparing the surface for a long-lasting finish. Readers will learn how to evaluate the wood, choose the right cleaners, and apply treatments safely and effectively.
Following best practices helps ensure that the stain adheres evenly and lasts longer, reducing the need for rework later. The process blends common cleaning solutions, careful mechanical prep, and protective steps to minimize moisture intrusion and surface damage.
Quick Answer
Best practice: start with a gentler surface cleaner, test a small area, then use a log cleaner for staining prep if heavy grime remains. Finish with a wood brightener to neutralize residues before staining and allow the surface to dry thoroughly.
A Quick List Of What You’ll Need
The following tools and products cover the essential prep steps. Use each item as described to maximize stain adhesion and wood health.
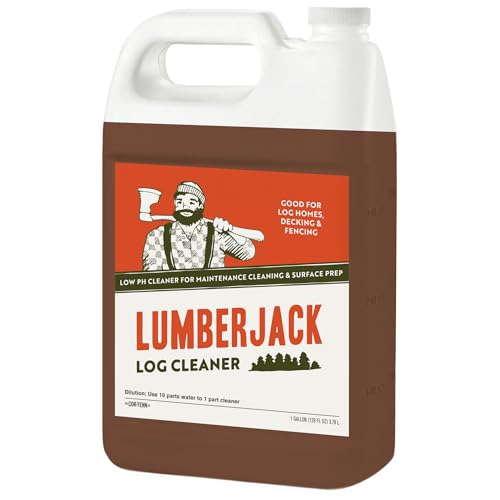
- Log cleaning solution for staining prep
- Wood brightener oxalic acid for log homes
- Deck cleaner for log cabins prep before stain
- Pressure washer soap wood cleaner for logs
- Sanding sponge block for log prep before staining


Before You Start
Before any product touches the wood, inspect for loose bark, cracks, or soft rot. Protect nearby plants and surfaces with plastic sheeting. Work in a shaded area or cool morning to prevent rapid drying that can leave streaks. Time estimates vary with log size, but plan for several hours to a full day including drying time. Read each product label for safety instructions and recommended dilution.
Safety notes include wearing eye protection, gloves, and a respirator if applying chemical treatments. Never mix cleaners with incompatible chemicals, and avoid using high-pressure applications on soft or damaged wood, which could cause gouging.
Step-By-Step: How To Clean Logs Before Staining
- Clear the area and rinse loose dirt with a garden hose to reduce initial grime.
- Test a small, inconspicuous area with the deck cleaner for log cabins prep before stain to confirm color or finish compatibility.
- Apply a log cleaning solution for staining prep according to label directions, focusing on shaded areas with mold or mildew.
- Wait the recommended dwell time to allow the cleaner to penetrate and loosen contaminants.
- Use a soft-bristle brush or sanding sponge block for log prep before staining to scrub mildewed spots without gouging the wood.
- Rinse thoroughly with clean water, working from the top down to prevent dirt from re-depositing on cleaned areas.
- If mineral deposits or tannin stains linger, apply a wood brightener oxalic acid for log homes following the label to brighten and neutralize residues.
- Rinse again completely and allow the wood to dry completely, ideally 24–48 hours depending on humidity and temperature.
- Inspect the surface for uniform brightness and absence of residue; re-sand any rough patches if needed.
- Optionally apply deck cleaner for log cabins prep before stain to remove remaining grime after brightening, then rinse and dry.
- Perform a final dry run by using a clean white cloth to check for oils or residues; if it rubs off, repeat cleaning steps.
- Proceed with staining after the wood is fully dry, following the stain manufacturer’s instructions for application and coverage.
Troubleshooting
| Symptom | Likely Cause | Fix | Prevention |
|---|---|---|---|
| Stain beads up or looks blotchy | Residual oils or cleaners | Rinse thoroughly; re-clean; ensure complete dry time | Test areas; avoid over-wetting |
| Patchy whitening after brightening | Uneven application or insufficient dwell | Reapply brighter product to affected areas and rinse | Apply evenly in a consistent motion |
| Wood feels sticky after cleaning | Soap residue | Rinse with clean water; repeat rinse if needed | Rinse thoroughly; use correct dilution |
| Rings or dark lines appear | Moisture trapped during cleaning | Ensure dry conditions; re-dry before staining | Weather-check and plan for dry window |
Common Mistakes To Avoid
- Skipping a dry-down period; staining while the wood is damp leads to poor adhesion.
- Using overly aggressive scrubbing on soft log surfaces, causing scratches.
- Over-application of chemical cleaners, which can leave residues and discoloration.
- Failing to test cleaners on a small area before full application.
- Cleaning with high-pressure water on fragile or damaged logs.
Tips For Best Results
- Always start with the gentlest cleaner and escalate if grime persists.
- Work in manageable sections to maintain a consistent cleaning action.
- Protect surrounding vegetation and surfaces during any chemical treatment.
- Ventilate when using oxalic acid products and follow disposal guidelines for runoff.
- Document any color changes observed during brightening to anticipate final stain appearance.
Call A Professional
Consider hiring a professional if the logs show extensive mildew, deep staining, or structural concerns such as soft rot. Stop and consult a pro if:
- There are widespread soft spots or hollow areas in the logs.
- Peeling or flaking finish accompanies the cleaning stage.
- You are unsure about the proper chemical concentrations or safety procedures.
FAQ
Can I stain soon after cleaning?
Stain should be applied only after the logs are completely dry, typically 24–48 hours depending on weather.
Is oxalic acid safe to use on all log types?
Oxalic acid brighteners are effective for many log types but always follow label directions and conduct a patch test.
Do I need a pressure washer for cleaning logs?
A pressure washer can speed up the process but use low to medium pressure and a wide spray to avoid damage.
What should I do if stain won’t penetrate evenly?
Re-clean and re-brighten, then verify the wood is thoroughly dry before reapplying stain.
How often should logs be cleaned before staining?
Clean logs per project needs; many projects follow a fresh cleaning and brightening cycle before each stain refresh.
Buying Guide
Key buying factors influence clean-up success before staining. Consider the following to match your project needs:
- <bSize and surface type: Larger log surfaces require cleaning products with deeper penetration and longer dwell times; pocket the right tools for slab or rounded logs.
- Noise level and ease of use: Electric or gas-powered equipment may affect your site environment; choose machines that minimize disruption.
- Energy efficiency and chemical usage: Dilution ratios impact both cost and environmental footprint; follow label guidance to minimize waste.
- Controls and accessibility: Look for simple operation, clear dwell times, and easy rinse controls to maintain consistency across large areas.
- Placement and workspace: Plan cleaning around decks, landscaping, and access routes to avoid run-off onto plants or vehicles.
When comparing products, prioritize combination kits that include log cleaning solution for staining prep, deck cleaner for log cabins prep before stain, and wood brightener oxalic acid for log homes to streamline prep cycles. Ensure compatibility with your stain product and follow all safety and disposal guidelines.