Preparing garage walls properly is essential for a lasting paint job. This guide focuses on removing dirt, grease, flaking paint, and old sealants so new coatings adhere evenly and last longer. The steps are practical for American garages and compatible with common cleaning tools and cleaners used in households.
Quick Answer
Clean walls thoroughly with a degreaser, scrub away grime, rinse, and let dry completely. Use a pressure washer for stubborn areas, a scrub brush to lift grime, and a microfiber cloth to wipe surfaces before painting.
What You’ll Need
The following tools and products are commonly used to prepare garage walls for painting. Use the items as described to achieve a clean, paint-ready surface.
- electric pressure washer for cleaning garage walls – for heavy soil and concrete-adjacent surfaces
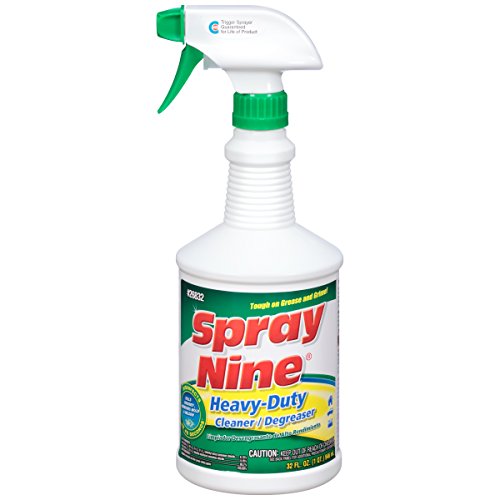
- garage wall degreaser cleaner spray for walls – remove oil and grease marks
- stiff bristle scrub brush set for cleaning walls – tackle textured or rough surfaces
- wall scraper with replacement blades for removing flaking paint – prepare peeling areas
- microfiber cleaning cloths for cleaning garage walls before painting – final wipe-down and dust removal


Before You Start
Assess the walls for damage, such as loose boards or mold. Wear protective gloves and eye protection, and ensure good ventilation. Move stored items away from the area and cover the floor to catch drips. Time estimates vary by wall size and condition, typically 2–6 hours for a standard two-car garage. Critical cautions: avoid using overly harsh chemicals on painted surfaces that could blister; test a small area first; never mix cleaners with bleach.
Step-By-Step: How To Clean Garage Walls Before Painting
- Remove items from the garage and lay down drop cloths to protect the floor.
- Inspect walls for peeling paint and use a wall scraper with replacement blades to remove loose flakes.
- Wipe the surface with a dry microfiber cloth to remove loose dust and debris.
- Prepare a cleaning solution with a garage wall degreaser cleaner spray for walls following label directions.
- Apply cleaner to greasy or oily patches and scrub with a stiff bristle scrub brush set for cleaning walls.
- Rinse areas with plain water using a electric pressure washer for cleaning garage walls where appropriate, focusing on seam lines and corners.
- Wipe surfaces with clean microfiber cloths to remove remaining moisture and cleaner residues.
- Address stubborn stains with additional degreaser and scrubbing, repeating as needed until the surface feels smooth to the touch.
- Allow walls to dry completely, typically 24 hours in dry conditions, before applying primer or paint.
- Inspect for any remaining flaking paint or stains; repeat scraping or cleaning as necessary.
- Lightly sand glossy patches to improve paint adhesion, then wipe down again with microfiber cloths.
- Apply primer in even coats if the wall material requires it before painting.
Troubleshooting
| Symptom | Likely Cause | Fix | Prevention |
|---|---|---|---|
| Peeling paint persists after cleaning | Surface not fully scraped or sanded | Re-scrape, sand, and re-clean the area | Probe edges and test small sections first |
| Grease stains remain | Grease not fully removed | Reapply degreaser and scrub with brush | Use a dedicated degreaser on oily spots |
| Damp patches after cleaning | Insufficient drying time or moisture issue | Improve ventilation, extend drying time | Repair moisture sources before painting |
| Dust resettles quickly | Drying surface creates airborne dust | Wipe with fresh microfiber cloths after drying | Clean on a calm, dry day |
Common Mistakes
- Not removing all flaking paint before cleaning and painting
- Using too little degreaser on oily stains
- Skipping the drying step, leading to poor paint adhesion
- Over-wetting walls with a pressure washer, causing damage or moisture buildup
These missteps can compromise adhesion and finish. Following the steps above reduces the risk of peeling, staining, or uneven results.
Tips For Best Results
- Test a small area with the chosen degreaser to ensure no damage to existing paint or finishes.
- Use a fresh microfiber cloth for final wiping to capture fine dust and cleaner residues.
- Work from top to bottom to prevent dirty runoff from marring cleaned areas.
- Ventilate well and wear protective gear when using chemicals or a pressure washer.
- Label and store cleaning tools properly to avoid cross-contamination with other projects.
Call A Professional
Consider contacting a professional if walls show extensive mold, deep structural damage, or persistent moisture issues. Stop and seek help immediately if you notice musty odors, discoloration spreading beyond accessible areas, or moisture intrusion from walls or ceilings. A pro can assess framing, ventilation, and moisture barriers to prevent future problems.
FAQ
Should I pressure wash interior garage walls?
Pressure washing can remove tough grime, but use low pressure and a gentle nozzle to avoid damage. Test small areas first.
What kind of degreaser should I use for walls?
Choose a degreaser labeled for walls or masonry; avoid harsh solvents that can degrade paint unless you plan to repaint.
How long does cleaning take before painting?
Expect several hours to full day, depending on wall size and condition, plus drying time before priming.
Is primer necessary after cleaning?
Primer helps adhesion on bare or patched areas, especially if old paint is uneven or stained.
Can I paint the same day as cleaning?
Only if the walls are fully dry and primed if needed. Rushing can trap moisture and cause peeling.
What if I discover mold while cleaning?
Address mold promptly with mold remediation steps or professional evaluation before painting.
Do I need to wear a mask?
Yes, wear a mask or respirator when using chemical cleaners or sanding dusty surfaces.
Buying Guide
When choosing gear for cleaning garage walls before painting, consider size, strength, and safety features. A household electric pressure washer can speed up cleaning on exterior-facing walls but may damage delicate surfaces if misused. A robust degreaser cleaner spray helps tackle oil spots, while a stiff bristle brush reaches textured surfaces effectively. A sturdy wall scraper with replaceable blades is essential for peeling paint, and microfiber cloths are best for final dust control and wipe-downs. Look for corrosion-resistant tools, comfortable grips, and compatible replacement blades to extend tool life. Finally, verify that cleaners are suitable for your wall material and any coatings you plan to leave in place.