Dry candle wax can cling stubbornly to surfaces, fabrics, and upholstery. This guide provides practical, step-by-step methods to safely remove dried wax from common materials using readily available tools and household products. By following the steps, most wax residues can be lifted without damage.
Understanding wax types and surface compatibility helps prevent staining or surface irritation. The methods below emphasize non-abrasive techniques and controlled heat and solvents to minimize mess and maximize success.
Quick Answer
For solidified wax on hard surfaces, gently lift or scoop with a plastic putty knife wax scraper, then finish with a rubber spatula wax scraper. For textiles and upholstery, use a heat source like a hot air heat gun to soften wax and a citrus solvent wax remover for removal, followed by a microfiber cleaning cloth wax stain remover. Always test in an inconspicuous area first and avoid hot solvents on delicate fabrics.
What You’ll Need
- Plastic putty knife wax scraper for dried candle wax
- Hot air heat gun for candle wax removal
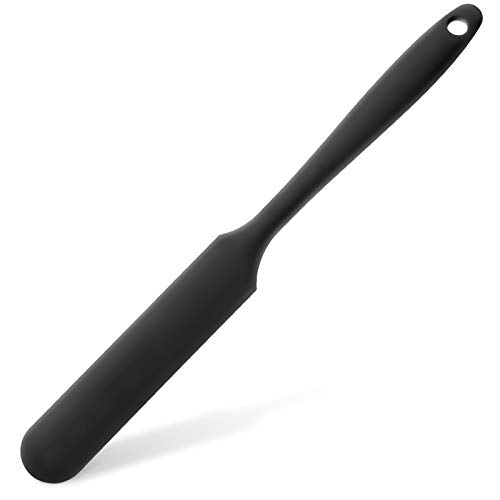
- Rubber spatula wax scraper for hard surfaces
- Citrus solvent wax remover for upholstery fabrics
- Microfiber cleaning cloth wax stain remover for dried wax


Before You Start
Prepare the area to catch drips and residue. Work in a well-ventilated space, especially when using solvents. Wear gloves to protect skin and safety glasses to shield eyes. Check surface labels for heat or solvent compatibility. Allow wax to cool fully before attempting removal on delicate materials. Estimate 15–60 minutes depending on surface and wax thickness. Avoid using hot water or aggressive scrubbing on delicate fabrics, as this can drive wax deeper.
Step-By-Step: How To Clean Dried Wax
- Identify the surface type and prepare the area. Remove any loose wax chunks with the plastic putty knife wax scraper.
- For hard surfaces, gently scrape along the grain to lift as much wax as possible without scratching.
- Hold a heat gun a safe distance away and warm the remaining wax until it appears soft but not melted. Move the heat source continuously to avoid heat spots.
- Wipe the softened wax with a microfiber cleaning cloth, pressing to absorb residue. Repeat heating and wiping as needed.
- Apply a citrus solvent wax remover to a clean cloth and dab the stained area on upholstery or fabric. Test in an inconspicuous spot first.
- Gently blot (do not rub) the solvent into the fabric to dissolve wax oils. Allow a few minutes for the solvent to work.
- Use the rubber spatula wax scraper for hard-to-reach wax on upholstery seams, then blot with microfiber cloth.
- Rinse the area with a clean, damp cloth to remove solvent traces. Blot dry with a towel or air-dry if allowed.
- Assess remaining residue. For stubborn spots, repeat solvent treatment and gentle scraping until clean.
- Finish by brushing or vacuuming the fabric once completely dry to lift any loosened particles.
- For fabrics that retained color or sheen, consider a fabric-safe stain remover following manufacturer instructions.
- Dispose of used cloths and residues responsibly, following local guidelines for solvent waste.
Troubleshooting
| Symptom | Likely Cause | Fix | Prevention |
|---|---|---|---|
| Wax smears after cleaning | Residual wax or incomplete softening | Reheat and wipe with fresh cloth | Apply heat gradually; work in small sections |
| Fabric color bleeding | Solvent interaction with dye | Stop and test in hidden area; use milder cleaner | Choose fabric-safe products; perform spot test |
| Hard surface scratches | Excess scraping on delicate surfaces | Switch to softer scraper and protective tape edge | Gentle pressure; frequent checks |
| Sticky residue remains | Wax components melted into fibers | Extended drying and repeat cleaning | Limit solvent exposure and promptly clean |
| Rough fabric after cleaning | Over-dried or over-wiped | Apply a light fabric conditioner if compatible | Follow product guidelines |
Common Mistakes To Avoid
- Using high heat too close to surfaces, which can damage finishes
- Rubbing vigorously on fabrics, which may embed wax fibers
- Applying solvent without testing first on delicate materials
- Waiting too long to remove wax, allowing deeper penetration
Tips For Best Results
- Test cleaners on inconspicuous areas before full application
- Work wax in small sections to maintain control and avoid spreading
- Keep solvents and heat sources at safe distances and use protective gear
- Use a microfiber cloth for its lint-free, non-abrasive properties
Call A Professional
Consult a professional if wax is embedded in delicate fabrics, antique finishes, or large spill areas. Stop signs include persistent staining after repeated attempts, heat damage signs (melting, warping), or fabric dyes bleeding despite cleansing. A professional can recommend safe solvents and specialized tools for your specific material.
FAQ
Can I use water to remove dried wax?
Water alone is not effective for dried wax and can spread it. Use heat, scraping, or appropriate solvents, then blot with a damp cloth to remove residue.
Is citrus solvent safe for all fabrics?
No. Always test in a hidden area first and avoid delicate fabrics or finishes that may react to solvents.
What if the wax is on wood furniture?
Use a plastic scraper to lift excess wax, then an appropriate wood-safe cleaner. Avoid soaking wood with solvents.
How long does it take to fully remove wax?
Time varies by surface and wax thickness. Plan for 15–60 minutes and repeat steps as needed.
Can I reuse the area after cleaning?
Yes, but ensure the surface is completely dry and wax-free to prevent new staining or stickiness.
Is heat safe on all upholstery types?
No. Check fabric care labels and avoid heat on heat-sensitive materials like certain synthetics or aged fabrics.
What is the best scraper for wax on hard surfaces?
A plastic putty knife is usually safest for hard surfaces; adjust pressure to avoid scratches.
Buying Guide
Choosing the right tools and products for wax cleanup depends on the surfaces you need to treat. Consider compatibility, effectiveness, and safety when selecting items. Below are key buying factors to help compare options and plan a practical toolkit.
- Surface compatibility: Select tools and solvents suited to wood, metal, glass, fabrics, and upholstery. Check labels for guidance.
- Heat source quality: A reliable hot air heat gun with adjustable temperature helps control softening without scorching. Look for a balanced nozzle and variable heat settings.
- Scrapers and tools: Plastic scrapers minimize scratches on delicate surfaces. Keep a rubber spatula for softer removal and a sturdy putty knife for tougher wax.
- Solvent options: Citrus-based solvents are generally milder for fabrics; reserve stronger cleaners for hard surfaces with caution. Ensure the product is labeled safe for your material.
- Cleaning cloths: Microfiber cloths remove wax without leaving fibers behind. Use several clean cloths for repeated passes to avoid re-depositing wax.
- Safety features: Protective gloves, eye protection, and good ventilation are essential when using solvents and heat.
- Storage and disposal: Properly store solvents away from heat sources and follow local guidelines for disposal of used cloths and wipes.
With the right approach, dried wax can be lifted from most surfaces without damage. Do you want to tailor this plan to a specific material—wood, fabric, or metal? The steps above can be adjusted for your unique cleanup scenario.