Discolored marble can detract from the elegance of countertops, floors, or tabletops. With the right approach, stains and dull patches can be lifted without damaging the stone. This guide covers practical steps, safe products, and pro tips to refresh marble surfaces at home.
Quick Answer
Identify the stain type, choose a suitable poultice or stain remover, apply according to directions, and gently buff with a polishing pad kit or an electric stone polisher as needed. Regular sealing after cleaning helps prevent future discoloration.
What You’ll Need
- Marble poultice stain remover kit
- Stone stain remover powder poultice for marble
- Marble cleaner and stain remover spray kit
- Marble polishing pad kit for dull stone
- Electric stone polisher for marble cleaning and polishing


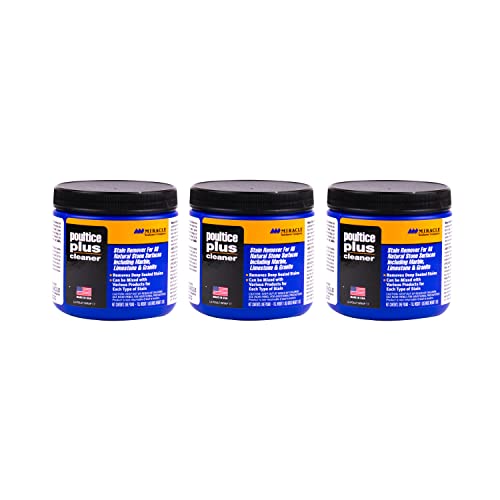
Before You Start
Inspect the stained area and determine if the marble is sealed or polished. Work in a well-ventilated area and test any product on a small, inconspicuous spot first to avoid further damage. Plan for a time investment: cleaning and poultice treatments may take several hours, with drying times between steps. Wear protective gloves and avoid acidic cleaners that can etch marble.
Prepare the surface by wiping loose debris, removing dust, and ensuring the area is level to prevent runoff onto unaffected sections. If you’re unsure about a stain type—organic, oil-based, rust, or efflorescence—proceed with the gentlest option first and move up as needed.
Step-By-Step: How To Clean Discolored Marble
- Determine stain type: organic stains (coffee, wine) respond well to poultice that draws liquids from the stone.
- Mix the appropriate poultice: follow product directions for consistency that resembles peanut butter, spreading easily without dripping.
- Apply the poultice: cover the stain with a thick layer, extending a bit beyond the visible area to capture the edges.
- Cover and wait: seal the poultice with plastic wrap and allow it to dry completely, usually 12–24 hours depending on the product.
- Remove and inspect: peel away the dried poultice and wipe the surface; rinse with clean water and pat dry.
- Assess progress: if the stain persists, reapply a fresh layer of the same poultice or switch to a different stain remover powder poultice for marble tailored to the stain type.
- Buff dulled areas: use a marble polishing pad kit for dull patches, following the grain and using light, even pressure.
- Polish for luster: with an electric stone polisher for marble cleaning and polishing, lightly buff the surface to restore shine, moving in slow, overlapping circles.
- Seal the surface: after cleaning and polishing, apply a marble-specific sealer to slow future staining and simplify maintenance.
- Clean regularly: use a dedicated marble cleaner spray for routine care and light stain prevention between deep poultice treatments.
- Reassess: monitor the surface over the following days; for persistent or large stains, consider repeating steps or escalating to professional help.
- Document results: note which products worked and which areas improved for future reference.
Troubleshooting
| Symptom | Likely Cause | Fix | Prevention |
|---|---|---|---|
| Stain remains after first poultice | Stain penetrated deeply | Repeat poultice with a different formulation | Address quickly; clean spills promptly |
| Hazy or etched looking marble after cleaning | Acidic cleaner or improper buffing | Rinse thoroughly and switch to pH-neutral cleaner; use gentle polishing | Avoid acidic products; follow stone-friendly methods |
| Polish dullness after treatment | Over-buffing or insufficient moisture | Moderate pressure, maintain moisture, rehydrate with water | Use proper pads and avoid dry rubbing |
| Gloss loss after sealing | Sealer incompatible with marble or poor prep | Remove sealer, re-clean, apply the right marble sealer | Test seal on small area first |
Common Mistakes
- Using abrasive cleaners or rough pads that scratch marble surfaces.
- Choosing the wrong poultice for the stain type, reducing effectiveness.
- Over-wetting during cleaning, which can seep into grout lines and create new issues.
- Skipping a test spot, risking discoloration or etching on a visible area.
Tips For Best Results
- Always start with the gentlest method before moving to stronger poultices or polishes.
- Keep surfaces wet during polishing to prevent heat buildup and scratching.
- Use a high-quality marble sealer to protect treated areas after cleaning and polishing.
- Maintain a routine of mild cleaning with a dedicated marble spray to prevent future discoloration.
- Document stain history for future reference and faster response if discoloration returns.
Call A Professional
Seek professional help if the stain persists after multiple poultice applications, if the marble shows deep etching or cracking, or if the surface area is large and difficult to manage safely. Signs that require a pro include sustained color changes, widespread dulling, and uncertain compatibility of products with the marble’s finish.
FAQ
Is marble poultice safe for all marble colors?
Most poultices are safe for common marble varieties, but it is essential to test on a hidden area first and follow product directions closely.
How long should a poultice stay on the stain?
Drying times vary by product; typically 12–24 hours, but always follow the instructions on the kit.
Can I use household cleaners on marble?
Most household cleaners are not ideal for marble; use pH-balanced, stone-safe cleaners specifically designed for marble surfaces.
When should I seal marble after cleaning?
Seal after a thorough cleaning and polishing, once the surface is fully dry and free of residues.
What maintenance helps prevent future staining?
Regular cleaning with a marble-specific spray, quick blotting of spills, and periodic sealing help minimize future discoloration.
Is an electric stone polisher necessary?
Not always, but it can save time and restore a uniform shine on larger dull areas or flat surfaces.
Buying Guide
Choosing the right products and tools for cleaning discolored marble involves matching stain type, finish, and maintenance goals. Consider the following factors:
- <bStain type and depth: Organic, oil-based, rust, or mineral stains respond to different poultice formulations; selecting the right one improves effectiveness.
- <bSize and surface type: Countertops, floors, and shower surrounds may require different kit sizes, pad options, and application methods.
- <bNoise and energy considerations: An electric stone polisher can speed results but may add noise and energy use; weigh convenience against comfort and space.
- <bControls and ease of use: Look for kits with clear instructions, pre-mixed poultices, and compatible sealers to streamline the process.
- <bPlacement and ventilation: Work in a well-ventilated area; protect surrounding areas from splashes and dust.
- <bMaintenance compatibility: Ensure cleaners, poultices, and sealers are compatible with your marble’s finish and seal status.
- <bBudget and value: Consider a complete kit that includes poultice, cleaner, and polishing accessories for comprehensive care.
With the right combination of poultice products, cleaning tools, and polishing accessories, discolored marble can regain its natural beauty. If in doubt, starting with a small test area helps confirm the method before treating larger sections.