After a rewarding day of mining, crystals often arrive covered in dirt, clay, or mineral residue. Proper cleaning helps reveal color, luster, and structural features without damaging delicate surfaces. This guide offers practical, safe methods tailored for hobbyists and collectors in the United States, using commonly available tools.
Careful cleaning preserves specimen value and prepares crystals for display, photographing, or study. Readers will find a clear sequence of steps, safety notes, and troubleshooting tips designed to minimize breakage and maximize shine.
Quick Answer
Begin with gentle soaking in lukewarm water, then use a soft brush to loosen soil. For stubborn material, an ultrasonic cleaner for gemstones and crystals can be effective, followed by a soft brushing and thorough drying. Avoid harsh chemicals and high-pressure jets on fragile specimens.
What You’ll Need
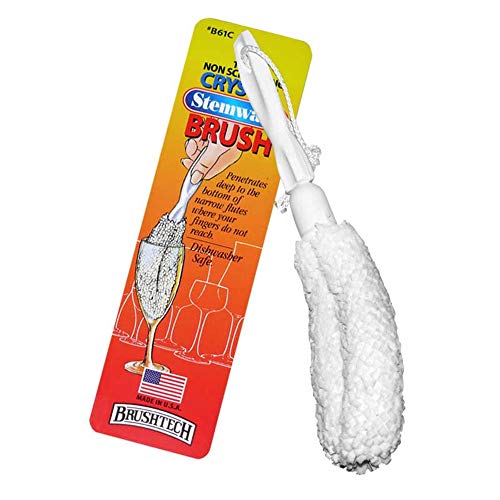
- Soft bristle cleaning brush for crystals
- Ultrasonic cleaner for gemstones and crystals
- Rock tumbler kit for mineral specimens
- Gemstone polishing kit for rocks and minerals
- Rock polishing wheel kit with felt and abrasive compounds


Before You Start
Preparation reduces the risk of damage. Work on a stable, padded surface and keep small crystals contained to prevent loss. Test cleaning methods on a harmless specimen first if possible. Time estimates vary: simple rinsing can take minutes, while multiple cleaning passes may take 30–60 minutes overall. Never use bleach or acidic cleaners on soft, porous, or iridescent crystals, and avoid ultrasonic cleaning on delicate or layered specimens unless you know they can withstand it.
Step-By-Step: How To Clean Crystals After Mining
- Rinse the crystals under cool running water to remove loose dirt before any other cleaning.
- Soak in a bowl of lukewarm water for 10–20 minutes to loosen clay and grime.
- Gently scrub with a soft bristle cleaning brush for crystals, using light, circular motions.
- For stubborn material, place the piece in an ultrasonic cleaner for gemstones and crystals on a gentle setting with water only, avoiding heat.
- Rinse thoroughly after ultrasonic cleaning and inspect for remaining deposits.
- If needed, repeat soaking and brushing. For mineral displays requiring polishing, follow with a gemstone polishing kit for rocks and minerals as directed by the kit’s instructions.
- Dry on a soft towel or rack, ensuring no moisture is trapped in crevices. Avoid prolonged exposure to direct sunlight if the crystal is heat-sensitive.
- Store or mount the crystals after they are completely dry to prevent water spots or mineral staining.
- Optionally, use a rock polishing wheel kit with felt and abrasive compounds for a final polish on hard, durable specimens, following safe operating procedures.
Troubleshooting
| Symptom | Likely Cause | Fix | Prevention |
|---|---|---|---|
| Cloudy surface after cleaning | Soap residue or minerals left behind | Rinse thoroughly; run a second rinse with clean water | Rinse promptly after any cleaning step |
| Scratched surface | Hard brushing or aggressive abrasive use | Switch to gentler brushing and softer abrasives | Use the softest method feasible |
| Color fading or iridescence dulls | Overexposure to ultrasonic waves or heat | Limit ultrasonic cleaning to gentle cycles; avoid heat | Test on a small area first |
| Residue in crevices | Clay or mineral deposits stuck in pores | Soak longer and brush with fine-tiber bristles | Gentle handling during cleaning |
Common Mistakes
- Using harsh chemicals or bleach on crystals
- Rubbing too hard with a brush, causing surface scratches
- Overusing ultrasonic cleaning on fragile or layered specimens
- Rinsing with hot water that can shock or crack delicate minerals
- Skipping a proper drying step, leading to mineral staining
Tips For Best Results
- Test cleaning methods on a low-value sample before applying widely
- Keep mineral specimens dry during storage to prevent staining or tarnish
- Label crystals by origin or type to track cleaning history
- Use distilled or deionized water if minerals react to tap water minerals
- Rotate specimens during polishing to achieve even shine
Call A Professional
Seek professional help if a specimen shows signs of fragility, significant cracking, or iridescence damage after cleaning. Stop cleaning and consult a gemologist or mineral specialist if any of these occur: cracking, flaking, or unusual color changes. Persistent dearling or surface loss may require expert assessment.
FAQ
Can I clean crystals with household cleaners?
Avoid household cleaners on crystals, especially acidic or abrasive products, as they can damage surfaces.
Is an ultrasonic cleaner safe for all crystals?
No. Fragile, layered, or iridescent specimens may be harmed by ultrasonic cleaning. Test first and use gentle cycles if recommended by a professional.
What is the best way to dry crystals after cleaning?
Air-dry on a soft towel or rack in a dust-free area, ensuring complete moisture removal from crevices.
How long should I soak crystals for cleaning?
Soaking times vary; start with 10–20 minutes and extend if needed, never exceeding safe limits for the specimen type.
Can polishing improve the appearance of all crystals?
Polishing helps hard, durable minerals but can be risky for soft or porous crystals; follow kit instructions and safety guidelines.
Is it okay to use a rock tumbler for cleaning?
Rock tumblers are useful for shaping and smoothing some minerals but are not suitable for all crystal types; use only on appropriate specimens and follow manufacturer guidance.
Buying Guide
When selecting cleaning and finishing tools for crystals, consider size, material compatibility, and ease of use. A well-rounded setup supports safe cleaning while preserving specimen integrity. Key buying factors include:
- Size and capacity: Choose a cleaner and polishing tools that fit your typical crystal sizes, from small clusters to larger geodes.
- Noise level: Ultrasonic cleaners and polishing wheels vary in quiet operation—important for home use.
- Energy efficiency: Look for energy-efficient motors and timers to minimize power use during cleaning sessions.
- Controls and settings: Adjustable temperature, cycle length, and abrasive options enable safer cleaning of different minerals.
- Placement: Ensure stable, ventilated workspace with a dedicated area for wet tasks to avoid cross-contamination.
For buyers, a combination of an ultrasonic cleaner for gemstones and crystals, a soft bristle cleaning brush for crystals, and a basic polishing setup often provides a balanced workflow. Each item should come with clear instructions and safety guidelines to help protect valuable acquisitions.