Burning candles can create a cozy atmosphere, but accidental wax drips onto floors are common. The right technique prevents staining and protects sensitive floor finishes. This guide outlines safe, effective methods for removing candle wax from various floor surfaces, with practical tools you likely already have at home.
Quick Answer
Let wax cool and harden, then lift with a plastic scraper or putty knife. If wax remains, gently apply heat with a hair dryer or use the ice cube method to firm the residue, then wipe away. Finish with a microfiber mop to remove any remaining wax and residue.
What You’ll Need
- candle wax remover for floors tool
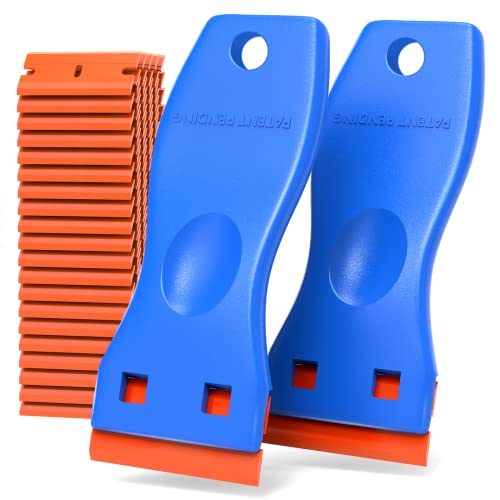
- floor wax scraper tool plastic blade
- plastic putty knife wax remover
- ice cube method wax removal floor tool
- microfiber mop wax stain remover floor


Before You Start
Clear the area and protect surrounding surfaces. If the floor is sealed or polished, test any method on a small, inconspicuous spot first to avoid dulling the finish. Work in a well-ventilated area. Plan for a 15–30 minute cleanup window depending on wax volume. Safety note: use plastic tools to prevent scratching; avoid metal scrapers that can gouge floors.
Step-By-Step: How To Remove Candle Wax From Floor
- Allow the wax to cool and harden completely. Soft wax is more likely to smear rather than lift cleanly.
- Use a plastic scraper tool or a floor wax scraper tool with a plastic blade to gently lift the wax along the grain of the floor.
- If any stain remains, apply a cold ice cube to the area for a minute to harden residual wax, then resume lifting with the scraper. This helps prevent spreading.
- For stubborn, dried wax, soften it slightly with a heat source such as a hair dryer set to low heat. Keep the dryer moving to avoid concentrating heat on one spot, then wipe away with a microfiber mop or cloth.
- Wipe the area with a damp microfiber mop to remove any loosened wax and residue. Rinse the mop frequently to prevent re-depositing wax.
- For any remaining residue, use a mild floor-safe cleaner following product instructions. If needed, repeat the heat-and-lift or ice-cube methods until clear.
- Dry the area thoroughly with a clean microfiber mop or towel to prevent slips and discourage moisture damage.
- Inspect the floor finish after cleaning. If the finish appears dulled, re-apply your usual floor cleaner or polish according to the manufacturer’s guidelines.
- Dispose of collected wax and cleaning materials appropriately. Do not pour large quantities of melted wax down the drain.
- Wash hands after completing the cleanup and return tools to their storage location.
- Optional: if wax left a faint stain, repeat the steps with a softer scraper or wax remover for floors and consider a floor-safe stain remover formulated for your specific floor type.
Troubleshooting
| Symptom | Likely Cause | Fix | Prevention |
|---|---|---|---|
| Wax smeared over a large area | Wax heated during removal and smeared | Re-chill wax with ice, then carefully lift with a plastic blade | Cool wax before handling; work in small sections |
| Streaks or dull finish | Residue left from wax or cleaner | Wipe with clean microfiber mop and a mild cleaner | Rinse tools frequently; use minimal cleaner |
| Floor scratch marks | Using a metal scraper | Switch to plastic blades and non-scratch tools | Test in inconspicuous area first |
| Wax reappears after drying | Undercured wax stuck in pores | Reheat slightly and lift again; finish with microfiber wipe | Avoid over-heating; remove excess wax before it hardens |
Common Mistakes
- Using metal tools that can scratch glossy or sealed floors
- Overheating wax too aggressively, pushing it into grout or seams
- Skipping a test patch on a hidden area of the floor
- Rushing cleanup, which spreads wax further
- Not drying the area after cleaning, which can cause slipping or water damage
Tips For Best Results
- Always work in small sections to control the spread of wax and heat
- Choose plastic tools designed for wax removal or floor scrapes to minimize damage
- Keep a damp microfiber mop handy to catch residual wax as you go
- For textured floors, use a softer technique to prevent pulling at grout lines
- If you have a sensitive floor finish, consult the manufacturer’s cleaning guidelines before applying cleaners
- Store wax removal tools in a dedicated container to avoid cross-contamination with other cleaning supplies
Call A Professional
Consider contacting a professional if:
- The wax has deeply penetrated porous flooring or damaged the finish
- There is extensive wax staining across a large area
- You notice bubbling, warping, or discoloration after attempting removal
- Multiple cleaning attempts fail to restore the floor’s appearance
FAQ
Can I use household ice to remove wax?
Yes. Freeze the wax with a cold ice cube to harden it, then lift with a plastic tool.
What if the wax stain won’t lift?
Reheat slightly and reapply a gentle lifting tool; follow with a microfiber mop and mild cleaner.
Is it safe to use a hair dryer for all floors?
Most sealed floors respond well, but test a small area first. Set to low heat and keep moving.
Should I use soap and water on all floor types?
Yes for many surfaces, but follow floor-specific guidelines to avoid dulling finishes.
Buying Guide
Choosing the right tools for candle wax removal can reduce effort and protect floor finishes. Consider size, durability, and compatibility with your floor type.
- <bSize and ergonomics: Select a floor wax scraper tool plastic blade with a comfortable handle for long sessions. A compact blade helps reach tight corners.
- <bMaterial compatibility: Plastic blades minimize scratching on wood, laminate, and polished stone floors. Avoid metal scrapers unless you’re sure they won’t damage surfaces.
- <bEffectiveness: A dedicated candle wax remover for floors tool or wax-specific putty knife can improve results on stubborn spots.
- <bHeat methods: If you plan to use heat, ensure your tools and appliances are rated for safe, controlled temperatures.
- <bCleaning performance: A microfiber mop with a damp, not soaking, cloth helps pick up residue efficiently and prevents streaks.
- <bMaintenance: Choose tools that are easy to clean and store away from cleaning solutions that could degrade plastic blades.
- <bPlacement: Keep wax-removal tools accessible but separate from ongoing cleaning supplies to reduce cross-contamination.
Are you cleaning a kitchen, bathroom, or living area floor? Matching tools to your floor type helps prevent damage while keeping wax-free floors gleaming. If in doubt, start with the simplest method and escalate as needed. A steady, patient approach often yields the best results.