Quick Answer
To refresh air flow and improve efficiency, use a combination of a vent cleaning brush kit, stainless steel duct brushes, a vacuum with a crevice tool, and a reinforced-bristle air duct cleaning kit. Work from the vent opening into the duct while protecting nearby surfaces, then finish with a thorough vacuum pass to remove loosened dust and debris.
What You’ll Need
- HVAC air return vent cleaning brush kit
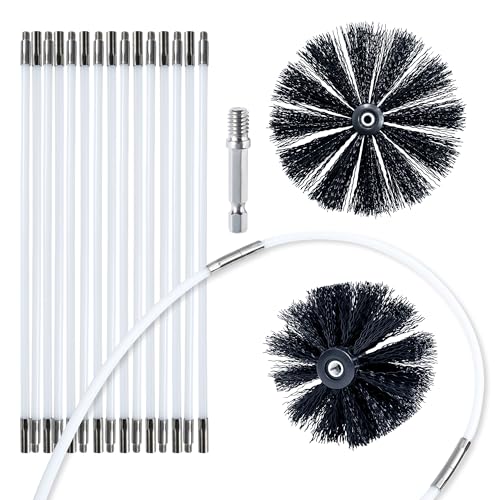
- duct vent cleaning brush set stainless steel 36-inch
- vacuum attachment for air return vents with crevice tool
- air duct cleaning kit with reinforced bristle brushes
- register/air vent cleaning kit for wall return vents


Before You Start
Before beginning, shut off the HVAC system at the thermostat or breaker to prevent debris from spreading through the air. Wear a dust mask and safety glasses, and cover nearby furniture with a drop cloth. If you suspect mold, pest activity, or excessive asbestos-containing materials, stop and consult a professional. Plan for a two to four hour window for a single large home, depending on the number of returns and duct layout. Avoid using high-pressure tools that can damage ductwork.
Step-By-Step: How To Clean Air Return Vents
- Remove the return vent cover and detach any grille or surrounding trim gently to avoid bending fins.
- Inspect the duct opening for visible dust, hair, or debris and note any signs of moisture or mold.
- Use the vacuum with a crevice tool to perform a preliminary pass around the vent opening to capture loose debris.
- Insert the duct vent cleaning brush set stainless steel 36-inch or an equivalent reinforced-bristle brush kit into the duct and push gently into the airway.
- Work the brush in short, firm strokes, pulling back toward the opening to pull dust into the vacuum stream.
- Repeat with different brush heads or adjustable angles to reach corners and bends, gradually moving deeper into the duct.
- Brush the interior surfaces of the vent cover as well, then wipe with a damp microfiber cloth to remove surface dust.
- Reattach the vent cover and secure all screws, ensuring the grille sits flush against the wall or ceiling.
- Turn the HVAC system back on and run for 10–15 minutes to re-aerate the space while listening for abnormal noises.
- Do a final vacuum pass around the vent opening to capture any residual debris that fell during reassembly.
- Repeat the process for each return vent in the home, taking breaks as needed to prevent dust buildup.
Troubleshooting
| Symptom | Likely Cause | Fix | Prevention |
|---|---|---|---|
| Dust still visible after cleaning | Dust settled in deeper ducts or hidden in grille | Use longer brushes or extend ducts with compatible tools | Clean vents more frequently to prevent buildup |
| Bad odor after cleaning | Moisture or mold in ducts | Inspect for mold and dry thoroughly; consider mold remediation if present | Keep humidity low and address leaks promptly |
| No airflow improvement | Blocked return or closed dampers elsewhere | Check system balance and damper positions; clear any obstructions | Schedule professional duct inspection if persistent |
| Vent cover won’t sit flush | Bent grille or misaligned mounting | Realign or replace cover; tighten mounting screws | Handle parts gently during removal and reassembly |
Common Mistakes
- Rushing through cleaning without turning off the system
- Using aggressive brushes that damage duct lining or grill fins
- Neglecting the vent cover and grille, which harbor dust
- Ignoring signs of moisture, mold, or pests
Tips For Best Results
- Work in a well-ventilated area and wear a dust mask to reduce inhalation of fine particles
- Match brush sizes to vent dimensions for better contact with surfaces
- Combine a vent brush kit with a vacuum attachment for optimal debris capture
- Clean returns at regular intervals—quarterly in high-traffic homes
Call A Professional
When should a pro be called? If there is persistent odor, visible mold growth, or suspected asbestos-containing insulation, stop cleaning and contact a licensed duct cleaning technician. If electrical components or duct damage is observed, do not attempt DIY repairs.
FAQ
How often should air return vents be cleaned?
Most homes benefit from cleaning every 1–3 years, with more frequent cleanings in households with pets, allergies, or heavy dust exposure.
Can I clean air return vents myself or should I hire a pro?
Basic cleaning is suitable for DIY, but complex duct systems or suspected mold require a professional inspection.
What tools are best for cleaning air return vents?
A stainless steel duct brush set, an HVAC vent cleaning brush kit, a vacuum with a crevice attachment, and a reinforced-bristle kit are commonly effective.
Will cleaning improve my system’s efficiency?
Yes, removing debris from returns can help improve airflow and potentially reduce operational strain on the system.
Should I remove mold myself?
Do not attempt mold remediation yourself on ductwork if it covers a wide area or is connected to HVAC components—seek professional help.
Buying Guide
Choosing the right cleaning tools depends on vent type, duct size, and the extent of dust. For typical American homes, a combination of a vent cleaning brush kit, a 36-inch stainless brush set, and a vacuum attachment designed for tight spaces provides comprehensive coverage. Consider the material and integrity of vent grilles, ensuring brushes won’t snag on edges. Noise level and weight matter for frequent users, and a modular kit that can expand to reach deeper ducts offers long-term versatility. Look for corrosion-resistant bristles and reinforced bristle brushes to maintain effectiveness over time.
Key Buying Factors
- Size and compatibility: Measure vent dimensions and duct access to ensure brushes fit and reach bends.
- Brush type: Stainless steel bristles are durable; reinforced bristles resist fraying in tight corners.
- Ease of use: Interchangeable attachments and ergonomic handles reduce fatigue during longer sessions.
- Durability: High-quality materials withstand frequent cleaning without bending or breaking.
- Noise and mess management: Tools that minimize dust escape help keep living spaces cleaner during maintenance.
- Placement flexibility: Kits that work for wall returns, ceiling returns, and floor returns offer better coverage.