Cleaning bathroom walls helps prevent mold, mildew, and grime buildup that can dull surfaces and create unpleasant odors. This guide walks through safe, practical steps to refresh painted, tiled, or wallpapered walls without damaging finishes. Readers will learn how to tailor techniques to wall material and keep bathrooms looking bright and sanitary.
Quick Answer
What to do in a nutshell: Gather a mildew remover spray, an extendable cleaning brush, microfiber cloths, an angled grout brush, and a no-scratch nylon scrub pad. Start with a gentle spray on walls, use a soft brush for corners, wipe with microfiber, and finish with a rinse or wipe-down. For stubborn spots, apply diluted cleaner, test a small area, and repeat carefully.
What You’ll Need
The following tools and supplies cover most bathroom wall cleaning tasks. Use them in a sensible sequence to avoid over-wetting walls or damaging surfaces.
- 32oz bathroom mildew remover spray for walls
- Extendable cleaning brush for bathroom walls with soft nylon bristles 3ft
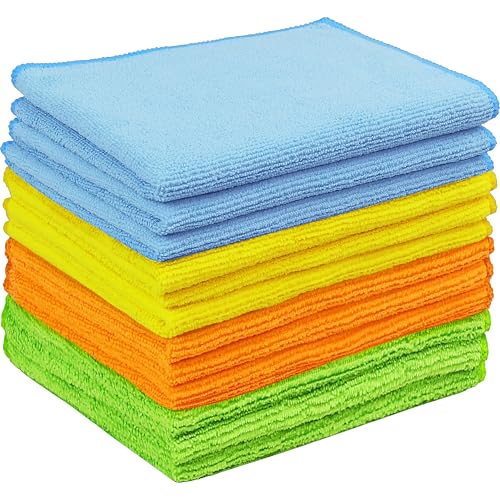
- Microfiber cleaning cloths for bathroom wall cleaning 12×12 inches
- Angled grout brush for bathroom walls grout cleaning
- No-scratch nylon scrubbing pad for bathroom walls gentle scrub


Before You Start
Prepare the area by removing rugs and wall decor or covering them with plastic. Ventilate the bathroom to avoid inhaling cleaning fumes. Test all cleaners on a hidden or inconspicuous spot to ensure colorfastness and finish safety. Time estimate: 20–40 minutes for typical walls, longer for heavy mildew or textured surfaces. Wear gloves and eye protection when using chemical cleaners.
Step-By-Step: How To Clean Bathroom Walls
- Assess the surface type—painted, tile, or wallpaper—as this affects cleaner choice and scrubbing pressure.
- Dust or dry wipe walls with a microfiber cloth to remove surface dirt before damp cleaning.
- Apply a mildew remover spray evenly to affected areas, following product directions and keeping the nozzle a few inches from the wall.
- For grout lines or textured areas, use the angled grout brush to work cleaner into crevices with gentle back-and-forth motions.
- Reach high spots with the extendable cleaning brush to prevent streaks and ensure even coverage.
- Wipe surfaces with fresh microfiber cloths, turning to a clean area as dirt transfers. For stubborn spots, scrub lightly with the no-scratch nylon scrubbing pad.
- Rinse or wipe with a clean damp cloth to remove residue, then dry with a dry microfiber cloth to avoid water marks.
- If stains persist, repeat in small sections rather than saturating a large area to protect wallpaper or paint.
- Inspect all cleaned areas for missed spots and re-clean as necessary, especially near corners and behind faucets.
- Allow walls to dry completely before reinstalling decor or rugs and reusing the space.
- Store cleaners upright in a cool, ventilated area away from children and pets.
- Update maintenance routine with periodic quick cleanings to prevent mildew buildup.
Troubleshooting
| Symptom | Likely Cause | Fix | Prevention |
|---|---|---|---|
| Streaks after cleaning | Residue from cleaner or water dries unevenly | Rinse with clean water and wipe dry with microfiber | Use minimal cleaner per area; wipe in a single direction |
| Mildew returns quickly | Inadequate ventilation or hidden mildew behind fixtures | Improve ventilation; treat affected areas again and consider sealing grout | Ventilate during and after cleaning; schedule monthly checks |
| Wallpaper lifting or peeling | Excess moisture or harsh cleaners | Use milder cleaners and less water; blot dry | Avoid soaking walls; use a spray-and-wipe method |
| Scratches on glossy paint | Aggressive scrubbing or inappropriate pad | Switch to no-scratch pad and very light pressure | Test on inconspicuous area first |
Common Mistakes
- Over-wetting walls, especially painted or wallpapered surfaces, which can cause peeling or warping.
- Using harsh abrasives on delicate finishes or glossy paints.
- Neglecting to dry walls after cleaning, encouraging mold regrowth.
- Failing to test cleaners on a small area before full-scale use.
Tips For Best Results
- Work from top to bottom to prevent drips on cleaned areas.
- Maintain a light touch; most bathroom walls respond to gentle scrubbing with proper tools.
- Keep a dedicated microfiber cloth for walls to avoid transferring grime from other surfaces.
- Schedule routine wipe-downs after baths or showers to minimize mildew formation.
- Rotate cleaning accessories to distribute wear evenly and avoid surface damage.
Call A Professional
Consider a pro if walls show extensive water damage, persistent mold beyond surface mildew, or wallpaper is extensively bubbled or peeling. Seek professional help for structural concerns, ceiling moisture issues, or if cleaning chemicals raise strong alarms during use. If symptoms worsen or do not improve after repeated treatment, contact a licensed cleaner or contractor.
FAQ
Can I use bleach on bathroom walls?
Bleach can be effective on mildew but may discolor certain finishes or harm wallpaper. Use diluted solutions and test first. Ventilate well and avoid mixing with ammonia.
How often should I clean bathroom walls?
Aim for a light cleaning every 1–2 weeks and a deeper clean monthly, depending on humidity and use.
What if mildew returns after cleaning?
Reassess ventilation, check for hidden leaks, and consider a longer-term mold treatment plan with appropriate cleaners.
Are there safe wipes for quick touch-ups?
Yes, microfiber cloths with a mild cleaner spray can handle quick touch-ups between deeper cleanings.
Buying Guide
When choosing products for cleaning bathroom walls, consider size, surface compatibility, and ease of use. A good setup includes a mildew remover spray formulated for bathroom walls, an extendable brush for hard-to-reach areas, microfiber cloths to minimize lint, and a gentler scrub pad for delicate finishes. Evaluate how each tool complements your wall material—paint, tile, or wallpaper—and aim for a balanced kit that can tackle routine maintenance and occasional heavy buildup. Think about storage and non-slip handling to maintain a tidy cleaning routine and reduce the risk of slips while reaching tall surfaces.