Rusty door hinges can creak, stick, or look unsightly. With simple tools and a bit of patience, most homeowners can restore smooth operation and restore a clean finish. This guide covers practical steps, safety notes, and pro tips tailored for American households.
Quick Answer
Use a penetrating oil to loosen the hinge, scrub with a wire brush to remove rust, apply a rust remover if needed, then lubricate with hinge lubricant designed for metal doors. For stubborn rust, a 3 inch stainless steel door hinge repair kit can replace failing parts. Regular maintenance prevents future corrosion.
What You’ll Need
- Rust remover for door hinges
- Wire brush for rust removal door hinges
- Penetrating oil for rusty door hinges
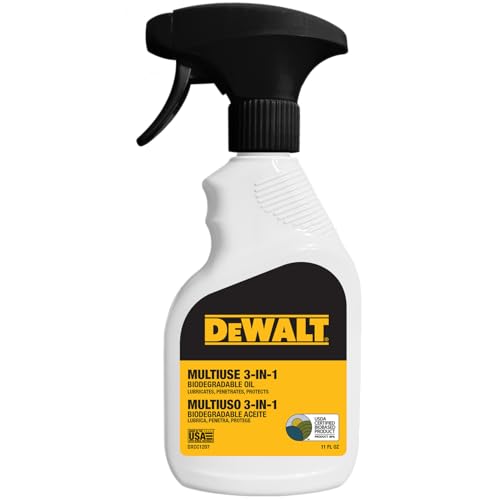
- Hinge lubricant with rust protector for metal doors
- 3 inch stainless steel door hinge repair kit


Before You Start
Assess hinge type and door weight. If a hinge is loose or the screw holes are stripped, plan to replace or reinforce. Work in a well-ventilated area and wear eye protection. Remove the door if the hinge is difficult to handle; a second person helps. Time estimate: 30–60 minutes for standard hinges, more for damaged hinges.
Important cautions: avoid over-tightening screws after lubrication, and never mix oil types. If you notice structural damage or cracks in the door frame, consider professional help.
Step-By-Step: How To Clean Rusty Door Hinges
- Remove the door from its frame or detach the pin to free the hinge for thorough cleaning.
- Wipe away loose rust with a dry cloth to prepare the surface for deeper treatment.
- Apply penetrating oil to the hinge pins and joints; let it soak for a few minutes to loosen corrosion.
- Use a wire brush for rust removal door hinges to scrub away flaky rust, working along the hinge leaves and pin.
- If rust persists, apply a rust remover for door hinges according to the product instructions and rinse or wipe clean after treatment.
- Reassemble the hinge and reattach the door; operate the hinge to work the lubricant into the moving parts.
- Apply hinge lubricant with rust protector for metal doors to ensure ongoing protection and smoother operation.
- Inspect screw holes and consider a 3 inch stainless steel door hinge repair kit if holes are stripped; replace screws or use repair plates as needed.
- Wipe away excess lubricant and test the door’s swing, adjusting as necessary for alignment and clearance.
- Repaint or touch up exposed metal if desired to improve corrosion resistance and appearance.
- Schedule periodic maintenance every 6–12 months to prevent future rust buildup and squeaks.
- Keep hinges clean and dry after rain or cleaning to minimize future rust formation.
Troubleshooting
| Symptom | Likely Cause | Fix | Prevention |
|---|---|---|---|
| Squeaking after lubrication | Dry lubricant or insufficient coverage | Reapply hinge lubricant and work it into the joint | Regular lubrication schedule |
| Stiff hinge that won’t move | Deep rust or bent pin | Apply penetrating oil, scrub with a wire brush; replace pin or hinge if necessary | Keep hinges dry and clean |
| Hinges feel loose | Loose screws or stripped holes | Tighten screws; use a repair kit for stripped holes | Use longer or brass screws where appropriate |
| Rust returns after cleaning | Moisture exposure or inadequate protection | Apply rust remover again, then lubricant with rust protector | Improve drainage and weather sealing |
Common Mistakes
- Over-lubricating, which can attract dust and create buildup
- Using the wrong lubricant for metal doors or incompatible shortcuts
- Delaying cleaning after rust appears, allowing corrosion to advance
- Forgetting to treat stripped screw holes, leading to recurring looseness
Regular inspection and timely maintenance help avoid recurring issues and keep doors operating quietly and smoothly.
Tips For Best Results
- Work in the direction of hinge pins when cleaning to minimize remaining rust.
- Choose a rust remover for door hinges that is safe for surrounding finishes to prevent staining.
- Use a 3 inch stainless steel door hinge repair kit when screws struggle to bite or holes are enlarged.
- Store lubricants in a cool, dry place to maintain effectiveness over time.
- Consider replacing hardware with corrosion-resistant options for high-humidity areas (e.g., kitchens, entryways).
Call A Professional
Consider professional help if: the door is sagging, hinges are severely corroded beyond simple repair, or the frame shows structural damage. If door alignment requires adjustment beyond standard tightening, or if you encounter legal or safety concerns with load-bearing doors, a professional should assess and address the issue.
FAQ
What is the first step to fix a rusty door hinge?
Identify whether the hinge is simply dirty and dry or if rust has compromised the pin and screws; begin with cleaning and lubrication, then assess for replacements as needed.
Can I replace only the pin on a rusty hinge?
Yes, replacing just the pin is common for minor rust; if the pin is seized or damaged, replacing the entire hinge is often more reliable.
Is penetrating oil enough to stop squeaks?
Penetrating oil helps loosen rust, but a finishing lubricant designed for hinges typically provides longer-lasting quiet operation.
When should I replace hinges entirely?
If screws don’t bite, holes are stripped beyond repair, or the hinge is bent or corroded, replacement is recommended for safety and function.
What maintenance schedule works best?
Inspect and lubricate at least twice a year, with more frequent care in humid or coastal climates where rust forms faster.
Buying Guide
When choosing products for door hinge care, consider size, material, and compatibility with metal doors. Key factors include the type of rust remover, the grit of the wire brush, and the suitability of lubricants for metal hardware. Look for rust protectors that form a durable barrier against moisture, and assess whether a repair kit is needed for stripped holes or damaged pins. For most homes, a combination of a penetrating oil, a rust remover, a high-quality hinge lubricant, and a stainless steel repair kit covers common scenarios. Assess hinge footprint, door weight, and frame condition before selecting replacements. A practical approach helps maintain reliability and avoids frequent door-related hassles.
Buying Guide: Size, Noise, Efficiency, Controls, And Placement
Size matters for replacement hinges and repair kits; match the hinge size to the door thickness and existing screw pattern. Noise reduction hinges and lubricants designed to minimize squeak are beneficial in quiet living spaces. Energy efficiency is not a primary factor for hinges, but stable door operation supports insulation by preventing drafts. Controls are simple: choose lubricants that specify metal doors and rust protection. Placement considerations include indoor rooms with higher moisture, entrances exposed to weather, and doors that bear frequent use. Compare products by durability, rust resistance, and ease of installation to ensure long-term value.