Vinyl floors offer durability and style, but light surface scratches can mar their appearance. This guide explains practical steps to minimize or remove scratches using common products designed for vinyl floor restoration. The methods balance efficiency with safety to keep your floors looking close to new.
Readers will learn how to evaluate the scratch, select appropriate products, and apply techniques that preserve the floor finish. The focus is on accessible tools and reliable results for homes with typical foot traffic, pets, and kids.
Quick Answer
You can often reduce or remove light surface scratches with a vinyl floor scratch repair kit or a wax stick scratch remover applied with the included applicator. For deeper scratches, a vinyl flooring repair kit with wax and applicator paired with a buffing pad can restore uniform sheen. A vinyl floor polish with buffing pad can help protect and blend repairs. Always test on a small, inconspicuous area first.
What You’ll Need
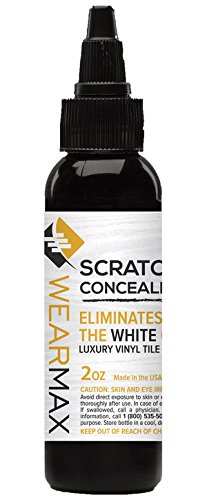
- Vinyl floor scratch repair kit
- Vinyl floor wax stick scratch remover
- Vinyl flooring repair kit with wax and applicator
- Vinyl floor polish with buffing pad
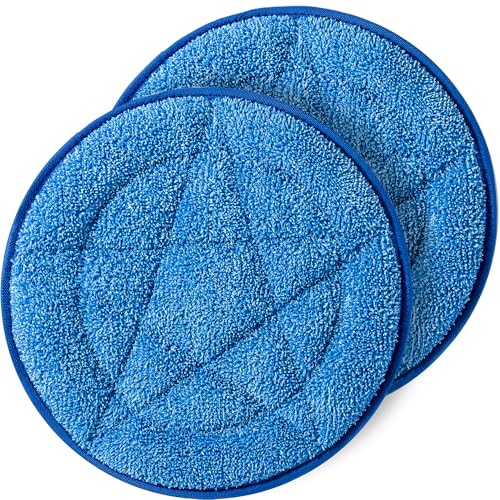
- Microfiber floor buffing pad for vinyl floors

Before You Start
Before beginning, ensure the area is clean and dry. Remove debris with a microfiber mop or cloth, then wipe the surface with a mild vinyl cleaner. Protect surrounding edges and baseboards to keep dirt from entering the repair area. Time estimate for a typical room is 30 to 60 minutes depending on scratch severity. Important cautions include avoiding abrasive pads on glossy finishes and never applying wax or polish to unclean surfaces, which can trap grime and worsen scratches.
Step-By-Step: How To Repair Scratches On Vinyl Floors
- Identify the scratch type: light surface marks vs deep gouges. This guides the chosen product and technique.
- Choose the repair product that matches the scratch depth, starting with a vinyl floor scratch repair kit for light marks.
- Clean the area thoroughly with a vinyl safe cleaner and let it dry completely.
- Apply the wax stick scratch remover along the scratch line, pressing gently with the included applicator to fill the scratch.
- Wipe away excess product with a clean microfiber cloth and buff in one direction to blend the repair.
- If the repair remains visible, use a vinyl flooring repair kit with wax and applicator to reapply and fill deeper sections.
- Allow the product to cure according to the manufacturer instructions, usually a few minutes to an hour.
- Finish with a vinyl floor polish and buffing pad to restore sheen and protect the area.
- Buff the repaired section with a microfiber floor buffing pad until the finish matches surrounding areas.
- Inspect under different lighting and, if needed, repeat the wax or wax stick steps in small increments.
- Apply a final light coat of polish if advised by the product instructions to even out gloss and seal the repair.
Troubleshooting
| Symptom | Likely Cause | Fix | Prevention |
|---|---|---|---|
| Repair is uneven or still visible | Insufficient filling or poor blending | Reapply wax, use applicator to fill, then buff | Test on an inconspicuous area first |
| Finish dull after repair | Over-wiping or incorrect product selection | Apply vinyl floor polish with buffing pad and buff evenly | Follow product directions precisely |
| New scratches appear soon after repair | Surface not properly cleaned or wax not set | Clean area, wait for cure, re-apply wax if needed | Maintain regular cleaning and use mats at high traffic zones |
Common Mistakes
- Using abrasive pads that scratch the finish further
- Applying too much wax or polish causing buildup
- Skipping a proper initial cleaning which traps dirt under repairs
- Neglecting to test products on a hidden area before wide application
Keeping to the manufacturer instructions and using the right combination of wax, applicator, and buffing tools helps minimize issues.
Tips For Best Results
- Test products on a small, inconspicuous area before tackling visible scratches
- Work in a well-lit area to accurately judge color and sheen match
- Use a clean microfiber pad for application and buffing to avoid introducing new particles
- Dust and debris removal before repair prevents scratching new along the repaired line
- Consider pairing a wax stick with a dedicated applicator for precision especially on tight corners
Call A Professional
Seek professional help if scratches cover a large area, if the vinyl has extensive wear, or if the floor shows underlying damage such as moisture warping. In cases of persistent dulling after multiple repairs or if the floor is under warranty, a licensed technician can advise on best restoration options or replacement requirements.
FAQ
Can I fix scratches on vinyl flooring myself?
Yes, light scratches can often be repaired with a vinyl floor scratch repair kit or a wax stick and applicator.
Will wax or polish restore a deep scratch?
Wax and polish can help blend and protect, but deeper gouges may require a vinyl flooring repair kit with wax and applicator or professional attention.
Is it safe to use household cleaners on repaired vinyl floors?
Use cleaners approved for vinyl surfaces and follow the product directions to avoid dulling or damage.
How long should repairs cure before foot traffic?
Most products require a short cure period, often minutes to hours as specified by the manufacturer.
Can I prevent scratches in the future?
Place mats at entrances, use felt pads under furniture, and clean regularly to minimize abrasive buildup on the surface.
Is there a difference between wax and polish for vinyl floors?
Wax fills and protects, while polish creates a glossy protective layer; both can be used together for restoration and protection when directed by product instructions.
Do I need professional help for a large area?
Yes, for extensive scratches or wear across a majority of the floor, a professional assessment is recommended.
Buying Guide
Choosing the right products and tools for vinyl floor scratch repair depends on floor type, finish, and the extent of damage. Key factors to consider include size of the repair area, noise level during buffing, energy usage of any cleaning devices, control options on polish and wax products, and placement of repairs within the room.
Size and scope matter; for small to medium scuffs, a vinyl floor scratch repair kit combined with a wax stick often suffices. For larger or deeper scratches, a vinyl flooring repair kit with wax and applicator may be necessary. Noise considerations are important for homes with bedrooms or open living spaces; select low-noise buffing tools or perform repairs during daytime hours. Energy efficiency is relevant when using electric buffers or polishing machines; choose models with variable speed controls and efficient motor design. Look for clear instructions, surface compatibility, and cure times that fit your schedule. Consider the flooring area layout, such as kitchen and hallways, to determine whether multiple repair kits or a single comprehensive vinyl floor repair kit with wax and applicator is best.
When comparing options, assess the finish match, ease of use, and the availability of matching accessories like the vinyl floor wax stick scratch remover and microfiber or buffing pads. If a kit includes multiple components, ensure they are compatible and intended for vinyl floors. For homes with pets or high traffic, prioritize long lasting protection that resists scuffing and staining. Finally, verify warranty or return policies in case repairs do not meet expectations.