Water in a washing machine can occur for various reasons, from overflows during a spin cycle to slow leaks or blocked drainage. This guide provides practical, step-by-step methods to remove standing water, diagnose common causes, and prevent future incidents. The goal is to help American homeowners handle routine drain issues safely and effectively, using common tools and readily available parts.
Quick Answer
Act quickly to remove standing water, then run a short test cycle with no load to confirm the issue. Start by unplugging the unit, then drain manually if needed. Check the drain hose, pump, and standpipe for clogs, and clear any debris. If water won’t drain after basic checks, inspect the pump and hoses for damage or blockages and consider replacements.
What You’ll Need
- washing machine drain pump kit
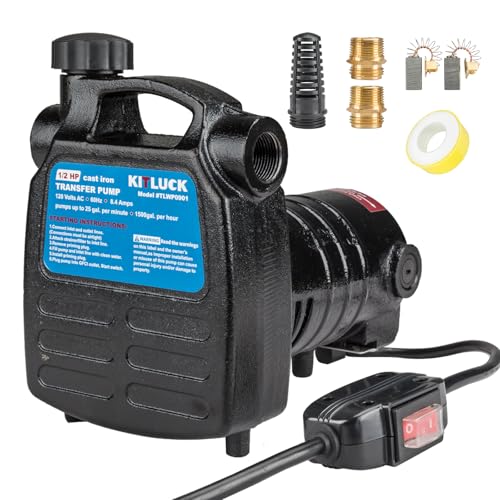
- portable submersible utility pump for washer water removal
- washing machine standpipe drain hose kit
- washer drain hose replacement kit
- siphon pump for washing machine water removal


Before You Start
Before attempting any drain or pump work, unplug the washer and turn off the water supply. Move the machine away from the wall to access the hoses and the pump. If water is hot, use caution to avoid burns. Clear the area of rugs or carpets to prevent slipping. Estimate the time required for draining and inspection; most tasks take 30–60 minutes, depending on access and the problem’s complexity.
Critical cautions: never work on an electrical appliance while it is plugged in. If you notice a persistent leak, refrigerant or chemical exposure, or if you hear unusual sounds from the pump, stop and seek professional help.
Step-By-Step: How To Remove Water From A Washing Machine
- Unplug the washer and shut off the water valves. Move the machine away from the wall to access the drains and hoses.
- Assess the visible drainage path. Inspect the drain hose for kinks, cracks, or blockages at the connection point to the standpipe or household drain.
- Remove any standing water manually. Use a cup or a small tub to scoop water, transferring it into a bucket. For larger volumes, a portable submersible utility pump for washer water removal can speed up the process.
- Check the drain filter or pump impeller. Accessibly, remove the access panel and locate the pump. Remove any lint, coins, or debris that may be obstructing the impeller.
- Test the drain system with a clear hose. Reconnect the drain hose to the standpipe and gently run a test cycle with no clothes. Observe whether water drains fully and the pump cycles normally.
- If water remains, inspect the washing machine standpipe drain hose kit for compatibility and proper height. A mis-sized or kinked hose can trap water and prevent draining.
- Inspect the drain pump impeller. If damaged or worn, replace it using the washing machine drain pump kit. Ensure electrical connections are dry before powering the unit.
- Address leaks. If you see water around the pump housing, reseal the connections with appropriate gaskets or clamps and ensure a tight fit on the hose connections.
- Run a final test cycle. After replacement or adjustments, run a short, empty wash cycle to ensure proper drainage and verify there are no leaks.
- Clean up and restore. Dry the area, return the washer to its place, and reattach the water supply lines. Reset any error codes if they appear on the control panel.
- Record what you did. Keeping notes helps if the problem recurs or if you need to explain the repair to a technician later.
Troubleshooting
| Symptom | Likely Cause | Fix | Prevention |
|---|---|---|---|
| Water remains in drum after drain | Clogged drain hose or pump; faulty impeller | Clear hose, inspect/replace pump | Regular hose cleaning; avoid inserting objects |
| Water drains slowly | Kinked hose or partial blockage | straighten/replace hose; remove debris | Avoid overloading with lint-prone items |
| Leak at hose connection | Loose clamp or damaged hose | Secure clamp; replace hose if cracked | Use correct hose size; inspect quarterly |
| Pump hums but doesn’t move water | Seized or worn impeller | Replace pump kit | Gentle cycle use to minimize debris |
| Standing water after power outage | Stalled cycle; valve stuck | Reboot and run a drain test; inspect valves | Ensure surge protection; avoid power interruptions |
Common Mistakes
- Ignoring safety: not unplugging the washer before work leads to shock risk.
- Forgetting to turn off water valves; water can spill onto floors and create hazards.
- Using incompatible hoses or failing to secure clamps, causing leaks.
- Rushing without testing: insufficient testing may leave hidden issues unaddressed.
- Disregarding debris in the pump: coins and lint can quickly redeposit and clog.
Tips For Best Results
- Keep a small drain toolkit on hand with a replacement hose and a basic pump kit for quick fixes.
- Use a clear siphon or drain hose to visually monitor water flow during testing.
- Install the standpipe drain hose kit at the recommended height to ensure efficient drainage.
- Schedule periodic maintenance: check hoses, clamps, and the pump every 6–12 months.
- Label or photograph connections before disassembly to simplify reassembly.
Call A Professional
Seek a professional if you notice persistent leaks, signs of electrical damage, or if the problem recurs after replacement parts. Stop signs include strong burning smells, sparking outlets, or water damage beyond the immediate area. A pro can confirm compatibility of the drain pump kit and diagnose issues beyond routine clogs, such as faulty valves or internal electronics.
FAQ
What causes water to stay in a washing machine after washing?
Common causes include clogs in the drain hose or pump, a faulty pump impeller, or a blocked standpipe that prevents proper drainage.
Can I use any drain hose with my washer?
It’s best to use manufacturer-approved hoses or a compatible kit designed for your model to ensure proper fit and safety.
Is it safe to run a washer while the drain is blocked?
No. Running with a blocked drain can cause overflow, water damage, and electrical hazards. Resolve the blockage before operating the unit.
How often should I replace hoses on a washing machine?
Inspect hoses annually and replace if they show cracks, bulges, or signs of wear to reduce leaks.
What should I do if the pump looks damaged?
Turn off power and water, stop using the machine, and replace the pump with a compatible kit. If unsure, contact a professional.
Why is water draining slowly even after cleaning?
A partial blockage or a kinked hose is likely; straighten the hose and clear any debris. If the problem persists, check the standpipe height and fit.
Is it necessary to test the washer after a repair?
Yes. Run an empty cycle to confirm full drainage and check for leaks or vibrations indicating alignment or hose issues.
Buying Guide
When choosing replacement parts or a pump kit for a washer drain system, consider size, compatibility, noise level, and installation ease. Key buying factors include:
- Size and compatibility: Match the kit to your washer model and drain configuration to ensure a secure fit.
- Drain capacity: Choose pumps and hoses rated for the typical water volume of a household washer.
- Noise level: Quieter components reduce disruption during operation and maintenance tasks.
- Energy efficiency: While pumps do not have energy ratings like motors, efficient designs reduce run time and heat exposure.
- Controls and fittings: Look for straightforward clamps and quick-connect fittings for easier DIY installation.
- Placement: Plan where to position the standpipe and pump, ensuring safe drainage away from walls and electronics.
- Warranty and support: Prefer kits with a warranty and accessible customer support for peace of mind.
Consider whether you need a complete drain kit with a standpipe hose, or if a portable submersible pump suffices for occasional water removal. For most households, starting with a comprehensive drain pump kit and a siphon pump offers flexibility for typical issues. If the unit is under warranty, follow manufacturer guidelines to avoid voiding coverage.