Introduction
Removing stubborn wallpaper seams can transform a room, especially when seams start to peel or show through after painting. A methodical approach minimizes damage to the wall surface and helps you achieve a clean, professional look. This guide lays out practical steps, the right tools, and common pitfalls to avoid.
With the right preparation and tools, homeowners can tackle most wallpaper seam issues in a weekend. The following steps are designed for typical interior walls and standard wallpaper types commonly found in American homes.
Quick Answer
To remove wallpaper seams effectively, score the seams to loosen adhesive, apply heat with a steamer to soften glue, lift and peel loose edges, and treat any stubborn spots with adhesive remover before priming and painting. Use a seam roller to press edges smooth as you go, and finish with a thorough cleanup.
What You’ll Need
- wallpaper seam roller tool
- wallpaper scraper tool with blade
- wallpaper steamer for removal
- adhesive remover spray for wallpaper
- wallpaper scoring tool for removal

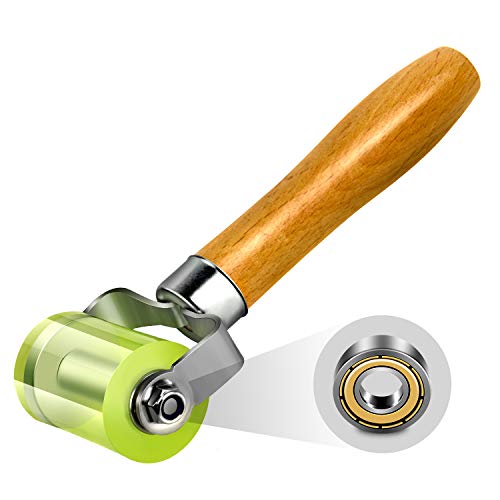

Before You Start
Assess the wall surface and determine if the wallpaper is vinyl or paper-backed, as this affects adhesion removal. Protect floors and nearby surfaces with drop cloths and painter’s tape. Ventilate the area well, as steam and solvents can irritate the eyes and lungs. Expect a typical removal session to take several hours, with extra time for stubborn seams. Safety first: wear gloves and eye protection when using blades or steam, and test a small area before full application.
Step-By-Step: How To Get Rid Of Wallpaper Seams
- Prepare the area by removing outlet covers and trimming loose paper from edges with the scraper.
- Score the seam area lightly with the wallpaper scoring tool to perforate the backing and allow moisture to penetrate.
- Apply the wallpaper steamer to the seam and let the heat soften the adhesive for several seconds, focusing on the seam line.
- Gently lift the seam with a putty knife or scraper, working from the edge inward to avoid tearing the paper nearby.
- Use the adhesive remover spray on softened seams to dissolve residual glue, then wipe with a damp sponge.
- Continue steaming, scoring, and scraping in small sections until all seams separate cleanly from the wall.
- For stubborn spots, re-apply steam and solvent, then carefully scrape again. Smooth any lifted edges with the seam roller tool as you progress.
- Allow the wall to dry completely, then apply a primer suitable for the wall surface to seal the area before painting or wallpapering anew.
- Inspect the surface for texture or gouges. Patch with joint compound if necessary, sand smooth, and re-prime before finishing.
- Finally, repaint or re-wallpaper with care, blending the edges to ensure a seamless appearance.
- Clean tools promptly and store them properly to extend their life for future projects.
Troubleshooting
| Symptom | Likely Cause | Fix | Prevention |
|---|---|---|---|
| Seams still visible after removal | Residual adhesive or paper fibers | Reapply adhesive remover and scrub gently; re-sand edges | Test patch first; use proper scoring depth |
| Wallpaper tears when lifted | Paper is brittle or aged | Work slowly, lift from the corners, use a thinner blade | Identify old material early; avoid forceful pulling |
| Excess moisture causes bubbling | Too much moisture or steam near seams | Limit steam duration; pat dry and allow to vent | Ventilate room; use controlled humidity |
| Adhesive reactivates after drying | Inadequate removal or insufficient drying time | Reapply remover; give full dry time | Follow product directions and dry times |
Common Mistakes
- Over-scraping, which tears paper and damages the wall surface
- Using excessive moisture near electrical outlets or mold-prone areas
- Rushing the steam process and skipping sections
- Neglecting to prime the wall after removal, leading to paint or wallpaper failure
Being patient and methodical reduces the risk of wall damage and helps achieve a smooth finish on the entire surface.
Tips For Best Results
- Test a small area with your chosen adhesive remover before wide application.
- Keep a damp sponge handy to wipe away softened adhesive as you work.
- Work in a well-ventilated area; steam can cause humidity buildup.
- Use a sharp scraper blade to minimize gouging; rotate blades often for clean cuts.
- After removal, lightly sand any raised edges to a uniform plane before priming.
Call A Professional
Consider hiring a pro if seams are extensive, if plaster underneath is damaged, or if there is visible water damage. Seek help if a steamer causes bubbling over large areas or if electrical outlets are near the work zone. If the walls show signs of mold, serious structural issues, or persistent moisture problems, consult a licensed contractor or a professional wallpaper installer for safe, durable results.
FAQ
Is wallpaper removal messy?
It can be, but proper preparation and drop cloths minimize cleanup.
How long does it take to remove wallpaper seams?
Time varies by room size and wallpaper type; plan for several hours per room with breaks for drying.
Can I wallpaper over the existing seams?
Generally not recommended; a smooth, dry surface yields the best finish.
What primer should I use after removal?
Choose a bonding primer suitable for the wall type to ensure adhesion of new paint or wallpaper.
Buying Guide
When choosing tools for removing wallpaper seams, consider size and comfort, noise and ease of use, and compatibility with your wall material. A seam roller helps secure edges after removal, while a scoring tool reduces the amount of liquid needed by allowing deeper penetration of the remover. A good wallpaper steamer can be gentler on delicate surfaces than aggressive scrapers, but it requires caution near outlets and trim. Adhesive remover sprays speed up glue dissolution, but test for wall compatibility first. For best results, aim for a balanced kit that covers scoring, steaming, scraping, adhesive removal, and edge smoothing. Compare tool ergonomics and blade quality to minimize wrist strain during longer jobs. Finally, verify compatibility with your room’s humidity and ventilation to keep the workflow smooth and safe. Do you prefer a compact toolkit for small rooms or a larger kit for frequent projects? A well-rounded setup reduces back-and-forth trips and helps maintain consistent results across rooms.