Shiny spots on painted walls can be a sign of surface sheen that reflects light differently, often caused by oil-based finishes, wax, or improper preparation. This step-by-step guide explains practical, consumer-friendly methods to dull or hide those spots without repainting the entire wall. It focuses on common interior finishes found in American homes and uses accessible tools and materials.
Quick Answer
Sand glossy spots with a fine sanding block, wipe with a damp cloth, then apply oil-based stain-blocking primer before touching up with interior joint compound and paint for a uniform finish.
What You’ll Need
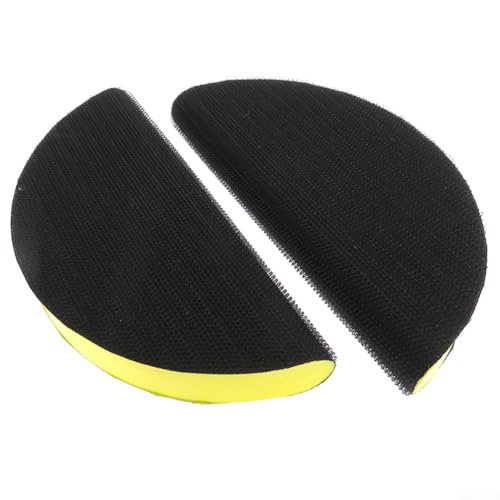
- 6 inch drywall sanding block non-slip
- interior spackling compound lightweight filler 1 lb
- 2 inch stainless steel putty knife
- all-purpose interior joint compound drywall mud 4 lb
- oil-based stain-blocking primer for glossy walls 1 quart


Before You Start
Assess the extent of the shiny spots and choose the right approach. For small, isolated spots, sanding and priming may suffice. For larger areas or glossy enamel, a primer designed to block stains and oils helps prevent bleed-through. Protect floors and outlets with drop cloths and painter’s tape. Allow adequate drying time between steps and work in a well-ventilated area.
Time estimate: 60–180 minutes depending on surface size and drying times.
Step-By-Step: How To Dull Shiny Spots On Painted Walls
- Prepare the area: Remove furniture from the space or push it to the center and lay down drop cloths. Turn off electricity to nearby outlets if you’re working close to them.
- Clean the surface: Wipe the wall with a damp cloth to remove dust and oils. Let it dry completely before proceeding.
- Sand the shiny spots: Using the 6 inch drywall sanding block non-slip, gently sand the glossy areas until the sheen dulls. Don’t oversand, or you may create an uneven surface.
- Wipe away dust: After sanding, wipe again with a damp cloth to remove dust from the disrupted areas. Let it dry.
- Apply lightweight filler: Use the interior spackling compound to fill any minor imperfections or nibs created by sanding. Smooth with the 2 inch stainless steel putty knife, removing excess material.
- Embed and blend with joint compound: Apply a thin coat of all-purpose interior joint compound drywall mud over the filled spots. Feather the edges beyond the affected area to blend with the surrounding wall. Allow to dry completely.
- Sand and inspect: Lightly sand the dried joint compound with the sanding block until the patched area is even with the rest of the wall. Wipe away any remaining dust.
- Prime the surface: Apply a coat of oil-based stain-blocking primer for glossy walls 1 quart to seal the patched area and prevent future sheen variation. Allow the primer to dry per label instructions.
- Touch up with paint: After the primer dries, repaint the patched area to match the surrounding wall. Use a small brush for precision and blend the edges into the existing finish.
- Evaluate: Check under different lighting to confirm an even surface. If necessary, apply a second thin coat of primer or paint to ensure uniform sheen.
- Cleanup: Clean tools with mineral spirits if used with oil-based products, and store materials properly for next projects.
Troubleshooting
| Symptom | Likely Cause | Fix | Prevention |
|---|---|---|---|
| Patched area dries with a different sheen | Insufficient primer sealing | Apply a second coat of stain-blocking primer | Seal with primer before topcoat |
| Patch shows through after painting | Uneven sanding or thin primer | Sand lightly and re-prime | Feather edges well and use enough primer |
| Glossy spots reappear after a while | Underlying oil or wax residue not removed | Thorough cleaning and re-prime | Pre-clean surface before any repair |
| Paint peels near repaired area | Over-wet joint compound or poor adhesion | Let fully dry and reseal with primer | Dry surfaces completely before painting |
Common Mistakes
- Skipping the cleaning step before sanding
- Using too much joint compound in one layer
- Skipping oil-based primer on glossy walls
- Not feathering edges enough, causing visible borders
- Rushing drying times, leading to ineffective sealing
Tips For Best Results
- Work in a well-ventilated space to minimize odor from oil-based products.
- Test primer on a small area first to ensure color match and adhesion.
- Use thin coats that dry fully between applications to avoid cracking.
- Choose a stain-blocking primer specifically designed for glossy or stained surfaces.
- Keep sanding to a minimum to preserve wall texture and avoid noticeable patches.
Call A Professional
Consider a pro if large sections show consistent sheen or if there is suspected moisture damage, mold, or structural concerns. Seek immediate help if paint layers blister, peel in multiple areas, or if you notice persistent odor or staining that resists priming.
FAQ
Can I just repaint over shiny spots without sanding?
Sanding helps ensure good adhesion and a uniform finish; repainting without smoothing glossy areas may result in poor coverage.
Is oil-based primer necessary for glossy walls?
Oil-based primers provide strong adhesion and block stains; they are often the best choice on glossy surfaces.
How long should primer dry before painting?
Follow label directions, typically 4–6 hours for oil-based primers and longer in cooler, humid conditions.
Will finishing with water-based primer work on glossy walls?
Water-based primers can work, but oil-based options often offer superior adhesion on slick surfaces.
Can I skip the spackling filler?
For minor indentations, filler may be optional, but it helps create a smooth, uniform patch before joint compound.
What if the shiny spots reappear after painting?
Reassess the area for oils or waxes, re-clean, re-prime, and apply a fresh topcoat with proper drying time.
How do I match texture after patching?
Lightly sand and, if needed, apply a thin texture coat or adjust sanding to mimic surrounding texture.
Buying Guide
When choosing products to fix shiny spots on painted walls, consider factors like the type of primer, the patching materials, and the tools that make the process smoother. The right combination helps achieve a seamless, durable finish.
Size matters for primers and joint compounds; larger rooms benefit from bigger containers while smaller touch-ups can use smaller amounts. Noise level and ease of use are practical considerations for DIYers who work in living spaces.
Key buying factors include:
- Size and packaging: Choose containers that fit the repair scope and storage space.
- Primer type and adhesion: Oil-based stain-blocking primers offer robust sealing for glossy walls.
- Joint compound and filler: Lightweight spackling and drywall mud options provide easy application and smooth finish.
- Tools: A non-slip sanding block and a small putty knife help control material application and finish.
- Drying time and recoat window: Faster-drying products speed up the project, but require precise timing.
- Compatibility: Ensure all products are designed for interior walls and compatible with your current paint finish.
Interested in durability and finish consistency? Think about whether you’ll need touch-ups in high-traffic areas or kitchens and baths where sheen and moisture resistance are important. Considering these factors helps select the right combination of products and achieves a uniform, long-lasting result.