Scuffs can ruin the look of favorite footwear, but many marks are removable with basic supplies and careful technique. This guide covers practical methods for leather, suede, nubuck, and sneaker materials so readers can restore appearance without professional help.
Quick Answer
For quick results, start with a gentle cleaner and a soft cloth, then move to material-specific tools: a leather scratch remover for leather shoes, a suede and nubuck repair kit for suede, a polish kit for color matching, and a magic eraser for stubborn marks on smooth surfaces. For sneakers, use the heel and sole repair kit as needed. Always test a small area first.
What You’ll Need
In addition to the tailored kits below, keep a soft microfiber cloth, a small brush, and a protective conditioner handy.
- Leather shoe scratch remover cream
- Suede and nubuck scuff repair kit
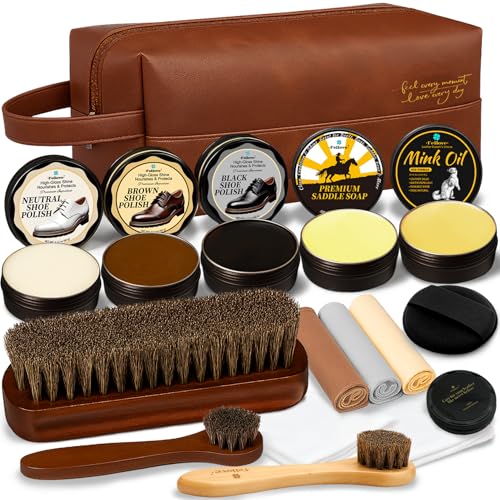
- Shoe polish kit leather conditioner and color match
- Magic eraser for shoe scuffs
- Heel and sole scuff repair kit for sneakers


Before You Start
Assess the material of each shoe before applying any product. Leather often responds well to conditioner and cream, while suede and nubuck require delicate, grain-aware treatment. Avoid soaking footwear or using high heat, which can damage finishes. Work in a well-lit area and place a soft cloth under the shoe to protect surfaces. Time estimates vary: leather touch-ups can take 15–30 minutes, suede repairs may take 30–60 minutes including drying time.
Step-By-Step: How To Remove Scuff Marks On Shoes
- Identify the material of each shoe to select the proper approach: leather, suede/nubuck, or fabric/Sneaker materials.
- For leather: apply a small amount of leather shoe scratch remover cream to a soft cloth and rub gently in a circular motion along the scuff. Wipe away excess with a clean cloth.
- For suede and nubuck: use the suede and nubuck scuff repair kit as directed, usually with a brush to lift nap and a light application to blend color.
- For sneakers with smooth uppers: use the heel and sole scuff repair kit to address rubberized edges and midsole marks, following kit instructions for adhesion and color matching.
- On stubborn marks, try a magic eraser for a very light touch, testing first on an inconspicuous area to avoid removing texture or shine.
- Finish leather with a small amount of shoe polish kit leather conditioner and color match to seal and even tone. Wipe excess and buff gently.
- For suede, after treatment, brush with a clean suede brush to restore nap and texture. Avoid water exposure unless the kit specifies.
- For sneakers, inspect drying areas and ensure all products are fully dry before wearing. Lightly buff with a cloth to remove any residue.
- Reassess the entire shoe for uniform appearance. Repeat steps in small increments if deeper scuffs remain, rather than applying heavy product at once.
- Store products in a cool, dry place and follow the manufacturer’s guidance for future care to prevent reoccurrence.
- Consider applying a protective conditioner or repellent appropriate to the material after repairs to maintain finish.
Troubleshooting
| Symptom | Likely Cause | Fix | Prevention |
|---|---|---|---|
| Leather still looks dull after cream | Insufficient product or heavy wear | Apply a thin additional layer and buff | Regular conditioning |
| White residue after eraser | Residual cleansing agents | Wipe with a damp cloth, dry, then buff | Test in hidden area first |
| Nap damaged on suede | Over-aggressive brushing | Lighten brush strokes and re-nap | Gentle tools; brush in one direction |
| Color mismatch after repair | Incorrect shade matching | Try a closer color from kit or blend with care | Test color on inconspicuous area |
| Rough finish on treated area | Over-application | Wipe excess and re-condition | Apply sparingly |
Common Mistakes
- Using the wrong kit for the shoe material, causing further damage
- Over-applying products, leading to stickiness or discoloration
- Not testing products on hidden areas before full application
- Bluish or uneven color from mismatched dyes
- Neglecting to dry thoroughly between steps, which can soften finishes
Awareness of material type and adherence to kit instructions reduces the risk of irreversible changes to the surface.
Tips For Best Results
- Test any product on a small, inconspicuous area first to confirm compatibility with the material and finish.
- Work in clean, controlled lighting to better judge color matching and texture restoration.
- Apply products in thin layers, allowing adequate drying time between applications.
- Use a dedicated brush or cloth for each material to avoid cross-contamination.
- Preserve the shoe’s overall look by conditioning leather and protecting suede after repairs.
Call A Professional
Consider professional help if: the scuffs cover large areas, the material is cracked or distressed, or repairs would require dyeing or advanced restoration beyond at-home kits. Also seek a pro if the shoe holds high monetary or sentimental value and you’re uncomfortable performing repairs yourself.
FAQ
Can I use leather conditioner on suede?
No. Leather conditioner can alter the texture of suede. Use suede-specific products from a suede and nubuck kit.
Will magic eraser damage leather or dyed surfaces?
Yes, it can remove color or finish. Use on a hidden area first and avoid prolonged contact with leather.
How long should I let repairs dry before wearing?
Allow at least 15–60 minutes, or as directed by the product instructions; some finishes may require longer.
Can these methods fix deep scratches?
Light scuffs respond well; deep scratches may require professional refurbishing or replacement parts.
Buying Guide
Choosing the right products depends on shoe material, expected use, and desired finish. Consider size and compatibility with leather, suede, nubuck, and sneaker materials. Noise level and energy efficiency are not typical concerns for this task, but ease of use and drying time matter. Look for multi-material kits that clearly label material compatibility, color-matching options, and included applicators. Consider SKU combinations that cover leather, suede, and sneaker repairs to minimize inventory. Think about storage: compact kits fit easily in a shoe care bag or closet shelf. When evaluating, ask, “Will this kit deliver a natural look without altering texture?”