Scratches on a wood table can affect both aesthetics and value. This guide outlines practical steps using common wood repair products to restore the finish and hide blemishes. It covers approaches from quick touch-ups to more substantial repairs, so homeowners can choose an approach that fits the depth of the scratch and the table’s finish.
Quick Answer
Small surface scratches often disappear with a wood scratch repair pen or marker kit. For deeper scratches, use wood filler epoxy putty or sandable repair paste, followed by touch-up stain to blend with the surrounding wood. Always test a hidden area first and work gradually for best results.
What You’ll Need
- Wood furniture repair kit scratch remover
- Wood scratch repair pen marker kit
- Furniture touch up stain marker set
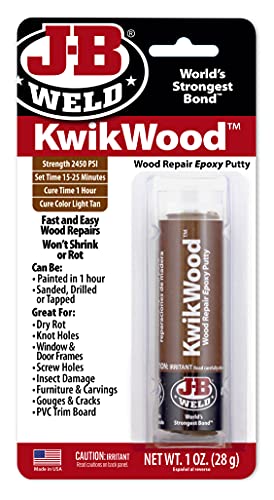
- Wood filler epoxy putty for scratches furniture
- Sandable wood repair paste for furniture scratches


Before You Start
Assess the depth of the scratch and the table’s finish. Clean the area with a soft, damp cloth and allow to dry. Work in a well-ventilated space and use protective gloves if handling epoxy putty. Test any product on a hidden area first to ensure it matches the wood tone and finish. Plan for time: surface cleaning, product application, curing, and final polishing may take several hours across a day or two depending on product sets.
Step-By-Step: How To Repair Scratches On Wood Tables
- Clean the scratched area with a mild wood cleaner and a microfiber cloth to remove dust and oils.
- For light surface scratches, apply a wood furniture repair kit scratch remover or a wood scratch repair pen marker kit following the product instructions.
- Wipe away excess product and buff with a soft cloth to even the finish.
- For deeper scratches, mix or press wood filler epoxy putty for scratches furniture into the groove, ensuring it’s slightly proud of the surface.
- Allow epoxy putty to cure according to manufacturer directions; this may take 15–60 minutes depending on the product.
- Clip off excess with a plastic scraper when cured; lightly sand the repaired area with fine-grit sandpaper until smooth and flush with the surrounding wood.
- Use a furniture touch up stain marker set to color-match the repair to the surrounding wood tone.
- Apply color with the marker, blending outward from the repair to avoid a clearly defined patch.
- If needed, apply a second color layer to better match depth of tone and sheen, then wipe away excess.
- Finish with a light coat of matching finish or furniture wax to seal and protect the repaired area.
- Allow the area to cure fully before placing objects on the surface, especially if epoxy was used.
- Inspect under different lighting and revisit any spots that look uneven, repeating steps as needed.
Troubleshooting
| Symptom | Likely Cause | Fix | Prevention |
|---|---|---|---|
| Repair stands out, color mismatch | Inadequate color match | Recolor with touch up markers in small increments | Test on hidden area first; choose a marker with multiple shade options |
| Epoxy not curing | Incorrect mixing ratio or humidity | Follow exact proportions; work in proper conditions | Read product instructions; avoid high humidity |
| Texture remains rough after sanding | Over-sanding or insufficient smoothing | Re-sand with higher grit and reapply filler | Sand gradually and finish with fine grit |
| Finish dulls after repair | Over-application of filler or improper seal | Re-apply appropriate sealant or wax | Match the gloss level to surrounding area |
| Small scratches reappear after cleaning | Repair didn’t fully bond with wood | Reapply repair product and sealant | Clean gently; avoid harsh cleaners on repaired areas |
Common Mistakes
- Using too much filler that creates a noticeable bump
- Choosing a marker shade that doesn’t match the wood
- Over-sanding and removing too much veneer or finish
- Skipping curing time, leading to weak repairs
- Failing to seal the repaired area, causing quick wear
Tips For Best Results
- Test color and finish on a hidden area before full application
- Work in thin layers to avoid build-up and color mismatch
- Lightly sand between steps to maintain a smooth surface
- Choose products that are specifically designed for wood furniture and follow manufacturer directions
- Apply a protective sealant or wax after repair to extend durability
Call A Professional
Consider a pro if the scratch is deep into the wood veneer, the table has an antique finish, or if the repair would affect structural integrity. Seek expert help for large spills, water damage, or if the finish is unusual or rare. If the project requires anesthesia of colors or gloss beyond consumer products, a furniture restoration specialist may be the best option.
FAQ
Can I fix scratches without sanding?
Yes, shallow scratches can often be addressed with a marker or repair pen and gentle buffing, avoiding sanding.
Will epoxy keep a scratch from returning?
Epoxy fills deepen the repair but may require sealing to prevent wear and ensure color match over time.
How do I choose the right color for a repair?
Match by testing on a hidden area and selecting a marker or stain kit with multiple shades for blending.
Is it safe to use house paint on wood furniture?
House paint is generally not recommended for fine furniture repairs; use stain markers, repair paste, or epoxy designed for wood.
Buying Guide
Choosing the right products for scratch repair involves evaluating several factors. Size matters: for small tables, compact kits or marker sets may suffice, while larger projects may benefit from epoxy putties or paste. Noise level and environment aren’t key here, but ease of use and cure times are important. Energy efficiency is not relevant to repair products. Focus on these factors:
- Size and scope: Select a kit that matches the typical scratch depth and table size.
- Color matching: Look for a kit with multiple shades or a stain marker set for better blending.
- Finish compatibility: Ensure the product works with your table’s finish (polyurethane, lacquer, oil finish, etc.).
- Ease of use: For quick fixes, markers and touch-up pens are simplest; for deeper scratches, epoxy paste or fillers are needed.
- Durability: Choose products that seal and cure well to resist wear.
- Placement and storage: Store repairs in a cool, dry place away from sunlight to prevent color drift.
When comparing options, consider a layered approach: start with a pen for light scratches, and move to filler or epoxy for deeper damage. Do you want the fastest fix or the most durable repair? If uncertain, a kit that includes both color-matching markers and a forgiving filler is a practical compromise.