Windshield scratches can affect visibility and the overall look of a vehicle. With the right tools and steps, minor scratches can often be reduced or removed without a costly windshield replacement. This guide provides practical, step-by-step instructions for American drivers who want a clear, safe view through their windshield.
Quick Answer
What to do now: Inspect the scratch to determine depth. If it’s light and washed out with a polishing system, use a windshield scratch repair kit with polishing compound. For deeper marks, you may need professional help. Always start with low-speed, gentle polishing and test on a small area first.
What You’ll Need
- Windshield scratch repair kit with polishing compound
- Auto glass polishing kit windshield scratches
- Car windshield scratch remover kit
- Glass polishing compound for windshield repair
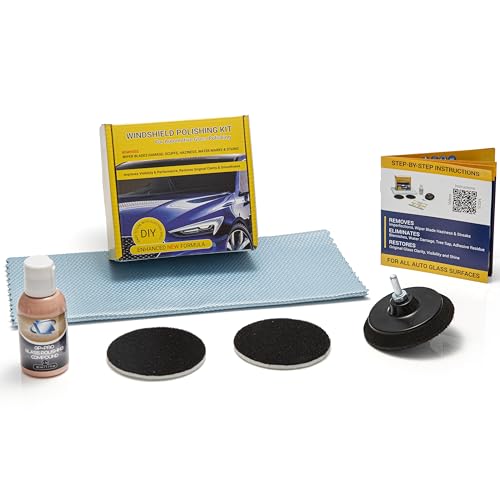
- Windshield scratch repair kit microfiber polishing pads


Before You Start
Assess the scratch depth: surface swirls and micro-scratches respond to polishing, while deep gouges may not. Ensure good lighting and a clean windshield free of dirt and grit. Work in a shaded area to prevent rapid drying of compounds. Time estimate: 20–60 minutes for initial treatment, plus a follow-up session if needed. Warning: Do not use on laminated layers or chips that expose metal edges. Testing on a small area first minimizes risk of additional damage.
Step-By-Step: How To Restore A Windshield Surface
- Prepare the windshield by cleaning it with a dedicated glass cleaner to remove dust and oils.
- Attach a microfiber polishing pad to the polishing tool or apply a small amount of polishing compound to the pad.
- Apply a small amount of glass polishing compound to the scratched area and begin with slow, even pressure.
- Move the pad in a circular or figure-eight pattern, covering the scratch and surrounding area evenly.
- Wipe away residue with a clean microfiber cloth and inspect the area under bright light.
- Repeat steps 3–5 in 2–3 passes, allowing the compound to work without excessive pressure.
- Rinse the area to remove any leftover residue and dry with a clean cloth.
- If the scratch remains visible, reapply a fresh layer of compound and repeat the process once or twice.
- Finish with a dedicated glass polish or a clear-coat compatible product for protection and clarity.
- Clean surrounding areas to remove any stray compound and test visibility from multiple angles and lighting.
- Inspect for haziness or new scratches; if needed, consider a second treatment or alternate method.
Troubleshooting
| Symptom | Likely Cause | Fix | Prevention |
|---|---|---|---|
| Hazy or cloudy area after polishing | Over-polishing or abrasive residue | Wipe thoroughly with glass cleaner and microfiber cloth | Use a lighter pass and clean tools |
| Scratch remains visible after treatment | Scratch depth exceeded polishing capability | Limit polishing attempts and assess replacement needs | Test areas first; avoid aggressive pressure |
| New scratches appear during process | Contaminated pad or dirt introduced | Clean pad and windshield, reapply fresh compound | Keep workspace clean and use new pads if needed |
| Residue streaking after wipe | Compound drying on glass | Rinse and wipe with a damp microfiber cloth | Work in shade; use minimal product per area |
Common Mistakes
- Using excessive pressure or high-speed tools on deep scratches.
- Polishing in direct sunlight or in very hot conditions.
- Skipping a pre-cleaning step, which traps grit in the polishing pad.
- Ignoring safety cautions around windshield edge and coatings.
Tips For Best Results
- Start with the mildest product and a light touch; you can increase pressure gradually if needed.
- Work in a controlled, shaded area to prevent rapid drying of compounds.
- Use a dedicated microfiber pad for glass to avoid introducing lint or fibers into the polish.
- Test the process on a small, inconspicuous area before full application.
- Follow up with a glass-specific protective polish to seal and restore clarity.
Call A Professional
Seek professional help if the scratch is deep, extends across the viewing area, or involves chip damage near structural components. Indicators to stop DIY efforts include visible cracks around the scratch, distorted vision at certain angles, or if the windshield shows signs of delamination. Insurance considerations may apply, and a pro can assess whether replacement is necessary for safety.
FAQ
Can a windshield scratch be completely removed?
Many minor surface scratches can be reduced or eliminated with polishing, but deeper gouges may remain and require replacement or professional repair.
What kit works best for windshield scratches?
Look for a windshield scratch repair kit with polishing compound and microfiber polishing pads designed for auto glass. Consistency in the compound and compatibility with glass are key.
Is DIY polishing safe for the windshield?
Yes, when done carefully with proper tools and light pressure. Avoid aggressive grinding and always test first on a small area.
How long does it take to fix a scratch?
The initial treatment typically takes 20–60 minutes, depending on scratch depth and kit quality. Some cases may require multiple sessions.
Will the process protect against future scratches?
Applying a glass polish or protective coating after polishing can help reduce new micro-scratches and improve clarity, but it won’t make the windshield scratch-proof.
Buying Guide
When choosing windshield repair tools, consider size and compatibility with your vehicle’s glass composition. Look for a kit that includes a reliable polishing compound, abrasive grade appropriate for light scratches, and microfiber pads. Noise level and ease of use matter for DIY enthusiasts who want a quiet, clean workspace. Energy efficiency is less relevant here, but a compact, battery-powered polisher can reduce fatigue. Controls should be simple, with clear instructions and safe operating speeds. Placement of the kit in your garage or trunk should permit quick access without disturbing other items. Compare kits by scratch type, pad quality, and compound chemistry to ensure you select a solution that matches common windshield conditions in the U.S. environment. If in doubt, choose a kit specifically marketed for automotive glass and backed by customer reviews that reflect real-world results.