Scratches on glass can be visually disturbing and may affect clarity. This practical guide walks through effective methods, from beginner-friendly kits to professional options, to restore smooth, clear glass on home windows, tabletops, and other surfaces. Readers will learn safety steps, choose suitable products, and follow a clear, step-by-step process.
The goal is to provide actionable, safe instructions that work for common household glass while avoiding overhyped claims. By using the right tools and techniques, most light scratches can be minimized or removed without replacing the pane.
Quick Answer
Identify the scratch depth—light surface scratches may be buffed out with a polishing kit, while deeper gouges might require professional repair or replacement. Start with a mild approach and test on an inconspicuous area. Use a suitable glass polishing kit and follow the product directions carefully for best results.
What You’ll Need
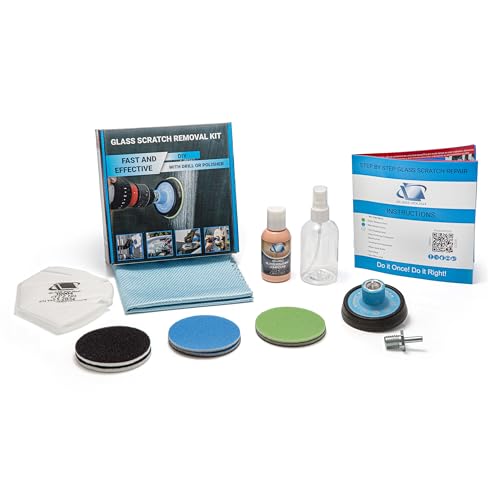
- Glass scratch repair kit for windows
- Auto glass scratch remover kit
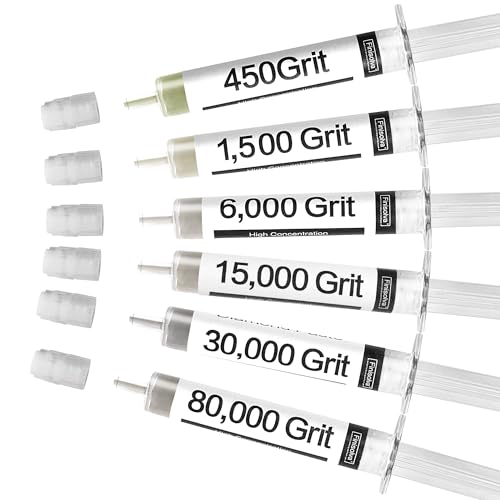
- Clear glass polishing kit 0.25 micron diamond paste
- Tempered glass scratch repair kit with polishing pads
- Micro abrasive glass polish kit for scratches

Before You Start
Before beginning, ensure the glass surface is clean and dry. Remove dust, dirt, and debris to prevent further scratching during polishing. Protect surrounding edges and frames to avoid accidental damage. Work in a well-lit area and use low-speed, controlled motions. Time estimates vary by scratch depth; plan 30–90 minutes for typical jobs and longer for multiple layers.
Crucial cautions: stop if the glass shows signs of cracking or structural failure. Use proper eye protection and gloves. Do not apply excessive pressure, which can widen scratches or heat the glass.
Step-By-Step: How To Use A Glass Scratch Repair Kit
- Prepare the surface: wipe with a soft microfiber cloth and clean with a mild glass cleaner to remove oils and residues.
- Select the correct polish: choose a kit appropriate for the scratch type—surface-only or deeper marks may need stronger pastes such as a 0.25 micron diamond paste.
- Apply a small amount of polish to the polishing pad or cloth, then place the glass under a steady light.
- Work in a consistent, circular motion with even pressure for 1–3 minutes, or as recommended by the product instructions.
- Wipe away residue with a clean cloth and recheck the scratch. If needed, repeat cautiously in short intervals.
- Rinse and dry the area, inspecting the finish from multiple angles to confirm improvement.
- For glass with multiple scratches, continue stepwise on each area, allowing the surface to cool between passes.
- Finish with a final polish using a clean pad for an even shine, then apply a protective coating or sealant if the kit includes one.
- When scratches persist or deepen, consider a tempered glass repair kit approach or consult a professional for evaluation.
Troubleshooting
| Symptom | Likely Cause | Fix | Prevention |
|---|---|---|---|
| Scratch remains after polishing | Scratch too deep or irregular | Apply multiple fine passes with light pressure or move to a specialized kit | Test on inconspicuous area first |
| Hazy or cloudy area after polish | Residual compound or residue | Thoroughly wipe with a clean microfiber and water | Rinse well during each step |
| New scratches appear | Over-aggressive polishing | Reduce pressure and duration; switch to a milder paste | Use proper pads and slow, controlled motions |
| Polish pad wears quickly | Rough surface or grit in pad | Clean or replace pad; inspect grit | Use fresh pads as needed |
Common Mistakes
- Using excessive pressure or speed, which can widen scratches or heat-glaze the glass
- Polishing over dirty surfaces, creating new scratches
- Rushing steps or skipping cleaning between passes
- Applying the wrong paste for tempered versus untreated glass
Sticking to the kit’s instructions and testing in a hidden area can reduce the risk of cosmetic damage.
Tips For Best Results
- Begin with the mildest abrasive intended for glass, especially on delicate surfaces like tempered or coated glass
- Work in a shaded area to prevent rapid drying of polishing compounds
- Keep the polishing pad flat to the surface to avoid creating new lines
- Use a clean, lint-free cloth to wipe away residues between passes
- Consider a dedicated glass polish kit for best compatibility with your specific surface
Call A Professional
Professional intervention may be necessary if a scratch is deep, penetrates a coating, or compromises safety. Stop and seek expert assessment if you observe cracks, fractures, or if the glass is structurally compromised. For large panes, high-traffic windows, or tempered glass with coatings, a pro often provides faster, more reliable results and ensures safety.
FAQ
Can I remove scratches on tempered glass?
Yes, but tempered glass is more sensitive to polishing. Use a kit designed for tempered glass and follow the manufacturer’s directions closely.
Will polishing leave a visible mark?
Light polishing may leave a faint, less noticeable mark. Deeper scratches can sometimes be reduced but not fully erased.
Are DIY glass scratch kits safe for all surfaces?
Most are suitable for common glass panes, but avoid coatings, mirrors, or specialty glass unless the kit specifies compatibility.
How long do results last?
Results depend on usage and environment. Avoid future scratching by handling glass carefully and applying protective coatings where appropriate.
Do I need protective equipment?
Yes. Wear eye protection and gloves, especially when using chemical pastes or aerosols.
Is professional repair always necessary for deep scratches?
Not always, but deep or wide scratches may require professional evaluation to determine whether polishing or replacement is best.
Buying Guide
Choosing the right approach to fix scratches on glass depends on several factors. Consider the following to select the most effective option for your needs:
- Scratch depth and type: Surface-only scratches are often removable with polishing; deeper gouges may need professional repair or replacement.
- Glass type: Standard glass, tempered glass, and coated glass behave differently with abrasives. Ensure compatibility.
- Kit contents: Look for a kit that includes appropriate abrasives, polishing pads, microfiber cloths, and clear instructions. A 0.25 micron diamond paste can handle fine scratches, but verify suitability for your glass.
- Ease of use: Beginner-friendly kits with stepwise guidance minimize risk and time.
- Surface location: For windows, tabletops, or monitors, ensure the kit is designed for the intended surface and safe around edges.
- Durability and buffers: Quality pads and polishes reduce the chance of introducing new scratches and improve finish consistency.
- Environmental and safety considerations: Some pastes may require protective gear or ventilation; review safety data before use.
- Price vs. value: While DIY kits are cost-effective for small jobs, consider replacement costs for large-scale or high-importance panes.
Would you like help selecting a specific kit based on your glass type and scratch depth? Matching the product keywords to your surface will improve outcomes and minimize risk.