Tree sap splatters on a vehicle are common experiences for drivers who park under leafy canopies. Sap can cling to paint and clear coats, creating a stubborn gloss that dulls the finish if not treated properly. This guide provides practical, safe methods using consumer products designed for automotive care.
By following a structured approach, drivers can remove sap effectively without damaging the vehicle’s surface. The steps below prioritize safe solvents, gentle tools, and clear safety practices to preserve factory finishes while restoring shine.
Quick Answer
Begin with a gentle, citrus-based sap remover or a dedicated tree sap remover spray for vehicles. Use a microfiber cloth or a soft cloth to wipe away loosened sap, then finish with a car paint-safe sap remover cloth. If sap is stubborn, employ a plastic scraper sap remover tool or a stiff nylon brush designed for car use, proceeding with caution to avoid scratches.
What You’ll Need
- Car sap remover solvent citrus-based
- Tree sap remover spray for vehicles
- Car paint-safe sap remover cloth microfiber
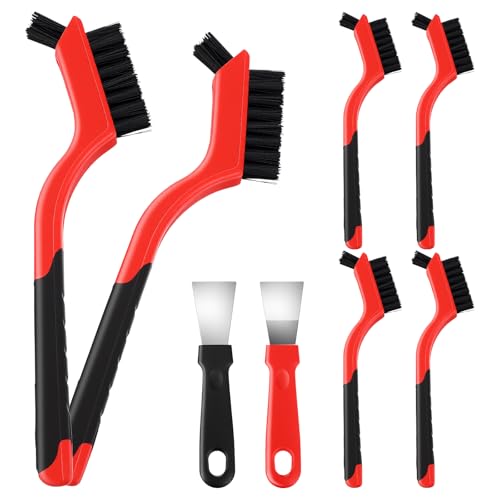
- Plastic scraper sap remover tool
- Stiff nylon brush for sap removal car


Before You Start
Prepare a shaded, cool work area to prevent rapid solvent drying. Test any product on a small, inconspicuous patch of paint before full use to ensure compatibility. Protect adjacent trim and rubber seals from solvent contact. Time estimates: 15–30 minutes for light sap, 45–60 minutes for heavier buildup. Critical cautions: avoid aggressive scrubbing that can mar clear coats; never use metal tools on painted surfaces; keep solvents away from exposed skin and eyes.
Step-By-Step: How To Remove Sap
- Assess the sap: identify the extent and hardness of the sap spots to gauge whether a solvent alone is sufficient or a mechanical aid is needed.
- Apply solvent: apply a small amount of car sap remover solvent citrus-based or tree sap remover spray to a microfiber cloth. Do not saturate the surface; work in circular motions over the sap.
- Let it sit: allow the solvent to dwell for 30–60 seconds to soften the sap, enabling easier lifting without excessive rubbing.
- Wipe away softened sap: use the microfiber cloth to gently lift sap from the paint. Fold the cloth to a clean side as needed to avoid reapplying dirty sap.
- Mechanical aid if needed: for stubborn sap, use a plastic scraper sap remover tool at a shallow angle, keeping the edge nearly flat to avoid gouging the paint.
- Rinse and recheck: rinse the treated area with water, then inspect for remaining sap. If residue persists, repeat the solvent application in a fresh area of the cloth and re-treat.
- Final wipe with microfiber: finish with a clean, dry microfiber cloth to remove any remaining moisture and to restore a smooth surface.
- Inspect the finish under daylight: ensure the area looks uniform; if a gloss difference appears, consider a light wax or sealant to equalize the appearance.
- Preventive care: wash the vehicle regularly and consider applying a ceramic coating or wax to ease future sap removal and protect the paint.
- Storage and cleanup: rinse tools with water after use and air-dry before storing in a cool, dry place.
Troubleshooting
| Symptom | Likely Cause | Fix | Prevention |
|---|---|---|---|
| Sap remains after first pass | Heavy sap buildup or rough surface | Repeat solvent application with a fresh cloth | Pre-wash with water if parked under trees |
| Paint feels rough after cleaning | Abrasive scrubbing or scraper contact | Switch to lighter strokes and a softer cloth | Avoid metal tools; keep tool edges dull |
| Streaks or hazing | Residue from solvent or improper drying | Rinse thoroughly and dry with a clean microfiber | Dry in a shaded area and buff with a clean cloth |
| Color transfer onto cloth | New sap loosened but not fully removed | Use fresh cloth and repeat treatment | Test in an inconspicuous area first |
Common Mistakes
- Using harsh household cleaners that can strip wax or damage clear coats
- Scraping with metal tools or aggressive scrubbing when sap is dry
- Neglecting a patch test before full application
- Failing to rinse solvent residues, which may attract dirt later
Tips For Best Results
- Work in the shade to prevent rapid solvent evaporation.
- Choose a citrus-based solvent when sap is on fresh paint to minimize risk.
- Use microfiber cloths designed for automotive finish and avoid linty fabrics.
- After removal, apply a light wax or sealant to ease future sap removal and maintain gloss.
Call A Professional
Seek professional help if sap covers a large area, if there are scratches, or if the vehicle has a recent repaint that could be sensitive to solvents. Stop and involve a pro if peeling or bubbling paint is observed after attempting removal, or if you’re unsure about the solvent’s compatibility with your specific finish.
FAQ
Can sap be removed without damaging clear coat?
Yes, by using vehicle-safe sap removers, gentle microfiber cloths, and non-abrasive tools, followed by a protective wax or sealant.
What should I avoid when removing sap?
Avoid metal scrapers, harsh household cleaners, and aggressive scrubbing that can scratch or dull the finish.
Is it necessary to wax after sap removal?
Waxing or sealing after removal helps restore gloss and eases future sap cleanup.
How long should I wait between applications for stubborn sap?
Wait at least 30–60 seconds for solvents to loosen sap, then reapply as needed with a fresh cloth.
Can I use the same cloth for multiple sap spots?
Prefer clean sections of a microfiber cloth to avoid redepositing sap on the paint.
Will sap removal damage vinyl or rubber trim?
Use products sparingly on trim and follow up with a trim-safe cleaner if needed to protect edges.
Buying Guide
When selecting sap removal products, consider size, effectiveness, and compatibility with automotive finishes. Look for citrus-based formulas designed for car care and ensure the product explicitly states safety for clear coats. Think about your typical parking environment—if sap exposure is frequent, a spray-on sap remover for quick reapplication may be ideal. For mobility between vehicles, a compact kit including a plastic scraper, microfiber cloths, and a dedicated sap remover can be a practical choice. Noise-free, chemical-based products with clear instructions tend to yield reliable results for American garages and driveways. Do you prefer a spray bottle for quick access or a concentrate for longer-term use? Choose based on your cleaning frequency and storage space.