Rain spots, mineral deposits, and acid rain can leave unsightly marks on a vehicle’s finish. With the right approach and the proper products, car owners can restore clarity and gloss without damaging the paint. This guide outlines practical steps, tools, and best practices for removing rain spots safely in a typical American driveway or garage setting.
By following a structured process and using the recommended supplies, most drivers can achieve professional-looking results at home. The steps below emphasize safe handling, appropriate product selection, and efficient techniques to minimize swirl marks and uneven patches.
Quick Answer
Best first step: test a small hidden area with a gentle polish to gauge paint reaction, then proceed with a dedicated water spot remover kit. For stubborn spots, pair a mineral deposit remover with a dual action polisher and a soft microfiber towel for even, controlled results.
What You’ll Need
- Car water spot remover kit 8 oz
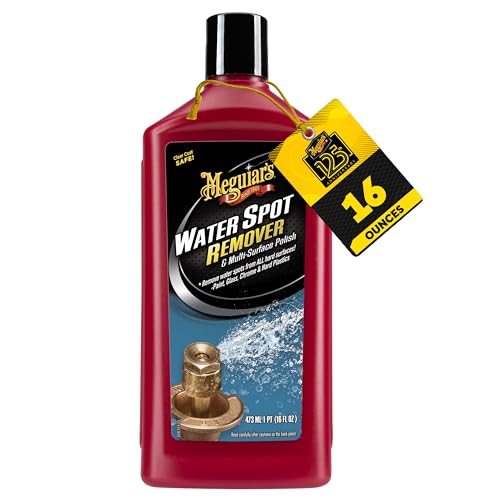
- Acid rain mineral deposit remover for cars 16 oz
- Dual action polisher for car detailing water spots
- Car polishing compound for water spots 8 oz
- Microfiber detailing towels for removing water spots


Before You Start
Before beginning, ensure the vehicle is in a shaded area away from direct sunlight. Wash the car thoroughly to remove loose dirt and dust so abrasives don’t scratch the paint. Use cool panels and work in a low-humidity environment to minimize water spotting during treatment. Wear eye protection and gloves, and follow product labels for dilution and contact times. Plan for a 1–2 hour session for a typical sedan, longer for larger vehicles.
Step-By-Step: How To Remove Rain Spots From A Car
- Wash and dry the vehicle completely to remove surface dirt and prevent scratching during treatment.
- Inspect the paint to identify the severity and location of rain spots, especially on horizontally oriented panels.
- Apply a small amount of car water spot remover kit 8 oz to a clean microfiber towel and rub the affected area with light, circular motions.
- For particularly stubborn spots, follow with acid rain mineral deposit remover for cars 16 oz, applying per the product instructions and allowing a brief dwell time.
- Rinse the area thoroughly with clean water and dry with a fresh microfiber towel to prevent water re-deposition.
- Use a dual action polisher for car detailing water spots for even polishing if residual haze remains, selecting a low to medium pad and a light pressure setting.
- Work in small sections, moving the polisher in overlapping passes to ensure even coverage and prevent hot spots on the paint.
- Wipe away any remaining residue with microfiber towels, then inspect under bright light to confirm clarity and uniform gloss.
- Apply car polishing compound for water spots 8 oz as a final step if a faint cloudiness persists, and buff to a high-gloss finish with a clean pad.
- Seal the finish with a wax or sealant to protect against future mineral deposits and UV damage.
- Clean and store tools properly, drying the polisher pad and towels to prevent mildew and material wear.
Troubleshooting
| Symptom | Likely Cause | Fix | Prevention |
|---|---|---|---|
| Streaks after polishing | Inadequate removal of residue | Re-wipe with a clean microfiber, re-wash the area, re-polish if needed | Use fresh towels and wipe in one direction |
| Paint feel rough after treatment | Over-polishing or aggressive compound | Switch to a finer polish and lighter pressure | Test on small area first |
| Water spots return quickly | Incomplete removal of minerals or inadequate protection | Apply a dedicated sealant or wax after polishing | Regular car washes with gentle detergents |
| White haze or chalking | Acid-based remover left on too long | Rinse thoroughly and re-wipe with damp towel | Follow dwell times exactly |
Common Mistakes
- Using strong abrasives on delicate finishes or clear coats
- Working in direct sun or on hot surfaces
- Neglecting a proper test spot before full application
- Over-wetting or over-wiping the surface, which can create new micro-scratches
Sticking to gentle products and controlled techniques helps preserve the paint’s integrity while removing rain spots.
Tips For Best Results
- Work in a shaded, cool area to reduce rapid drying and spotting during product contact.
- Use a high-quality microfiber towel with tight, plush fibers to lift residues without scratching.
- Keep the pad flat and parallel to the surface to avoid gouges or uneven polishing.
- Follow a consistent pattern: horizontal for doors, vertical for fenders, to monitor progress easily.
- Finish with a protective layer like wax or sealant to minimize future mineral deposits.
Call A Professional
Consider professional help if rain spots cover very large areas, if the paint shows deep etched lines, or if oxidation is present. Signs requiring a pro include: fading color, clear coat failure, or repeated spot formation despite at-home treatment.
FAQ
What causes rain spots on cars?
Rain spots form when mineral-rich water evaporates on the surface, leaving behind mineral deposits and potential acid components that etch the clear coat over time.
Can I use household cleaners to remove rain spots?
Household cleaners are not recommended for paint finishes; they can strip wax and damage clear coats. Use purpose-built water spot removers and polish intended for automotive use.
How long does it take to remove rain spots with a kit?
Most sessions take 1–2 hours for a typical sedan, depending on spot density and paint condition.
Is sealing after treatment necessary?
Yes. A sealant or wax adds a protective barrier against minerals and ultraviolet exposure, helping prevent future spots.
Will polishing remove deep etching?
Light to moderate polishing can improve shallow etching; deep etching may require professional refinishing or repaint services.
Should I use a different product for hard water spots?
Hard water spots respond to mineral deposit removers and polishing; if stubborn, consult product guidelines or a pro for mineral restoration.
Buying Guide
When choosing products to tackle rain spots, consider size, efficiency, and compatibility with your vehicle’s finish. Key factors include:
- Size and coverage: Larger bottles or multi-pack sets provide better value for extensive spotting, but smaller kits work well for routine maintenance.
- Effectiveness on coatings: Ensure the remover is safe for your clear coat and any wax or sealant you plan to apply.
- Low-abrasive options: Look for products labeled as gentle or suitable for light to moderate polishing to minimize swirl marks.
- Tool compatibility: If using a dual action polisher, verify that the pad type and speed range are compatible with the product’s recommended use.
- Surface safety: Choose formulas with clear application directions, dwell times, and thorough rinse instructions to avoid residue buildup.
- Ease of use: Kits that combine a cleaner, polish, and towel set streamline the process for at-home use.
Placement considerations include working in a well-lit garage or driveway, away from direct sunlight, and having access to a water source and outlets for the polisher. For most drivers, a balanced approach—safe cleaners, a mid-range polisher, and soft microfiber towels—yields the best results without complex steps.