Press-on nails are popular for their ease and versatility, but removing them correctly protects your natural nails from damage. This guide walks through practical methods, using common removal products and easy at-home steps. Readers will learn safe techniques, estimate timelines, and know when to seek professional help.
Quick Answer
Best overall method: Use acetone-based removers and foils or wipes designed for press-on nails, followed by gentle filing and moisturization. For gentler options, softening solutions can ease removal without harsh solvents.
What You’ll Need
- Nail glue remover acetone for press-on nails
- Press-on nail removal kit acetone wipes nail file
- Acetone-based nail polish remover for press-on nails
- Foil wrap nail remover kit for press-on nails
- Softening solution for removing press-on nails with acetone
 |
Glamnetic Press On Nail Remover | Odorless, No Acetone, Gentle Press-On Nail Remover Serum for Fake Nails | 30 ml/1.01 fl. oz. | |
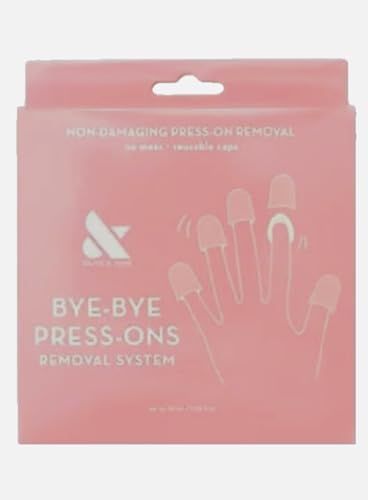 |
Olive & June Press-Ons Nail Remover Kit -32pc – 2.03 fl oz |
Before You Start
Prepare a well-lit workspace and gather all tools. Some removals involve acetone, which can dry skin, so apply a small amount of cuticle oil around the nails after completion. If you have a history of sensitive skin or allergies, test a small amount of remover on a nail corner first. Expect removal to take 15–40 minutes depending on method and nail type.
Critical cautions: Avoid forcing nails off, which can peel or damage natural nails. Do not use metal tools aggressively; they can scratch the nail bed. If you notice redness, swelling, or persistent pain, stop and seek guidance from a professional.
Step-By-Step: How To Safely Remove Press-On Nails
- Choose a removal method based on current nails: foil wrap method for heavy acrylic-like nails, or acetone wipes for lighter adhesives.
- Prepare the nails by trimming back extended tips if present and gently buffing the surface to remove shine, which helps the remover penetrate.
- Soak or wrap: For foil method, soak a small cotton pad in acetone-based remover and wrap it with foil around each finger; for wipes, saturate a wipe and place it over the nail.
- Let sit: Keep wraps or wipes in place for 10–15 minutes. Check progress—nails should appear soft and pliable at the edge.
- Carefully lift: Use a gentle nail file or a pusher to ease the edge of the press-on nail away from your natural nail. Do not pry forcefully.
- Remove residual adhesive: Use another acetone wipe or the removal kit’s tool to dissolve remaining glue, then wipe clean with a damp cloth.
- Hydrate: Rinse hands, apply a mild moisturizer or cuticle oil to restore moisture, and allow nails to dry completely.
- Assess and treat: If any nail is irritated or if adhesive remains stubborn, repeat the removal process or switch to a softening solution for easier detachment.
Troubleshooting
| Symptom | Likely Cause | Fix | Prevention |
|---|---|---|---|
| Nail glue stubbornly resists removal | Adhesive is particularly strong or nails are long | Repeat removal step with acetone or try foil wraps longer; use softening solution | Take your time; avoid forcing nails off |
| Excess dryness or cracking skin | Frequent acetone exposure | Limit acetone exposure, moisturize after removal | Alternate removal method with gentler solutions |
| Residual glue on nails | Insufficient soaking time | Repeat soaking and use a gentle file to remove | Follow timing guidelines precisely |
| Discomfort or burning sensation | Allergic reaction to acetone or adhesive | Discontinue use immediately; wash hands and seek guidance | Test products on a small area first |
Common Mistakes
- Peeling or prying nails instead of waiting for the remover to work
- Using metal tools aggressively, which can damage the natural nail
- Skipping a patch test for removers or solvents
Careful adherence to timing and gentle handling helps prevent nail bed injury and dryness. If multiple nails resist removal, consider a professional manicure removal session.
Tips For Best Results
- Choose acetone-based removers for quicker and more complete adhesive breakdown, especially for stubborn nails.
- Use foil wrap methods for better heat and solvent penetration in tougher sets.
- Follow up with moisturizing oils and a gentle nail care routine to restore flexibility and shine.
- Keep nails trimmed and avoid aggressive filing; this reduces damage during future removals.
- Store removers and kits out of reach of children and away from heat sources to prevent accidents.
Call A Professional
Seek professional help if any of the following occur: persistent redness, pain, or swelling around the nail folds; signs of an infection; or if you have nails that are severely split, damaged, or contain acrylic or gel overlays beyond the scope of at-home removal.
FAQ
Can I remove press-on nails without acetone?
Yes, using a non-acetone remover or a softening solution is possible, but it may take longer and be less effective on tougher adhesives.
How long should foil wraps stay on during removal?
Typically 10–15 minutes per hand, checking progress midway and reapplying if necessary.
Will removal damage my natural nails?
When done carefully and with proper moisturization afterward, the risk is minimized and natural nails can remain healthy.
What should I do if I see redness after removal?
Rinse the area with water, avoid further irritants, and apply a light moisturizer. If symptoms persist, contact a professional.
Buying Guide
Choosing the right removal method depends on nail type, budget, and comfort with solvents. Consider the following factors to pick the best option for home use:
- <bSize and nail length: Longer or thicker sets may require stronger removers or foil wraps for effective penetration.
- <bNoise and odor: Acetone products emit noticeable fumes; look for low-odor formulations if sensitive.
- <bEnergy efficiency: Not a primary factor for removals, but compact kits with minimal disposable waste are preferable.
- <bControls: Pre-soaked wipes, foam pads, and foil wraps provide straightforward control and timing.
- <bPlacement: Have a dedicated workspace to keep removers, wipes, and tools organized and away from children.
When comparing kits, think about how often you remove nails, the strength of adhesives you typically encounter, and your comfort with acetone-based products. If you frequently switch styles, a reusable removal kit with acetone wipes and a softening solution can offer versatility. Always follow product instructions and safety warnings for best results.