Paint lines and ridges on interior walls can make a room look uneven. With the right tools and a careful approach, smooth, professional-looking walls are achievable. This guide covers practical steps, tool recommendations, and common fixes to remove paint lines effectively.
Quick Answer
To remove visible paint lines, start with gentle scraping, then sand the area evenly. Use heat or chemical aids only if needed, then fill and feather edges with a drywall repair kit for a seamless finish. For stubborn lines, repeat sanding and touch up as necessary.
What You’ll Need
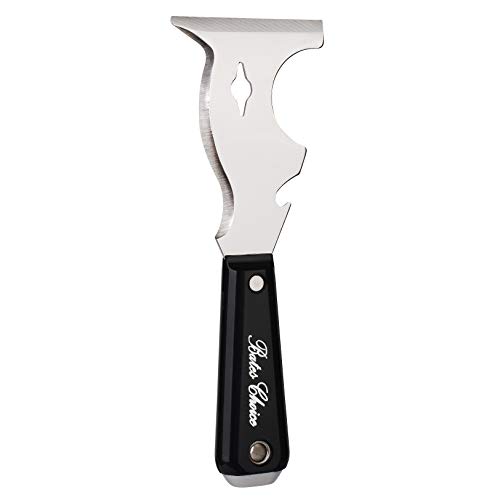
- Wall scraper for removing paint lines with putty knife
- Sanding sponge 80 grit drywall sanding block for paint removal
- Heat gun for removing latex paint from walls
- Putty knife set for drywall repair and filling gaps
- Drywall repair kit joint compound patch kit for walls


Before You Start
Inspect the wall to identify all paint layers and lines. Protect floors and furniture with drop cloths, and wear safety goggles and a dust mask during sanding. Avoid overheating delicate areas or trimming too aggressively, which can damage the wall surface. Plan for 2–4 hours of work for typical size patches, depending on the extent of the lines and repairs.
Step-By-Step: How To Remove Paint Lines On Walls
- Prepare the area by laying down coverings and removing any loose paint around the lines with a wall scraper for removing paint lines with putty knife.
- Use a putty knife to gently score along the edge of the line, lifting loose paint without gouging the wall.
- Lightly sand the raised edges with an 80‑grit sanding sponge to flatten ridges and blend into the surrounding surface.
- For stubborn latex lines, apply brief heat with a heat gun to soften paint; pause and test a small area before continuing to avoid scorching the drywall.
- Wipe dust from the area and inspect the repair site for any remaining ridges or unevenness.
- Apply a thin coat of joint compound from a drywall repair kit over the repaired area using a putty knife; feather edges beyond the line to blend with the wall.
- Let the compound dry fully according to product instructions, then sand smoothly with the 80 grit sponge until flush with the wall.
- Apply a second, light coat of compound if needed, followed by a final pass of fine sanding once dry.
- Prime the repaired area if necessary and repaint to match the surrounding wall for a seamless finish.
- Clean the area and recheck for any visible lines after the paint dries; touch up as required.
- Dispose of dust and tools properly, and store supplies for future touch-ups.
Troubleshooting
| Symptom | Likely Cause | Fix | Prevention |
|---|---|---|---|
| Ridges still visible after sanding | Insufficient feathering or uneven compound | Apply another thin coat, feather edges, and sand | Feather edges wider than the repair area |
| Paint lifts when scraping | Poor surface adhesion or moisture present | Dry surface completely; test moisture first | Address moisture issues and cure before refinishing |
| Discoloration after repaint | An old underlying layer or stain bleed | Use stain-blocking primer before repainting | Prime thoroughly around the repair |
| Gouges or deep lines | Over-scraping or aggressive sanding | Fill with joint compound, re-sand flush | Work gently and frequently check level |
Common Mistakes
- Over-scraping the wall, creating new gouges
- Skipping the feathering step and leaving hard edges
- Not letting drywall compound dry completely before sanding
- Using an overly aggressive sanding grit that damages the surface
Tips For Best Results
- Test a small area first when using a heat gun to avoid scorching paint or drywall
- Use a light touch with the putty knife to prevent digging into the wall
- Choose an 80‑grit sponge for initial smoothing, then finish with a finer grit if needed
- Prime repaired areas before painting to ensure even color and adhesion
Call A Professional
Consider contacting a pro if there is extensive water damage, multiple layers of robust coatings, or structural concerns. Stop and seek help if you notice peeling, severe cracking, or bowed walls, which may indicate underlying issues beyond cosmetic repair.
FAQ
Can I use only a scraper to remove paint lines?
A scraper helps, but for a durable finish it should be followed by sanding and filling with joint compound.
Will repainting fix visible lines?
Often yes, but repainting should be paired with proper feathering and priming for a uniform look.
Is an 80‑grit sanding sponge enough?
80 grit is good for initial smoothing; finish with finer grit to reduce scratch marks before painting.
How long does the repair take?
Small patches can dry within a day; larger repairs may require 24–48 hours depending on humidity and temperature.
Buying Guide
When selecting tools for removing paint lines and repairing walls, consider size, comfort, and compatibility with your project. Below are key factors to compare and how they influence results.
- Size and scope: For small patches, a compact drywall repair kit is sufficient; larger areas may require a spreader and extended sanding block.
- Noise level: Power tools like heat guns and electric sanders can create noise; choose quieter options if you work in shared spaces or late hours.
- Energy efficiency and safety: Use heat guns with adjustable temperature settings to control heat and reduce the risk of damage.
- Controls and ergonomics: Look for comfortable handles and easy-grip putty knives; a multi-pack with different blade widths increases versatility.
- Placement considerations: Work in well-ventilated areas; keep paint chips contained and avoid working near electrical outlets or fixtures.
If comparing products, match the skill level and repair scope to the tool set. Is a dedicated drywall repair kit enough, or do you need separate wall scrapers, sanding blocks, and a heat gun? Consider whether dust collection features or ergonomic handles will improve the overall experience and results. A balanced kit with reliable joints and a compatible patch compound can streamline repairs and minimize rework.