Nail holes are common across homes, especially after hanging pictures or shelves. With the right tools and a simple repair process, these small flaws can disappear into the wall without noticeable texture changes. This guide walks American homeowners through a practical, step-by-step method to repair nail holes using standard drywall repair products.
Quick Answer
Fill the holes with a drywall repair compound, smooth the surface with a putty knife, lightly sand once dry, and repaint to match the wall. For deeper or larger holes, use mesh patches or repair kits to reinforce the area before applying compound.
What You’ll Need
- Drywall repair kit with spackle compound and patch mesh
- Pre-mixed spackle compound wall hole patch kit
- Putty knife set for drywall repair and patching
- Sanding sponge block for wall repair finish
- Wall hole repair kit nail hole patch with mesh patch
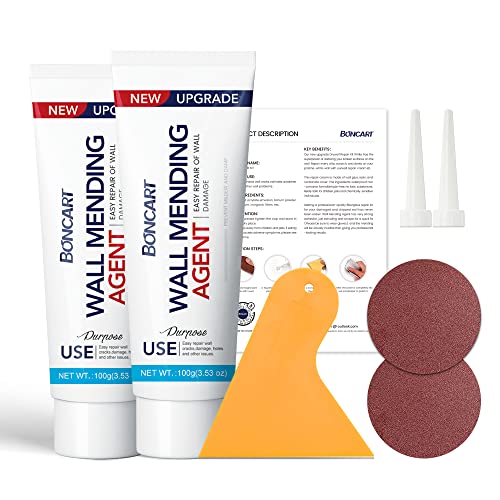
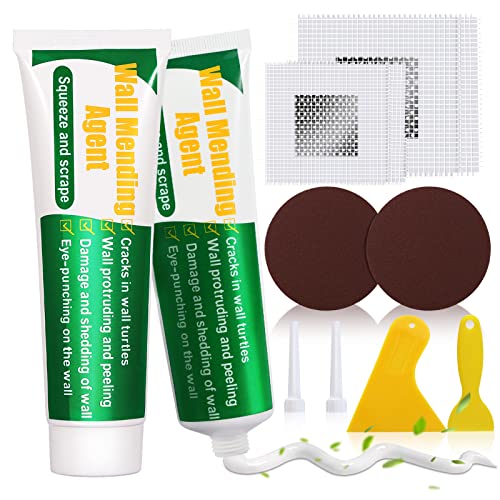

Before You Start
Assess each nail hole: shallow pinholes from nails are easier to fix than larger punch holes. Protect surrounding surfaces with painter’s tape and a drop cloth. Work in a well-ventilated area, especially when sanding or using drying compounds. Time estimates: small holes typically dry in 1–2 hours; larger patches may require longer, up to 24 hours for full curing. Critical cautions: avoid overloading the repair area with compound, which can cause cracking; never sand excessively to create a hollow feel in the wall.
Step-By-Step: How To Fix Nail Holes In A Wall
- Clear the hole and remove loose material with a small brush or the corner edge of a putty knife.
- Choose the appropriate patch method: shallow nail holes can be filled with pre-mixed spackle, while deeper holes may need a patch mesh.
- Dip a putty knife into the spackle and apply a small amount over the hole, pressing gently to spread it into the surrounding wall.
- For small nail holes, smooth the surface level with the wall using the edge of the knife; for larger holes, apply patch mesh first, then cover with additional compound.
- Allow the compound to dry completely according to the product’s instructions.
- Lightly sand the patched area with a sanding sponge block until it’s flush with the wall surface.
- Wipe away dust and apply a second thin coat if needed, then let it dry again.
- Prime and repaint the patched area to match the wall color for a seamless finish.
- Inspect the finish under different lighting to ensure concealment; touch up as needed.
- Clean tools promptly to prevent hardening; store any leftover patch materials for future use.
- Dispose of debris and restore furniture or decor in the repaired area.
Troubleshooting
| Symptom | Likely Cause | Fix | Prevention |
|---|---|---|---|
| Patch stands proud after drying | Insufficient sanding or too much compound | Sand smoothly, reapply a thin coat if needed | Apply thin layers, sand between coats |
| Cracking around the patch | Movement or overly thick patch | Remove excess, reapply in thin layers | Use mesh patches for larger holes |
| Patch not blending with wall texture | Texture mismatch | Sand lightly and apply a tiny amount of texture spray or brush texture | Test texture technique on scrap patch |
| Dusty surface after sanding | Dust not cleaned before painting | Wipe with a damp cloth, let dry | Dust removal before priming |
Common Mistakes
- Overfilling holes, causing a noticeable lump that requires heavy sanding
- Skipping the patch mesh for larger holes, leading to weaker repairs
- Using the wrong drying time, causing sandable surfaces to crumble
- Neglecting to prime before painting, which can alter color match
Tips For Best Results
- Choose a patching product that matches the wall material and hole size for optimal adhesion.
- Use a sharp putty knife for clean, even cuts around the hole edge.
- Match the paint color as closely as possible; consider tester patches before full repaint.
- For textured walls, replicate the original texture after patching using a small texture brush or sponge.
Call A Professional
Seek professional help if the holes are extensive, if there is underlying moisture damage, or if the wall shows signs of structural issues. Stop repairs and consult a pro if you notice recurring holes, large cracks, or inconsistent wall finishes that require more advanced remediation.
FAQ
Can I fix nail holes with any spackle?
Most pre-mixed spackle compounds are suitable for nail holes and small patches, but small holes may do well with standard spackle while larger patches benefit from patch kits.
Do I need to prime after repairing nail holes?
Yes, priming helps seal the patched area and ensures even paint adhesion and color match.
How long should I wait before painting?
Follow the product’s drying time; typically 1–2 hours for small patches, longer for larger repairs.
What if the wall has a glossy paint finish?
Sanding or using a bonding primer helps the patch adhere to glossy surfaces.
Can I fix nail holes without sanding?
A very light sanding is usually required to achieve a flush finish, especially if the patch sits slightly above the surface.
Is a mesh patch always needed for nail holes?
For tiny nail holes, a mesh patch is often unnecessary; larger holes benefit from a patch for added strength.
Will repairs blend with textured walls?
Texture must be replicated to hide the repair; use texture techniques after applying the final coat.
Buying Guide
Choosing the right nail hole repair products helps ensure a durable, seamless finish. Consider the following factors when shopping:
- Size and type of hole: Small nail holes vs. larger holes require different patching approaches. For mixed uses, consider a versatile drywall repair kit with patch mesh.
- Patch materials: Pre-mixed spackle compounds are convenient for quick fixes, while patch kits may offer stronger, longer-lasting repairs for rough surfaces.
- Ease of use: Putty knife sets should include multiple blades for precise application and smoothing.
- Finish options: Sanding sponges help achieve a smooth finish; textured walls may need surface texture matching tools.
- Drying and cure time: Look for products with predictable drying times to plan repainting around your schedule.
- Compatibility with paint: Ensure the repair product accepts standard interior latex paints for color matching.
- Surface prep: Some kits include primer or bonding agents; consider adding a primer to improve adhesion on glossy or previously painted walls.
- Placement and application: If repairs are near outlets or corners, choose flexible patch materials and tools that can navigate tight spaces.
With the right tools and a methodical approach, most homeowners can repair nail holes quickly and restore a smooth, uniform wall surface. The key is selecting the appropriate patching system, following proper steps, and taking time to blend the finish with the surrounding wall.