Loose threads on clothing are common yet unsightly issues that can escalate if not addressed promptly. This guide provides practical, step-by-step methods using common sewing tools to restore the neat look of fabrics. The focus is on safe handling, minimal damage, and quick fixes that work on most fabrics—from cotton tees to delicate knits.
Quick Answer
Quick method: trim the thread close to the fabric, seal the edge with a fabric sealant if needed, and carefully weave or secure the remaining fibers. For stubborn thread tails, use a seam ripper or curved tip tweezers to pull the loose strand through to the inside of the fabric.
What You’ll Need
The following tools are commonly effective for removing or stabilizing loose threads. Gather these before starting to ensure a smooth repair.
- Seam ripper stainless steel for loose threads
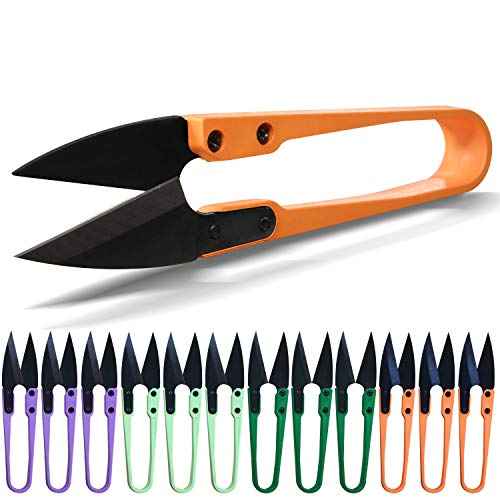
- Thread snips small fabric scissors 4 inch
- Fabric fray check liquid sealant
- Curved tip tweezers for pulling threads
- Mini sewing repair kit for loose threads


Before You Start
Before tackling loose threads, consider fabric type, location of the loose end, and whether the garment is washable. Test any sealant on an inconspicuous area first to ensure it doesn’t alter color or texture. For delicate fabrics like silk or lace, extra caution is required. Time estimate: 10–20 minutes for a small area; full garments may take longer if multiple threads appear.
Step-By-Step: How To Get Rid Of Loose Threads On Clothes
- Isolate the loose thread by lifting it gently with a curved tip tweezers to avoid pulling extra fibers.
- Use a thread snips 4-inch to trim the loose tail as close to the fabric as possible without cutting the fabric itself.
- If the thread is part of a seam that has frayed, insert the seam ripper under the thread and carefully release a small portion from the fabric edge.
- For stubborn tails, thread the tail into a needle or the tip of the seam ripper and guide it through to the inside of the fabric to hide it.
- Apply a thin line of fabric fray check liquid sealant along the edge where fibers are fraying; let it dry according to the product instructions.
- Press the area lightly with a warm iron if the fabric permits, to help set the sealant and smooth the surface.
- Re-check for any remaining loose strands and repeat the steps as needed, ensuring the seam remains intact.
- For multiple threads or larger areas, consider using the mini sewing repair kit for loose threads to reinforce with a few tiny stitches.
- Store the garment away from direct heat until the sealant dries completely, then wash as recommended on the care label.
- Inspect after laundering to confirm the threads stay in place and no new fraying occurred.
- If the fabric shows signs of damage, move to the Call A Professional section for guidance.
- Document the repair with a quick test on a fabric swatch to refine technique for future fixes.
Troubleshooting
| Symptom | Likely Cause | Fix | Prevention |
|---|---|---|---|
| Edge fraying returns after washing | Inadequate sealing or heavy fabric wear | Reapply fabric fray check and allow full cure; reinforce with tiny stitches | Seal edges thoroughly; wash garment inside out |
| Sealant clouds or discolors fabric | Sealant applied too thick or on sensitive fibers | Apply a very thin layer; test first on a hidden area | Use fabric-friendly products and color-safe formulas |
| Thread keeps pulling after repair | Core thread damaged or fabric stress at seam | Reinforce with a few invisible stitches using mini sewing repair kit for loose threads | Address underlying seam stress; avoid tugging |
| Delicate fabric shows fraying along length | Overhandling or aggressive trimming | Trim only the visibly loose tails; use soft approach | Handle fabrics gently and use appropriate tools |
Common Mistakes
- Using heavy pressure with a seam ripper near delicate fabrics, causing snags.
- Over-sealing with fabric fray check on fabrics that do not tolerate chemicals well.
- Failing to test sealants on an inconspicuous area before full application.
- Trimming too aggressively and creating more loose ends.
Taking a measured approach helps avoid creating new issues while removing loose threads.
Tips For Best Results
- Choose the right tool for the fabric: fine tweezers for knits, precision snips for woven fabrics.
- Work in good lighting to spot all loose fibers before trimming.
- Work from the outside inward toward the seam to maintain garment structure.
- Keep a small repair kit handy for quick fixes on the go.
- Document your method for future repairs to speed up the process next time.
Call A Professional
Seek professional help if the fabric is heavily frayed, a seam is coming apart, or the garment is valuable and delicate (such as heirloom items or intricate knitwear). Signs to escalate include visible fabric distortion, large holes near seams, or persistent unraveling despite repeated attempts. When in doubt, consult a tailor or alterations specialist who can restore the garment without compromising its integrity.
FAQ
How do I remove a loose thread without damaging the fabric?
Gently lift the thread with curved tweezers, trim with small scissors, and seal any exposed edge if needed.
Can fabric sealant harm colored fabrics?
Some sealants can alter color; test on a hidden area first and choose color-safe formulas.
Is a seam ripper necessary for every loose thread?
Not always, but a seam ripper helps when the thread is part of a seam or tightly anchored.
When should I replace tools?
Replace dull scissors or bent tweezers to prevent snagging and ensure clean cuts.
What if fraying continues after repair?
Reinforce with a few tiny stitches or consult a professional for seam stabilization.
Are there fabrics that shouldn’t be repaired with sealant?
Yes; delicate fibers like silk or chiffon may respond poorly to certain sealants and require specialized care.
Will washing affect the repair?
Some repairs are water-resistant after curing, but always follow the care label and recheck after washing.
Buying Guide
When selecting tools to tackle loose threads, consider size, grip comfort, and compatibility with fabric types. A seam ripper stainless steel for loose threads is essential for precise release, while thread snips small fabric scissors 4 inch offer clean, quick cuts. A fabric fray check liquid sealant helps stabilize edges that are prone to unraveling, and curved tip tweezers for pulling threads provide controlled extraction. For ongoing maintenance, a mini sewing repair kit for loose threads bundles essential items for quick fixes on the go. When choosing, prioritize durability, ease of cleaning, and how the tools feel in hand. Consider your typical fabrics and whether you need more delicate handling or more aggressive removal. A well-rounded kit helps address most common fraying scenarios without unnecessary purchases.