Dealing with bubbles in automotive window tint can be frustrating, but with the right tools and a careful technique, you can achieve a smooth, professional finish. This guide covers practical, user-friendly steps to remove bubbles and prevent them during future installations.
Whether you’re correcting a DIY tint job or refreshing an older installation, following the steps below will help you achieve clearer, longer-lasting results. The focus is on safe handling, precise application, and using common tinting tools effectively.
Quick Answer
Start by identifying the bubble type. If it’s trapped under the film, use a soft squeegee or felt-edge tool to push air toward the edges, then re-wet and re-squeegee. For stubborn bubbles near seams, a heat gun on a low setting helps loosen the adhesive, followed by careful reapplication with a lint-free cloth. Always work from the center outward to minimize new air pockets.
What You’ll Need
- auto window tint squeegee with felt edge kit
- window tint application scraper razor blade for bubble removal
- heat gun for automotive window tint installation
- tinting card and felt edge squeegee set for car windows
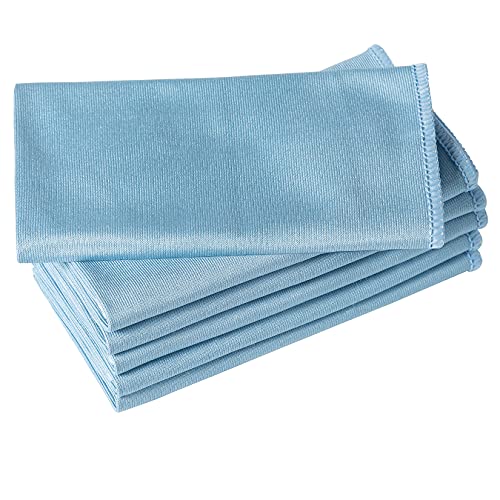
- lint-free microfiber cloth for smoothing tinted windows


Before You Start
Prepare a clean, dust-free workspace and ensure the car windows are cooled to touch. Work in a well-lit area with a spray bottle of soapy water or tinting solution within reach. Safety first: keep the heat gun on a low setting and avoid prolonged exposure to any one spot to prevent scorching the film or glass. Allow the tint film to relax after trimming to reduce edge lifting.
Estimated time for typical DIY corrections ranges from 20 minutes to an hour, depending on the size of the window and the number of bubbles. Have a spare squeegee and razor blade handy in case of stubborn pockets. If the film is damaged or bubbles persist after several attempts, consider professional help.
Step-By-Step: How To Get Rid Of Bubbles In Tint
- Inspect each window to locate bubbles and categorize them by size and location. Smaller bubbles near the center may require re-wetting and careful pushing toward the edges.
- Prepare the surface by lightly cleaning with a lint-free microfiber cloth and the appropriate tint cleaning solution. Remove any dust or lint that could cause new specks under the film.
- Gently re-wet the tint in the bubble area using a spray bottle. The solution should be enough to allow movement but not so wet that it beads or pools.
- Use the squeegee with a felt edge to push the air toward the edges of the window. Maintain steady pressure and work from the center outward in small strokes.
- If air pockets persist, employ the razor blade for bubble removal to work under the film’s edge. Lift the edge slightly, re-wet, and re-squeegee while guiding the bubble out.
- For stubborn or edge-bound bubbles, switch to a heat gun on a low setting and warm the film gently. This loosens the adhesive, making it easier to smooth out air pockets without tearing the film.
- Gently re-squeegee the area after heating, ensuring the air escapes toward the window seal. Use clean, lint-free cloths to wipe away moisture and residue.
- Check the window for remaining bubbles. If any persist, repeat the wetting and squeegeeing process, focusing on the center first and moving outward.
- Trim any overlapping edges carefully with the razor blade, then re-squeegee to seal the edges. A well-seated edge prevents new air from forming bubbles over time.
- Let the film cure in a dust-free environment for the recommended timeframe, avoiding car washing or heavy moisture exposure for at least 48 hours.
- Finish by wiping the glass with a clean microfiber cloth to remove any fingerprints or streaks that can mimic bubbles.
Troubleshooting
| Symptom | Likely Cause | Fix | Prevention |
|---|---|---|---|
| Small specks under film | Dust during application | Re-wet and re-squeegee; replace cloths and clean area thoroughly | Use lint-free environment; keep tools clean |
| Bubble near edge | Air trapped at edge | Lift edge, re-wet, re-squeegee toward center | Work from center to edges |
| Large bubble that won’t disappear | Adhesive not fully activated or film misalignment | Professional reapplication or heat-assisted release | Take time to align before final squeegee |
| Film lifts after curing | Improper initial adhesion or insufficient pressure | Re-tack with squeegee and ensure constant pressure | Apply consistent pressure during install |
Common Mistakes
- Using rough or dirty tools that scratch the tint surface
- Rushing the squeegee process, causing new air pockets
- Over-wetting, which can cause sagging and uneven adhesion
- Holding the heat gun too close or on high heat, risking film damage
Tip: Keep a dedicated, lint-free microfiber cloth handy to continuously wipe away moisture and dust during the reapplication process.
Tips For Best Results
- Always work in optimal lighting to spot tiny bubbles early.
- Use a lint-free microfiber cloth to keep the film and glass clean during the process.
- Match the squeegee to the window size; larger windows can benefit from a broader blade for even pressure.
- Practice on a smaller window panel first to fine-tune technique and heat settings.
- Allow the film to settle after final squeegeeing, rather than rushing to test removal or cleaning.
Call A Professional
Consider contacting a professional if bubbles persist after multiple corrections, if the tint is severely misaligned, or if the window has scratches or damage. Stop and seek expert assessment when:
- The film is creased or torn.
- Edges do not adhere well after heating and pressing.
- There are extensive air pockets across large sections of the tint.
FAQ
What causes bubbles in auto window tint?
Bubbles are usually caused by trapped air, improper adhesive activation, or dust under the film during application.
Can heat help remove bubbles?
Yes, a low-heat setting can loosen adhesive and assist in reapplication, but excessive heat can damage the film.
Should I re-wet the film after heating?
Yes, re-wetting helps the film reposition and release any remaining air pockets.
Is it normal for tint to have some haze after installation?
A short curing period is typical; haze often clears as the film fully adheres. If haze persists, seek professional help.
Buying Guide
When choosing tools and supplies for removing bubbles in tint, consider size, material quality, and compatibility with automotive films.
- <bSize and type of squeegee: Larger squeegees cover more area but require steady hands to avoid creases. Felt-edged edges help prevent scratching the film.
- <bRazor blades and scrapers: Use sharp, automotive-grade blades designed for tint work to avoid tearing.
- <bHeat gun performance: Low-to-moderate heat with adjustable settings prevents film damage while enabling adhesive release.
- <bApplication cards and tools: Cards help with precision in tight corners and seams without marring the surface.
- <bCloth and cleaning supplies: Lint-free microfiber cloths maintain cleanliness and prevent fibers from sticking to the film.
Consider kits that bundle a squeegee, felt edge, and cleaned tools for a streamlined workflow. Compare options by how easily you can reuse tools across multiple windows and how well the kit handles stubborn bubbles near edges.
Placement matters too: smaller, less exposed windows often benefit from more precise control tools, while larger panels may require larger squeegees and additional hands. Noise level and energy efficiency are not typically concerns for this task, but a comfortable, well-lit workspace improves accuracy. If you are uncertain, a professional tint shop can provide guidance on the best tool set for your specific vehicle model and window configuration.