Bubbles and blisters in drywall tape are a common issue that can compromise the finish of a wall. Proper technique, preparation, and the right tools help ensure a smooth, seamless surface. This guide walks through practical steps to identify causes, fix the problem, and prevent future bubble formation.
Quick Answer
Repair bubbles early, press the tape into the mud, apply even coats, and allow thorough drying between passes. Using the right tools—like stainless steel taping knives, a mud pan set, a corner trowel, and a fine sanding block—helps achieve a professional finish with fewer reworks.
What You’ll Need
- 6 inch drywall taping knife stainless steel
- 12 inch drywall taping knife stainless steel
- drywall mud pan with knife set
- corner trowel drywall tool
- drywall sanding block 120 grit finish

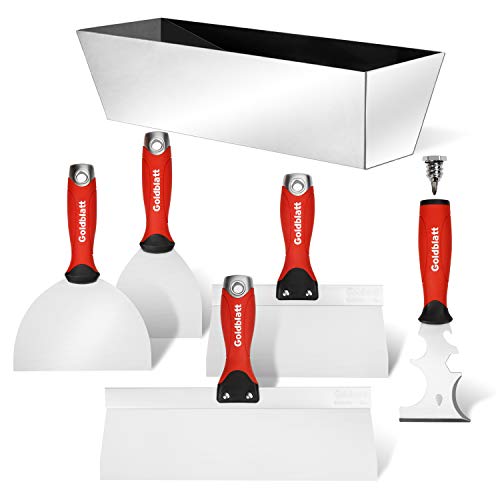
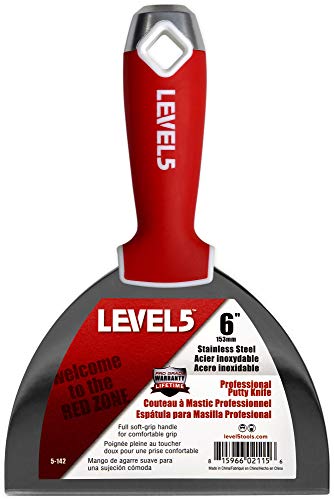
Before You Start
Inspect the area for dampness, air leaks, or moving joints that could cause future bubbles. Prepare the workspace by removing furniture, laying down drop cloths, and protecting nearby surfaces. Time estimates vary by wall size; plan for several passes and drying times of 24 hours or more in humid conditions. Safety first—wear eye protection and a dust mask when sanding, and ensure electrical outlets are off if you’re near outlets or lights.
Step-By-Step: How To Fix Bubbles In Drywall Tape
- Identify all bubble-affected areas and lightly sand the raised tape with a 120 grit sanding block to create a feathered edge.
- Mix or open your joint compound to a workable consistency, then load a 6 inch drywall taping knife with mud.
- Press the bubble areas firmly with the knife, working from the center outward to reseat the tape in the mud.
- Apply a thin coat of mud over the repaired tape, using a smooth, even stroke. Use the 12 inch drywall taping knife for larger surfaces to minimize ridges.
- Let the first repair dry completely. Lightly sand the area with a drywall sanding block 120 grit finish to level the surface and create a seamless transition.
- Apply a second thin coat of mud across the repaired area, feathering the edges beyond the tape. A corner trowel helps if you’re near corners or edge joints.
- Allow to dry fully, then sand again with fine grit. Lightly wipe the area to remove dust before applying a final skim coat if needed.
- Inspect under good lighting; repeat thin coats if any imperfections remain. Do not overwork the mud at once—multiple thin coats yield best results.
- Finish with a final light sanding, wipe clean, and apply texture or paint as desired once the surface is dry.
- Clean tools promptly after use to prevent dried mud buildup on the blades of metal taping knives.
- If stubborn bubbles recur, examine the underlying drywall for moisture or misaligned joints and address those issues before re-taping.
Troubleshooting
| Symptom | Likely Cause | Fix | Prevention |
|---|---|---|---|
| Bubbles reappear after drying | Moisture behind the tape | Drywall patch area completely, improve ventilation | Control humidity during mud drying |
| Tape lift at edges | Insufficient mud bed under tape | Re-seat with a generous mud base and re-tape | Press tape into mud thoroughly |
| Ridges after sanding | Over-sanding or thick coats | Sand evenly; apply thin subsequent coats | Use correct knives and consistent pressure |
| Cracking after paint | Over-drying mud or heat shock | Moisture control, gradual drying | Even ambient temperature and humidity |
Common Mistakes
- Using mud that’s too thick, which traps air under tape.
- Overworking the joint with a single thick coat instead of multiple thin layers.
- Not feathering edges enough, creating visible seams after painting.
- Failing to fully dry mud between coats, increasing bubble risk.
Tips For Best Results
- Keep knives clean to prevent mud from catching on dried edges.
- Use the right tool for the job: the 6 inch and 12 inch knives reduce lap marks on large surfaces.
- Work in a well-ventilated area to speed mud drying while minimizing dust.
- Lightly dampen sanding blocks before use to prevent rapid dust generation.
- Test a small area first if you’re unsure about mud consistency or drying times.
Call A Professional
Seek professional help if bubbles persist after multiple repairs, if there is significant underlying moisture damage, or if you’re working on large sections near electrical fixtures, plumbing, or structural joints. Signs to call a pro include persistent warping, widespread staining, or repeated joint failure after multiple fix attempts.
FAQ
What causes bubbles in drywall tape?
Bubbles are typically caused by trapped air, moisture behind the tape, improper mud consistency, or insufficient pressing of tape into the mud.
Can I fix bubbles without removing the tape?
Yes, by reseating the tape with fresh mud and applying thin coats, but severe cases may require re-taping.
What tools are essential for repairing drywall tape bubbles?
Essential tools include a 6 inch drywall taping knife, 12 inch drywall taping knife, drywall mud pan with knife set, and a drywall sanding block 120 grit finish.
How long does it take to fix bubbles and finish a wall?
Drying times vary with climate and mud depth; expect a few days for complete repair across sections with multiple coats.
Should I skim coat after repairing bubbles?
Yes, a light skim coat helps even out the surface before priming and painting.
Is corner tape or corner trowel necessary for corners?
A corner trowel drywall tool helps achieve clean, flat corners when repairing or finishing near edges.
Buying Guide
Choosing the right tools for tackling bubbles in drywall tape involves considering size, durability, and comfort. Look for stainless steel blades that resist corrosion and deliver a smooth glide. When evaluating taping knives, consider blade width (6 inch for general spots, 12 inch for larger fields) and handle grip for prolonged use. A complete drywall mud pan with knife set streamlines mud mixing and application. For tight corners, a reliable corner trowel drywall tool improves efficiency. Finish work benefits from a drywall sanding block 120 grit finish to create a flawless surface before painting. Assess noise, weight, and material quality for repeated upgrades. Consider storage space, ease of cleaning, and compatibility with your existing tools. Finally, compare kits that include a range of blades and handles to minimize tool switching during projects.