Maintaining a clean YETI lid helps prevent lingering odors, residue buildup, and potential mold growth. This guide provides a practical, step-by-step approach suitable for everyday use in American households and workplaces. Readers will learn how to tackle common stuck-on grime, choose the right cleaning tools, and dry the lid properly for long-lasting performance.
Quick Answer
Rinse the lid with warm water, apply a gentle dish soap, scrub with a dedicated YETI lid cleaning brush or silicone scrub brush, rinse thoroughly, and dry completely with a microfiber towel. For stubborn buildup, soak in a warm soapy bath for several minutes before scrubbing. Avoid using harsh abrasives that could scratch the seal.
What You’ll Need
- YETI cup lid cleaning brush
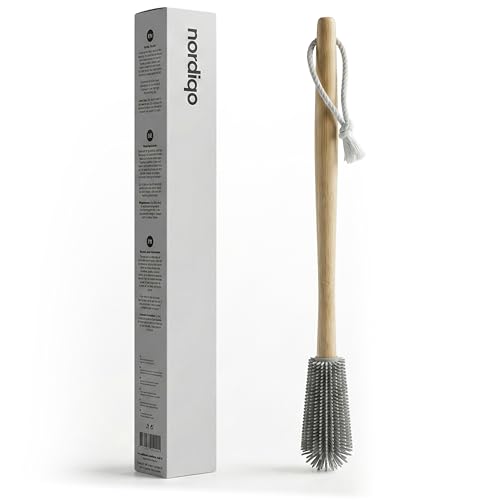
- Long handle bottle brush for YETI lid
- Silicone scrub brush for YETI cup lid
- Dish sponge and scrubber set for YETI lid
- Microfiber drying towel for YETI cup lid


Before You Start
Gather all cleaning tools and empty the bottle or cup. Rinse the lid under warm running water to loosen loose particles. Use warm, not boiling, water to avoid damaging seals. Do not soak the lid for extended periods if the seal is damaged or if the lid shows signs of warping. Plan for about 5–10 minutes of cleaning for routine maintenance, and up to 20 minutes for stubborn residue.
Step-By-Step: How To Clean A YETI Lid
- Disassemble the components that detach from the lid to expose all surfaces.
- Rinse under warm water to remove surface debris such as coffee grounds, fruit pulp, or dust.
- Apply a small amount of mild dish soap directly to the cleaning brush or silicone scrub brush.
- Scrub the inner gasket, threads, spout opening, and any small crevices using the YETI cup lid cleaning brush or long handle bottle brush for hard-to-reach areas.
- For stubborn buildup, let the lid soak in a warm, soapy solution for 3–5 minutes before scrubbing again.
- Rinse thoroughly to remove all soap residues from every surface, including inside the gasket channel.
- Dry with a microfiber drying towel, paying extra attention to the gasket and any moisture-trapped areas.
- Inspect the lid for any remaining residue. If needed, repeat the scrubbing step on problem spots.
- Reassemble the lid and conduct a quick rinse with clean water to ensure no soap remains before reuse.
- Store the lid in a dry, ventilated area to prevent mold growth and preserve seal integrity.
- Regularly repeat the above steps to maintain optimal cleanliness, especially after consuming dairy, citrus, or sugary drinks.
- For frequent travel, consider pairing routine cleaning with a dedicated brush set to streamline the process.
Troubleshooting
| Symptom | Likely Cause | Fix | Prevention |
|---|---|---|---|
| Stubborn residue on gasket | Food particles stuck in corners | Soak, then scrub with silicone or brush | Rinse promptly after use; wipe dry |
| Edge mold or odor | Moisture retention and organic buildup | Use hot water and mild detergent; dry thoroughly | Regular cleaning; air-dry after washing |
| Scratches on lid surface | Harsh abrasives or metal brushes | Switch to non-abrasive brushes | Avoid abrasive tools; follow gentle scrubbing |
| Seal loosening or leaks | Warped gasket or worn threads | Inspect and replace damaged parts | Handle with care; avoid dishwasher if not recommended |
Common Mistakes
- Using abrasive pads that scratch the lid’s surface or seals
- Leaving soap residues, which can affect taste and seal integrity
- Skipping thorough drying, which promotes mold and odor
- Overlooking hidden crevices where residue can hide
Tips For Best Results
- Use a dedicated brush from the kit to reach tight gasket channels without damaging the seal.
- For citrus-heavy drinks, rinse promptly; citrus oils can degrade seals over time.
- Dry the lid with a microfiber towel immediately after washing to prevent water spots and odor.
- Keep a small cleaning kit in your bag for on-the-go maintenance; it reduces buildup between deep cleans.
- Periodic deep cleaning: soak the lid in a 1:1 mix of warm water and white vinegar for 5–10 minutes, then scrub and rinse.
Call A Professional
Contact a professional if the lid shows persistent damage such as warped plastic, cracked gaskets, or leaks that do not improve after cleaning. Do not use the lid if the seal is compromised or if there are visible cracks that could harbor bacteria.
FAQ
How often should I clean my YETI lid?
Clean after every few uses, and perform a deeper clean weekly or after consuming sugary or dairy-rich beverages.
Can I put the YETI lid in the dishwasher?
Check the manufacturer’s guidelines; many lids are not dishwasher safe due to seals and materials.
What tools are best for cleaning hard-to-reach areas?
A long handle bottle brush and silicone scrub brush work well for gasket channels and spouts.
What should I do if the lid smells even after cleaning?
Try a vinegar soak (1:1 with water) for a brief period, then scrub and rinse thoroughly and dry completely.
Buying Guide
When selecting cleaning tools for a YETI lid, consider size, material, and compatibility with the lid’s design. A dedicated YETI cup lid cleaning brush is ideal for reaching tight spaces, while a long handle bottle brush can tackle hard-to-reach areas around the gasket. Silicone scrub brushes reduce abrasive damage and are gentle on seals. A microfiber drying towel speeds up moisture removal and minimizes odor formation. For routine maintenance, keep a dish sponge and scrubber set handy for quick cleans. Finally, evaluate if a compact kit fits your lifestyle—whether at home, in the office, or on the go.
Final Notes
Maintaining a clean YETI lid is essential for taste, hygiene, and longevity. Regular, gentle cleaning using the right tools ensures the lid remains leak-free and pleasant to use. By following the steps above, users can keep their lids in peak condition without risking damage to seals or finish.