Maintaining clear water supply pipes helps ensure steady water pressure, prevent mineral buildup, and extend the life of plumbing. This guide outlines practical steps using common household tools and targeted cleaners to safely clean copper and PVC water lines, addressing both routine maintenance and stubborn blockages.
Whether you’re dealing with reduced flow, discolored water, or mysterious smells, a structured approach can resolve many issues without professional help. The focus remains on safe, DIY methods suitable for typical American homes.
Quick Answer
Assess water flow by running taps on multiple floors; if pressure is consistently weak, proceed with a cleaning plan. Start with safe, non-invasive steps like flushing lines and using a pipe brush set, then move to targeted descalers and cleaning tools for mineral buildup. If the issue persists or you encounter leaks, consult a professional.
What You’ll Need
Gather these tools and materials before you begin. They cover common pipe materials and typical blockages encountered in domestic water lines.
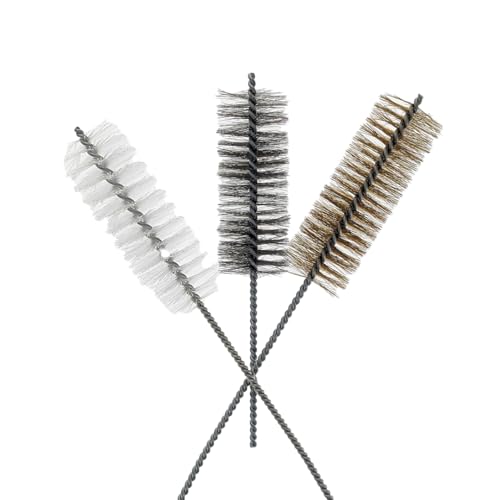
- Water line cleaning brush set for copper PVC pipes — flexible brushes that scrub interior walls without scratching.
- Plumbing snake for water supply lines — flexible auger for clearing minor clogs.
- Pipe scale remover descaler for household water pipes — safe chemical or mechanical descalers for mineral deposits.
- High pressure water jetter nozzle kit for home plumbing — for powerful flushing of mineral buildup and debris.
- Pipe inspection camera kit for water lines — to visualize blockages behind walls or under sinks.


Before You Start
Prepare the work area and protect surroundings. Shut off the main water supply if you anticipate significant water discharge and relieve pressure by opening a faucet at the lowest point of the system. Wear safety glasses and gloves to protect eyes from splashes and sharp edges. Test cleaners in a small area first to verify material compatibility with copper or PVC. Time estimate: 1–3 hours for initial checks and cleaning, longer if a clog is stubborn.
Caution: Do not mix chemical descalers with bleach or ammonia. Follow manufacturer directions for any chemical products, and avoid acidic cleaners on copper pipes unless specified by the product.
Step-By-Step: How To Clean Water Supply Pipes
- Shut off and drain: Turn off the main water supply and open exterior or basement faucets to drain residual water. This reduces spill risk when accessing lines.
- Inspect visible sections: Look for corrosion, leaks, or loose fittings near valves. Tighten or replace as needed before deeper cleaning.
- Flushing routine: Attach a hose to an outdoor faucet and flush each line starting from the main shutoff. Use steady, full-flow water to push loose debris toward the drain.
- Brush interior surfaces: Use the water line cleaning brush set on exposed copper or PVC segments to scrub mineral scale and buildup. Work slowly to avoid scratching or deforming pipes.
- Auger for minor clogs: If a partial clog remains, insert the plumbing snake into accessible runs (like under sinks). Rotate and push gently to dislodge sediment without harming pipe walls.
- Descale local deposits: Apply the pipe scale remover descaler following product directions. Allow time for deposits to soften, then flush with clean water. Avoid overuse and monitor for any adverse reactions.
- Hydro-flush with a jetter nozzle: For stubborn buildup, connect the high pressure water jetter nozzle kit and perform controlled, high-velocity flushes through the main supply line or affected branches. Maintain a steady distance to prevent pipe damage.
- Visual check with camera: Use the pipe inspection camera kit to verify clean sections and identify any hidden blockages or corrosion behind walls or in service lines.
- Reassemble and test: Close drains, turn the main back on, and run multiple taps to ensure uniform flow. Check for leaks at joints and fittings, tightening as needed.
- Schedule regular maintenance: Plan routine flushing and descaling at least once a year or sooner if you live in hard-water areas, to prevent heavy scale buildup.
- Document findings: Note which sections showed deposits or flow improvement. This helps future maintenance and planning professional assessments if needed.
- Monitor water quality: After cleaning, check for color, scent, or sediment. If issues persist, consider professional water testing for mineral content or pipe integrity.
Troubleshooting
| Symptom | Likely Cause | Fix | Prevention |
|---|---|---|---|
| Low water pressure after cleaning | New clogs or partially cleared lines | Re-flush with nozzle and re-check with camera | Regular flushing, avoid excessive chemical use |
| Discolored water | Residual deposits or corroded fittings | Flush longer; inspect and replace corroded sections | Install filters; schedule professional inspection for aging pipes |
| Leak at a joint | Over-tightened fittings or damaged seals | Loosen and reseal with appropriate plumbers tape or sealant | Use correct torque and inspect seals during maintenance |
| Clogs return quickly | Hard-water scale buildup | Permanent descalers and periodic jetting | Water softening or filtration if needed |
Common Mistakes
- Using metal brushes aggressively on PVC; this can cause micro-scratches that trap minerals later.
- Over-relying on chemical descalers without flushing; residue can react with metals or affect taste.
- Ignoring safety steps or PPE; water systems can contain sharp fittings and pressurized components.
- Skipping camera checks; unseen blockages behind walls complicate later repairs.
Tips For Best Results
- Start with mechanical cleaning before chemical descalers to minimize chemical exposure and risks.
- Maintain a regular flushing schedule in hard-water areas to reduce mineral buildup.
- Use the inspection camera periodically to spot developing issues early.
- Label and store tools properly to avoid cross-contamination between copper and PVC segments.
- Keep detailed notes of cleaning dates, sections treated, and outcomes for future reference.
Call A Professional
Some signs indicate professional intervention is wiser. If you encounter persistent leaks, significant corrosion, pipe replacements, or gas-water mixing concerns, contact a licensed plumber. Stop signs include complex pipe runs behind walls, main line replacements, or if testing reveals unusual contamination or pressure irregularities.
FAQ
Can cleaning water supply pipes cause damage to copper or PVC?
When done carefully with appropriate tools, cleaning minimizes risk. Avoid aggressive brushing on PVC and never use high-heat methods on plastic pipes.
How often should I clean my water lines?
Hard-water areas may benefit from annual flushing and descaling; otherwise, every 1–3 years is common for routine maintenance.
Is a pipe inspection camera essential?
Not always, but it helps locate hidden blockages and verify clean sections, especially in walls or underground runs.
What if I still have discoloration after cleaning?
Discoloration can indicate deeper corrosion, sediment behind fittings, or water source issues. Consider professional testing and assessment.
Are chemical descalers safe for home use?
Only use products labeled for household plumbing and compatible with your pipe material; never mix with other cleaners.
Should I install a water softener after descaling?
A water softener can reduce mineral buildup but evaluate water hardness and system needs before installation.
Buying Guide
When selecting tools for cleaning water supply pipes, balance effectiveness with safety and compatibility. Consider the following factors:
- Pipe material compatibility: Copper and PVC require different handling. Choose brushes and cleaners rated for both.
- Size and reach: Flexible brushes and a compact inspection camera help access tight spaces under sinks and behind walls.
- Cleaning power: A combination of mechanical tools (brushes, snake) and optional high-pressure jetting yields the best results for mineral buildup.
- Ease of use: Tools with clear instructions and safe operation features reduce the risk of damage.
- Maintenance interval: Group tools into a kit that supports regular maintenance scheduling, not just one-off repairs.
- Noise and water usage: Practical jetter kits offer adjustable pressure to minimize noise and water waste in residential settings.
- Placement flexibility: Choose tools that work in under-sink cabinets, basements, and exterior access points.
Thinking about a full kit? A combined approach using a water line cleaning brush set for copper PVC pipes, a plumbing snake for water supply lines, a pipe scale remover descaler for household water pipes, a high pressure water jetter nozzle kit for home plumbing, and a pipe inspection camera kit for water lines offers comprehensive coverage for most residential cleaning tasks.