Clogged or slow-draining washer lines can cause backups, foul odors, and detergent residue. This guide explains practical, DIY steps to clear a washer drain using common tools and safe methods. Readers will learn a straightforward process to restore proper drainage without professional help in many cases.
Following a simple routine can prevent future clogs. The focus here is on a methodical approach that uses a washer drain auger and related tools designed for laundry room drains. The steps emphasize safety, proper tool use, and testing after each stage.
Quick Answer
Clear the line with the right auger or drain snake, work from the standpipe downward, flush with water, and re-test the washer to ensure steady drainage. If resistance or odor persists, move to more thorough cleaning or seek professional help.
What You’ll Need
Gather tools designed for laundry drain maintenance. The list below includes items aligned with typical washer drain tasks.
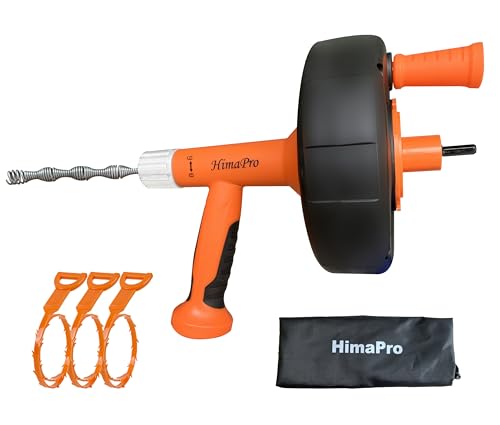
- Washing machine standpipe auger
- Drain snake for clothes washer drain line
- 1/4 inch flexible drain auger for laundry room
- Handheld drain cleaning wand for washing machine
- Laundry room drain cleaning kit


Before You Start
Ensure the washing area is dry and the machine is unplugged. Move the washer slightly to access the standpipe without kinking hoses. Place towels or a shallow tray to catch any residual water. Safety first: wear rubber gloves and eye protection. Check for signs of mold, unusual odors, or standing water that could indicate a larger blockage. Estimate 30–60 minutes for a standard session, longer if multiple drains are involved.
Step-By-Step: How To Clean Washer Drain Pipe
- Disconnect the washer’s drain hose from the standpipe to inspect the pipe opening for visible blockages.
- Insert the washing machine standpipe auger into the standpipe a few inches and rotate gently to dislodge hair and lint.
- Advance the auger slowly while twisting to reach any bends or curves in the drain line.
- Withdraw the auger, periodically cleaning the head to remove debris, and repeat as needed until the path clears.
- If the blockage resists, switch to the drain snake for clothes washer drain line and feed carefully around 90-degree turns.
- Flush the line with a moderate flow of warm water from a pitcher or hose to push debris out toward the main drain.
- Reconnect the drain hose to the standpipe and run a short test cycle to verify drainage.
- If water still backs up, try the 1/4 inch flexible drain auger for laundry room to access tighter sections and traps.
- For persistent clogs, use the handheld drain cleaning wand for washing machine to blast away residue from the inside of the pipe.
- Rinse the system with several gallons of warm water after clearing and monitor for smooth draining during a full wash cycle.
- Document any recurring issues and consider periodic maintenance to prevent future clogs.
Troubleshooting
| Symptom | Likely Cause | Fix | Prevention |
|---|---|---|---|
| Water backs up in tub | Blockage in drain line | Use augers to clear, then flush | Regular minor cleanings |
| Slow drainage after cycle | Lint buildup or trapped debris | Targeted snaking and wand blasts | Lint filter maintenance |
| Strong odor from standpipe | Standing water and organic matter | Deep flush with warm water and sanitizer if appropriate | Keep line dry when not in use |
| Hose backflow into washer | Backflow prevention issue | Inspect hose routing and standpipe height | Install proper standpipe height and traps |
Common Mistakes
- Overforcing the auger and damaging the pipe lining or standpipe.
- Using excessive force without rotating to navigate bends.
- Forgetting to reattach the drain hose securely after cleaning.
- Rushing steps without testing drainage after each stage.
Taking a careful, methodical approach reduces the risk of pipe damage and helps confirm that the drainage remains clear after maintenance.
Tips For Best Results
- Start with a cold-water flush and progress to warm water for better debris loosening.
- Keep a small supply of replacement washers and O-rings on hand for hose connections.
- Schedule periodic checks, especially in households with long hair or high lint production.
- Use a high-quality drain cleaner only if recommended for your pipe material—avoid harsh chemicals that can damage PVC or metal pipes.
- Document blockage frequency to identify if a more serious plumbing issue exists.
Call A Professional
Seek professional help if any of the following occur: continuous backups after multiple cleaning attempts, standing water lingering after tests, unusual noises from the drain, or signs of sewer gas. Do not attempt to clear mains sewer lines yourself. A licensed plumber can assess whether there are deeper clogs, venting problems, or pipe damage requiring repair.
FAQ
What is the first step to clear a washer drain?
Disconnect the drain hose, inspect the standpipe opening, and begin with a standpipe auger to remove the nearest blockage.
Can I use chemical drain cleaners for a washer drain?
It’s best to avoid harsh chemicals in laundry lines; they can damage pipes and leave residue. Use mechanical augers and flushing instead.
How often should I clean a washer drain?
Perform a light inspection every few months and a thorough cleaning if slow drainage or backups occur.
Is a laundry room drain cleaning kit enough for stubborn clogs?
Yes, for many clogs a kit with a few augers and a wand suffices. If not, call a professional for deeper access.
What maintenance prevents future clogs?
Regular lint trap cleaning, avoiding the disposal of fibrous items, and periodic flushing help sustain clear drains.
Buying Guide
When selecting tools to clean a washer drain pipe, consider several buying factors to optimize performance and ease of use.
Size and reach: Choose augers and wands with flexible leads that can navigate bends in typical laundry standpipes. A compact, handheld kit can fit small laundry spaces, while longer tools help in deeper systems.
Material compatibility: Verify that the tools are suitable for your pipe material (PVC, metal). Some cleaners and augers may be abrasive to certain pipe coatings.
Drain line compatibility: Ensure the kit includes a washer-specific drain snake or auger designed for clothes washers and standpipes, which differ from bathroom drains.
Ease of use: Look for tools with comfortable handles, simple rotation mechanisms, and quick-change heads to reduce setup time.
Maintenance features: Tools with removable heads and easy cleaning prevent residue buildup and extend tool life.
Noise and mess: Some kits are designed for quiet use with minimal splash, helpful in compact laundry rooms.
Cost and warranty: Compare entry-level and mid-range kits with warranties, ensuring support if parts wear out quickly.
In practice, an integrated laundry room drain cleaning kit that covers standpipe augers, drain snakes, and a handheld wand offers the most versatile solution. Assess your space, typical blockages, and comfort level with DIY maintenance to choose the right setup.