Removing or cleaning wallpaper glue can be a delicate task that protects your walls and preserves the finish. This guide walks readers through practical steps, safe products, and common pitfalls to avoid, with a focus on American homes and typical wall materials.
Whether the wallpaper is freshly installed or already peeling, the right approach saves time and reduces damage. The methods below emphasize prepared work areas, appropriate tools, and patient technique to achieve clean, smooth surfaces ready for painting or re-wallpapering.
Quick Answer
Best method at a glance: start with warm water and a mild adhesive remover, test a small area, then gently scrub with a soft sponge. For stubborn spots, use a scoring tool to loosen glue and a scraper to lift it. Always work in small sections and wipe away residue promptly to prevent wall staining.
What You’ll Need
- Wallpaper glue remover spray or adhesive remover for wallpaper
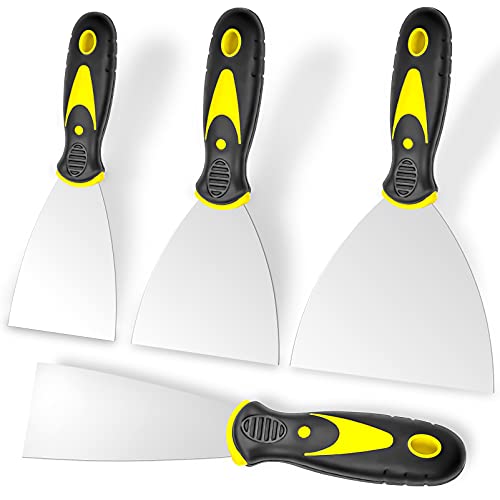
- Wallpaper scraper tool
- Scoring tool for wallpaper removal
- Utility knife for wallpaper removal
- Soft sponge or cloth
- Warm water in a bucket
- Plastic sheeting or drop cloths
- Gloves and eye protection


Before You Start
Assess the wall surface and wallpaper type. Non-porous surfaces may require stronger solvents, while porous drywall or plaster can be damaged by harsh chemicals. Always test a hidden area first to confirm no paint peeling or texture damage will occur. Time the project in two to three-hour blocks to prevent over-wetting the wall, which can lead to warping. Safety first: use gloves, eye protection, and good ventilation when using chemical removers.
Step-By-Step: How To Clean Wallpaper Glue
- Prepare the work area by covering floors with drop cloths and removing nearby furniture.
- Mix a mild solution of warm water with a small amount of wallpaper adhesive remover if using a liquid product.
- Apply the remover lightly to a small, inconspicuous area to test compatibility with the wallpaper and wall surface.
- Begin at a corner and work in 1–2 square foot sections, applying the solution with a sponge and letting it sit for 3–5 minutes.
- Use a scoring tool for wallpaper removal to gently perforate glue layers in stubborn areas, which helps the solution penetrate.
- Gently scrub the area with a soft sponge, moving in circular motions to lift glue without scratching the wall.
- For resistant spots, use a wallpaper scraper tool to carefully lift the glue, keeping the blade at a shallow angle to avoid gouging.
- Rinse the area with clean warm water and wipe with a clean cloth to remove residue.
- Repeat as needed in small sections until all glue is removed, then allow the wall to dry completely before proceeding with painting or wallpapering.
- Inspect the surface for any remaining film or texture; if found, repeat the cleaning process or consider a light sanding for a smooth finish.
- Dispose of used rags and wash tools promptly to prevent residue transfer to other surfaces.
Troubleshooting
| Symptom | Likely Cause | Fix | Prevention |
|---|---|---|---|
| Glue remains after cleaning | Insufficient dwell time or inadequate solvent | Reapply remover and re-test on a small area | Follow product instructions and test area first |
| Wall finish peels or blisters | Over-wetting or aggressive scrubbing | Limit moisture, allow to dry, then assess | Use minimal moisture per section; avoid softening paints |
| Scratches on wall | Too-strong blade or aggressive scrubbing | Switch to a softer pad; use the blade at a shallow angle | Work gently and test inconspicuous areas |
| Streaks or water stains | Excess moisture during cleaning | Wipe immediately with dry cloth; ensure proper drying time | Work in well-ventilated, cooler areas to control evaporation |
Common Mistakes
- Using too much water on porous walls, causing swelling or warping
- Rushing with a scraper, risking gouges or texture damage
- Skimping on test patches before full-area application
- Skipping safety gear, especially ventilation and gloves
Tips For Best Results
- Work in shaded, cool areas to slow drying and maximize solvent effectiveness
- Switch to a fresh sponge frequently to avoid re-depositing glue
- Keep glue removal products labeled and stored safely away from children
- After removal, plan the next steps (painting, priming, or re-wallpapering) to start promptly once the wall is dry
Call A Professional
Seek professional help if the wallpaper is bonded to sensitive materials like unprimed drywall, old plaster with hairline cracks, or if large sections loosen unexpectedly. Signs to consider a pro include extensive bubbling, water damage, or persistent adhesive that resists standard methods.
FAQ
What’s the safest way to remove wallpaper glue without damaging plaster?
Use a mild adhesive remover and gentle scrubbing with a soft sponge, testing first on a hidden area to prevent damage.
Can I clean glue with plain water?
Plain water can work on fresh glue, but many adhesives require a remover to fully break the bond.
Is scoring the wallpaper necessary?
Scoring helps with stubborn glue but should be used carefully to avoid wall damage.
How long should the wall dry after cleaning?
Allow at least 24 hours of drying in normal conditions before painting or applying new wallpaper.
Buying Guide
When choosing products for cleaning wallpaper glue, consider the following factors:
- Size and coverage: Larger bottles save reapplication time on big projects, but smaller bottles are easier for patch repairs.
- Effectiveness vs. wall type: Some removers work better on vinyl-backed wallpaper; others are gentler on plaster or drywall.
- Odor and ventilation: Low-odor formulas help in occupied spaces; ensure good airflow during use.
- Ease of use: Sprays can be quicker for large areas, while liquids might offer better control for detail work.
- Tools compatibility: A scraper, scorer, and utility knife should work with the chosen remover without dulling blades or causing damage.
- Placement considerations: For ceiling edges or tight corners, select tools with ergonomic handles and precise blades.
Having the right combination of remover and tools helps provide a smoother project flow. Are you preparing for a clean slate—literally? A thoughtful mix of products and careful technique reduces headaches and leaves walls ready for the next finish.