Spring is the ideal time to refresh and renew hosta beds after winter dormancy. Proper cleanup promotes vigorous growth, improves appearance, and helps prevent common issues like disease and pests. This guide outlines a clear, step-by-step plan to clean up hostas safely and efficiently.
Whether you’re tackling a single bed or a larger perennial border, the right tools, technique, and timing make a big difference. The following sections provide a practical approach that American gardeners can follow to get hostas ready for a lush growing season.
Quick Answer
Start after the average last frost, remove old foliage, trim damaged leaves, and refresh mulch. Use sharp pruning tools for clean cuts, work plants gently, and keep soil evenly moist. Rake debris, divide crowded clumps if needed, and replant with a light mulch to conserve moisture.
What You’ll Need
- Stainless steel pruning shears 7 inch for hosta cleanup
- Hori-hori garden knife with sheath 6 inch blade for deadheading hostas
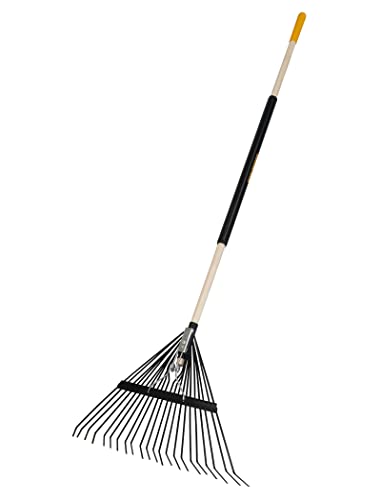
- Duty leaf rake 18-24 inch steel tines for spring garden cleanup
- Stainless steel hand trowel for planting and dividing hostas
- Garden kneeler and tool bag for hosting spring cleanup


Before You Start
Clear the area of obstacles and plan a workflow that minimizes soil compaction. Wear gloves and eye protection, and avoid harvesting foliage when it is wet to prevent disease transfer. Prepare a compostable collection bin for debris. Time your cleanup for a mild day; most hostas respond well to early spring conditions.
Caution: Do not remove more than one-third of the visible plant in a single session, which can stress the crown. Avoid using dull tools that crush leaves; sharp blades ensure clean cuts and faster healing.
Step-By-Step: How To Clean Up Hostas In Spring
- Inspect the bed and identify leaves that show signs of frost damage or disease; set aside any questionable material for disposal.
- Use the pruning shears to trim away tattered leaf edges and to cut dead flower stalks if blooming has finished.
- With the hand trowel, loosen soil around the base of each clump to encourage root expansion and improve air movement.
- Gently divide crowded clumps with a clean knife or sharpened spade, separating into smaller plants for future transplanting or sharing.
- Remove thick mulch buildup near the crown to improve moisture penetration and reduce slug habitat.
- Rake leaves and debris with the leaf rake, collecting material that could harbor pests or disease.
- Inspect for pests such as slugs or snails and apply targeted controls if needed, ensuring products are safe for hostas and pets.
- Apply a light layer of mulch around each plant, avoiding mound buildup against the crown to prevent rot.
- Water evenly after cleanup to help plants recover, especially if the spring is dry or windy.
- Tag or note any companions or specimens that may need later relocation or special care through the season.
- Label newly divided divisions for later planting; prepare a schedule for regular seasonal maintenance (every 4–6 weeks).
- Assess overall bed aesthetics and plan future deadheading and trimming as the season progresses.
Troubleshooting
| Symptom | Likely Cause | Fix | Prevention |
|---|---|---|---|
| Brown, crispy leaf edges | Drought or sun scorch | Water deeply and provide afternoon shade during peak heat | Mulch and monitor soil moisture |
| Fungal spots on leaves | Remove affected leaves, improve spacing, ensure good drainage | Water at soil level, remove diseased debris promptly | |
| Slow growth or crowded clumps | Overcrowding | Divide and transplant to reduce competition | Plan annual divisions every 3–4 years |
| Slug damage | Moist, shady beds | Implement slug barriers or safe deterrents | Keep mulch away from crowns, daytime watering |
Common Mistakes
- Over-pruning in early spring by removing too much foliage, which stresses plants.
- Using dull tools that crush leaves and legs, delaying healing.
- Mulching too high against the crown, promoting rot.
- Forgetting to water after cleanup in dry spells, risking drought stress.
Tips For Best Results
- Work on one bed at a time to maintain an efficient flow and reduce plant stress.
- Keep a small pruning kit handy during sessions to address damage promptly.
- Label divisions to track origin and ensure proper planting depth during reinstallation.
- Use a kneeler for comfort and to protect the knees during longer cleanup sessions.
Call A Professional
Seek professional help if hostas exhibit persistent disease, extensive pest infestation, or if the bed spans a large area and requires significant division or relocation. Signs that warrant expert advice include widespread yellowing, unusual growth patterns, or suspected root rot that extends beyond visible foliage.
FAQ
When is the best time to clean up hostas in spring?
The best time is after the last expected frost and when plants show new growth emerging from the crown.
Should I remove old flower stalks?
Yes, removing spent flower stalks helps direct energy to foliage and future blooms.
How deep should divisions be planted?
Plant divisions at the same depth as the original crown, with roots spread evenly and soil settled gently.
Can I use any mulch with hostas?
Use organic mulch like shredded bark or composted material; avoid heavy, dense mulches directly against the crown.
How often should I divide hostas?
Most hostas benefit from division every 3–4 years, depending on clump size and growth rate.
What maintenance follows spring cleanup?
Schedule light watering, occasional fertilization if needed, and mid-season deadheading to encourage a tidy bed.
Are hostas safe for pets and children?
Hostas are generally non-toxic, but it is best to prevent ingestion and maintain safety around garden tools.
Buying Guide
Choosing the right equipment and planning for spring hosta cleanup can improve efficiency and results. Consider the following factors:
- Size and strength of hosta bed: Larger beds may benefit from a wider, longer rake and enough divisions for quick cleanup.
- Tool quality: Sharp, corrosion-resistant blades reduce effort and protect plant tissue during pruning.
- Noise and comfort: Ergonomic handles and lightweight tools reduce fatigue during extended sessions.
- Energy efficiency: Hand tools conserve energy compared to heavy power equipment and are ideal for precise tasks.
- Controls and safety: Tools with secure locking mechanisms during transport prevent accidents in a busy yard.
- Placement and storage: A kneeler with a built-in bag or a tool bag keeps everything organized and accessible.
When comparing options, align tools with your specific task—deadheading, dividing, or general cleanup. For example, a 7-inch pruning shear is ideal for precise cuts, while a 6-inch hori-hori knife can handle dividing and careful deadheading. A sturdy leaf rake clears debris efficiently, and a compact hand trowel supports planting and division work. If storage space is limited, a kneeler and tool bag combo can streamline cleanup sessions and make it easier to move between beds.